World Settings
Ambient Occlusion
Reference
- Panel
Ambient occlusion is a lighting method based on how much a point on a surface is occluded by nearby surfaces. It simulates soft global illumination shadows by faking darkness perceived in corners and at mesh intersections, creases, and cracks, where ambient light is occluded, or blocked. This is a trick that is not physically accurate, but it is useful to emphasize the shapes of surfaces, or as a cheap way to get an effect that looks a bit like indirect lighting.
- Factor
The strength of the ambient occlusion; value 1.0 is like a white world shader.
- Distance
Distance from shading point to trace rays. A shorter distance emphasizes nearby features, while longer distances make it also take objects farther away into account.
Lighting from ambient occlusion is only applied to diffuse reflection BSDFs; glossy or transmission BSDFs are not affected. Transparency of surfaces will be taken into account, i.e. a half-transparent surface will only half occlude.
An alternative method of using Ambient Occlusion on a per-shader basis is to use the Ambient Occlusion shader.
Mist Pass
Reference
- Panel

Mist example (blend-file).
Mist can greatly enhance the illusion of depth in your rendering. To create mist, Blender makes objects farther away more transparent (decreasing their Alpha value) so that they mix more of the background color with the object color. With Mist enabled the further the object is away from the camera the less its alpha value will be.
Shown when the Mist pass is enabled. Mist values will range from 0.0 - 1.0 and are available from the Render Layers node.
- Start
The distance from the camera at which the mist starts to fade in.
- Depth
The distance from Start of the mist, that it fades in over. Objects further from the camera than Start + Depth are completely hidden by the mist.
- Falloff
The curve function that controls the rate of change of the mist’s strength further and further into the distance.
- Quadratic
Uses the same calculation as light falloff (\(1\over{x^2}\)) and provides the smoothest transition from transparent (0.0) to opaque (1.0).
- Linear
Has a steeper start than quadratic (\(1\over{x}\)).
- Inverse Quadratic
Has the steepest start (\(1\over{\sqrt{x}}\)) and approaches 1.0 faster than the other two functions.
Tipp
A visualization can be activated in the panel.
Tipp
Because Mist works by adjusting transparency, this can sometimes cause objects to be partially transparent when they should not be. One workaround is to set the Mist settings as desired, but turn Mist off. The Mist data is still available for compositing even though it is off. Use Compositing to feed the Mist pass to the Alpha Over node to blend the background color (or a render layer with just the sky) with the rendered image. This produces the mist effect but since Mist is off the object transparency (or lack of) is preserved.
Settings
Reference
- Panel
Surface
- Multiple Importance Sample
Enabling this will sample the background texture such that lighter parts are favored, creating an importance map. It will producing less noise in the render in trade of artifacts (fireflies). It is almost always a good idea to enable this when using an image texture to light the scene, otherwise noise can take a very long time to converge.
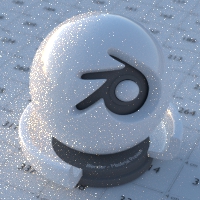
Below is a comparison between Multiple Importance Sample off and on. Both images are rendered for 25 seconds (Off: 1500 samples, On: 1000 samples).

Multiple Importance Sample off.

Multiple Importance Sample on.
- Map Resolution
Sets the resolution of the importance map. A higher resolution will better detect small features in the map and give more accurate sampling but conversely will take up more memory and render slightly slower. Higher values also may produce less noise when using high-res images.
- Max Bounces
Maximal number of bounces the background light will contribute to the render.
Siehe auch
See Reducing Noise for more information on how to reduce noise.
Volume
- Sampling Method
- Distance
If you have got a pretty dense volume that is lit from far away then Distance sampling is usually more efficient.
- Equiangular
If you have got a light inside or near the volume then equiangular sampling is better.
- Multiple Importance
If you have a combination of both, then the multiple importance sampling will be better.
- Interpolation
Interpolation method to use for the volume.
- Linear
Good smoothness and speed.
- Cubic
Smoothed high-quality interpolation, but slower.
- Homogeneous Volume
Assume volume has the same density everywhere (not using any textures), for faster rendering. For example absorption in a glass object would typically not have any textures, and so the renderer can be set to avoid taking small steps to sample the volume shader.
Ray Visibility
Reference
- Panel
As with other objects, Ray Visibility allows you to control which other shaders can „see“ the environment.
Tricks
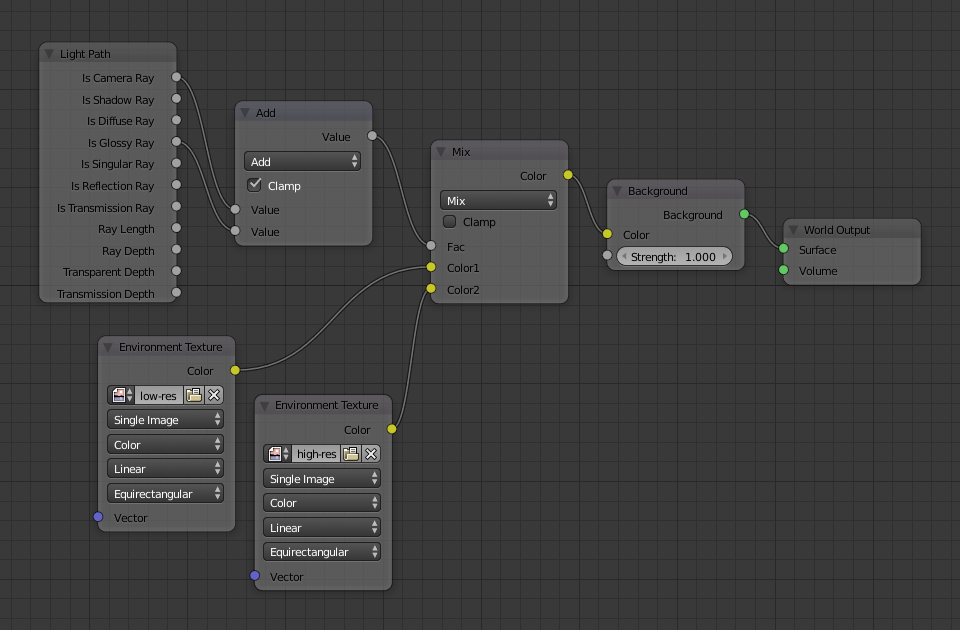
Sometimes it may be useful to have a different background that is directly visible versus one that is indirectly lighting the objects. A simple solution to this is to add a Mix node, with the Blend Factor set to Is Camera Ray. The first input color is then the indirect color, and the second the directly visible color. This is useful when using a high-res image for the background and a low-res image for the actual lighting.
Similarly, adding the Is Camera and Is Glossy rays will mean that the high-res image will also be visible in reflections.

Nodes for the trick above.