UV Warp Modifier
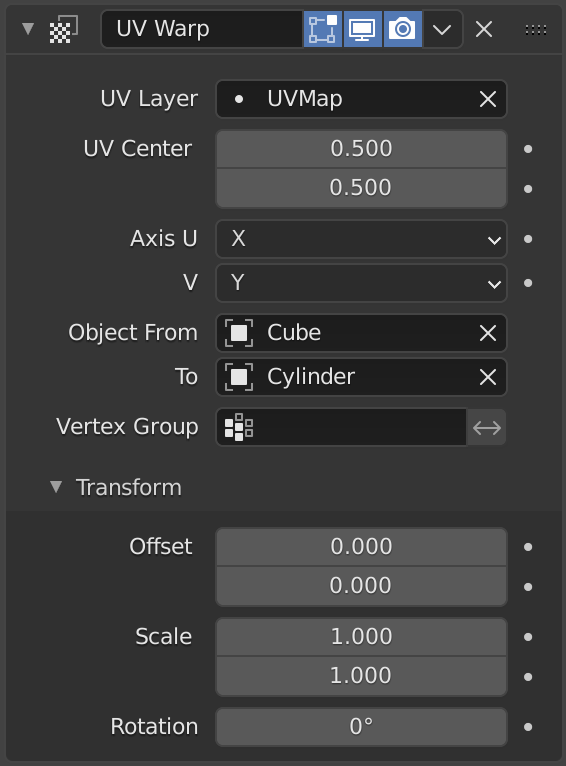
The UV Warp modifier transforms an object’s UV map based on values or two objects. Its purpose is to give you direct control over the object’s UVs in the 3D Viewport, allowing you to directly move, rotate, and scale existing UV coordinates using defined values or a controller object or bone.
Options

- UV Layer
Which UV map to modify; if not set it defaults to the active rendering layer.
- UV Center
The center point of the UV map to use when applying scale or rotation. With (0, 0) at the bottom left and (1, 1) at the top right.
- Axis U/V
The axes to use when mapping the 3D coordinates into 2D.
- Object From, To
The two objects used to define the transformation. See Usage below.
- Vertex Group
The vertex group can be used to scale the influence of the transformation per vertex.
- Invert
<-> Inverts the influence of the selected vertex group, meaning that the group now represents vertices that will not be deformed by the modifier.
The setting reverses the weight values of the group.
- Invert
Transform
- Offset
Amount to move the UV map.
- Scale
Amount to scale the UV map.
- Rotate
Amount to rotate the UV map.
Nutzung
How the UVs are warped is determined by the difference between the transforms (location, rotation and scale) of the from and to objects.
If the to object has the same transforms as the from object, the UVs will not be changed.
Assuming the UV Axis of the modifier is X/Y and the scale of the objects is (1, 1, 1), if the to object is one unit away from the from object on the X axis, the UVs will be transformed on the U axis (horizontally) by one full UV space (the entire width of the image).