Control Points
Extrude Curve and Move
Reference
| Mode: | Edit Mode |
|---|---|
| Menu: | |
| Hotkey: | E |
Extrudes points by duplicating the selected points, which then can be moved. If the selection is an end point, a new point will be connected to the selected point, else a new unconnected point is created.
Make Segment
Reference
| Mode: | Edit Mode |
|---|---|
| Menu: | |
| Hotkey: | F |
Connects two disconnected control points. The selection must be loose points, or the first/last point of a curve, then press F. If the points belong to different curves, these are joined by a segment to become a single curve.
Two curves before. |

Curve after joining. |
Note that you can only join curves of the same type (i.e. Bézier with Bézier, NURBS with NURBS) Additionally, you can close a curve by toggling cyclic.
Tilt
Reference
| Mode: | Edit Mode |
|---|---|
| Tool: | |
| Menu: | |
| Hotkey: | Ctrl-T |
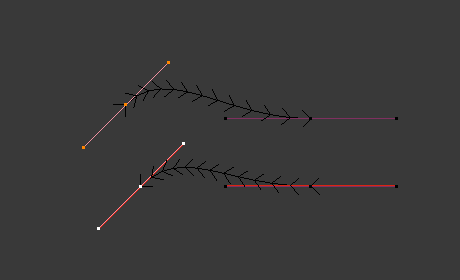
This setting controls how the normals (visualized as arrows) twist around each control point – so it is only relevant with 3D curves! The tilt will be interpolated from point to point (you can check it with the normals).
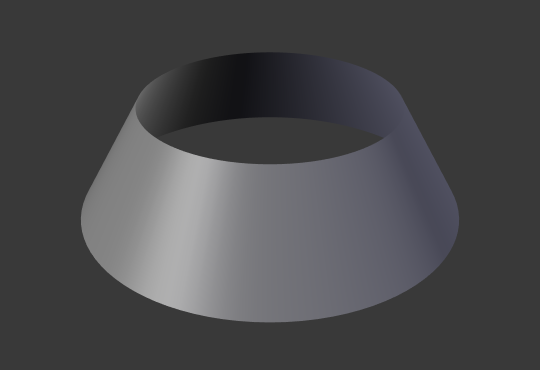
30 degree Mean Tilt of all control points.
Clear Tilt
Reference
| Mode: | Edit Mode |
|---|---|
| Menu: | |
| Hotkey: | Alt-T |
You can also reset the tilt to its default value (i.e. perpendicular to the original curve plane). With NURBS, the tilt is always smoothly interpolated. However, with Bézier, you can choose the interpolation algorithm.
Set Handle Type
Reference
| Mode: | Edit Mode |
|---|---|
| Menu: | |
| Hotkey: | V |
Handle types are a property of Bézier curves and can be used to alter features of the curve. For example, switching to Vector handles can be used to create curves with sharp corners. Read the Bézier curves page for more details.
- Toggle Free/Align
- Additionally, this operator can be used to toggle between Free and Aligned handle types.
Recalc Normals
Reference
| Mode: | Edit Mode |
|---|---|
| Menu: | |
| Hotkey: | Shift-N |
The Recalc Normals operator rotates the selected control point’s handle to be tangential to the curve. This can be used to make curves smoother and more consistent looking.
- Length
- Recalculates the length of the handles so they are all the same length.
Smooth
Reference
| Mode: | Edit Mode |
|---|---|
| Menu: |
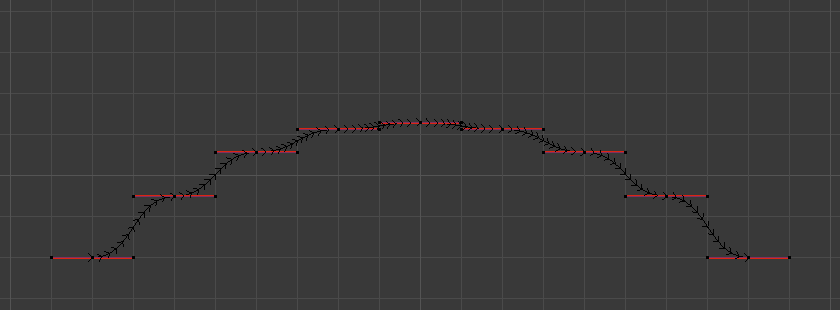
For Bézier curves, this smoothing operation reduces the distance between the selected control point(s) and their neighbors, while keeping the neighbors anchored. Does not effect control point tangents.
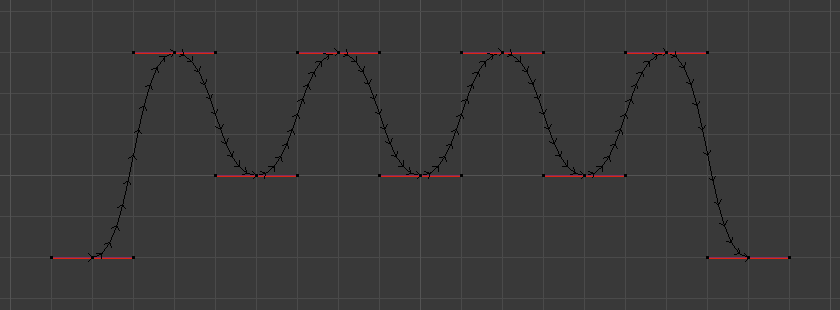
Original, unsmoothed Curve.
Entire curve smoothed over 20 times by holding Shift-R to repeat last step.
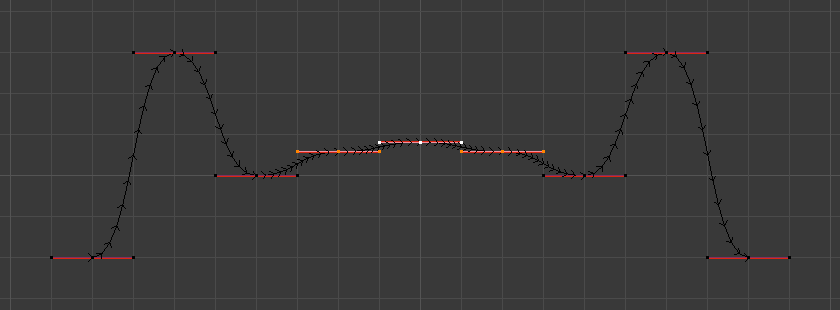
Only three control points in the center smoothed over 20 times.
Smooth Curve Tilt
Reference
| Mode: | Edit Mode |
|---|---|
| Menu: |
The Smooth Curve Tilt operator interpolates the Tilt value for the selected control points. This will reduce sharp changes in the curve’s Tilt and give a smooth transition between points.
Smooth Curve Radius
Reference
| Mode: | Edit Mode |
|---|---|
| Menu: |
The Smooth Curve Radius operator interpolates the Radius value for the selected control points. This will reduce sharp changes in the curve’s Radius and give a smooth transition between points.
Smooth Curve Weight
Reference
| Mode: | Edit Mode |
|---|---|
| Menu: |
The Smooth Curve Weight operator interpolates the Weight value for the selected control points. This will reduce sharp changes in the curve’s Weight and give a smooth transition between points.
Hooks
Reference
| Mode: | Edit Mode |
|---|---|
| Menu: | |
| Hotkey: | Ctrl-H |
Hooks can be added to control one or more points with other objects.
Make Vertex Parent
Reference
| Mode: | Edit Mode |
|---|---|
| Menu: | |
| Hotkey: | Ctrl-P |
You can make other selected objects children of one or three control points, as with mesh objects.
To select a mesh (that is in view) while editing a curve, Ctrl-P click on it. Select either one or three control points, then Ctrl-LMB the object and use Ctrl-P to make a vertex parent. Selecting three control points will make the child follow the median point between the three vertices. An alternative would be to use a Child of Constraint. See also the Curve Modifier.