Warp Modifier
The Warp modifier can be used to warp parts of a mesh to a new location in a very flexible way, by using two objects to select the “from” and “to” regions, with options for using a curve falloff, texture and/or vertex group.
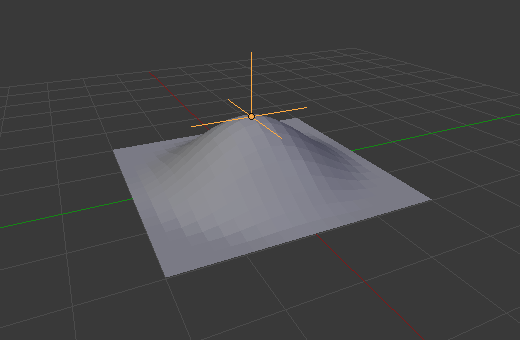
A Warp modifier applied to a grid mesh.
This modifier is a bit tricky to understand at first. It requires two points, specified by the two target objects’ origins. The “from” point designates a point in space that is pulled toward the “to” point. It is akin to using the Proportional Editing in Edit Mode.
Options
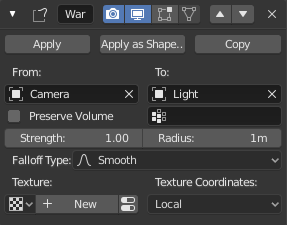
The Warp modifier.
- From
- The object defining the origin transformation of the warp.
- To
- The object defining the destination transformation of the warp.
- Preserve Volume
- Enables volume preservation when rotating one of the transforms.
- Strength
- Sets how strong the effect is.
- Radius
- Sets the distance from the transforms that can be warped by the transform handles.
- Falloff Type
- Sets the way the strength of the warp change as it goes from the center of the transform to the Radius value. See Proportional Editing for descriptions of the falloff types.
You can finely control which vertices are affected by the warp, and to what extent, using a vertex group and/or a texture.
See common masking options for a complete reference.
Usage
The Warp modifier can be awkward to use sometimes, and its use case is rather small, But there are a few still. For example, it can be used to have an interactive Proportional Editing that can be used for animations.
Another way to use this modifier is similar to the Deform Modifier. This allows you to deform parts of the mesh without having to make a vertex group.
Examples
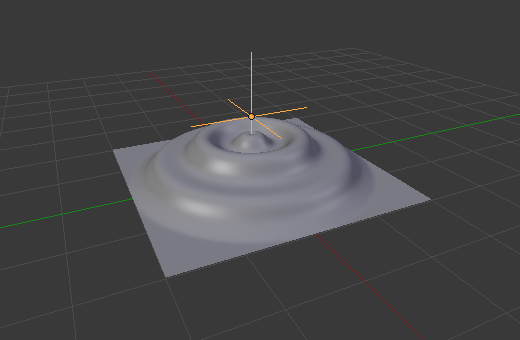
Warp Modifier with a custom falloff curve.