Node Groups
Example of a node group.
Grouping nodes can simplify a node tree by allowing instancing and hiding parts of the tree.
Conceptually, grouping nodes allows you to specify a set of nodes that you can treat as though it were “just one node”. Node groups are similar to functions in programming, they can be reused in many places in a node tree and can be customized by changing the “parameters” of the node group.
As an example: If you have created a material that you would like to use with different inputs e.g. diffuse color: red plastic, green plastic. You could create different materials with Make Single User for each different color with a copy of the tree part describing the plastic material. If you like to edit the material you would need to redo the edit on all materials. A better method of reuse is to create node groups, exposing only the variable inputs (e.g. diffuse color).
Also nested node groups are supported. I.e. a node group can be inserted or created inside another node group.
Note
Recursive node groups are prohibited for all the current node systems to prevent infinite recursion. A node group can never contain itself (or another group that contains it).
Interface
When a node group is created, new Group Input and Group Output nodes are generated to represent the data flow into and out of the group. Furthermore connections to input sockets coming from unselected nodes will become attached to new sockets on the Group Input node. Similarly, outgoing connections to input sockets of unselected nodes will become attached to the new Group Output node.
If you want to pass an additional parameter into the group, an socket must be added to the Group Input node. Therefore drag a connection from the hollow socket on the right side of the Group Input node to the desired input socket on the node requiring an input. The process is similar for the Group Output regarding data you want to be made available outside the group.
Panel
Reference
- Mode
All Modes
- Panel
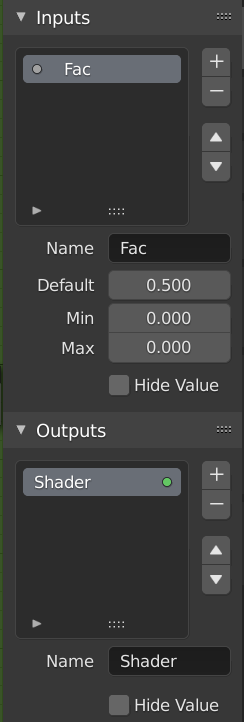
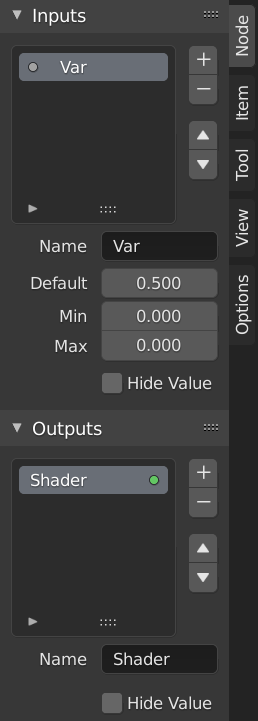
The interface panel for editing groups.
Sockets can be added, re-ordered, or removed, descriptive names can be added and the details of the input data value defined here.
If you have multiple inputs or outputs, they can be re-ordered by selecting the socket in the list. and then moving them up or down with the arrow buttons on the right side of the panel. The plus button will add an unconnected socket of the same type as the selected socket or a value socket if there is no selection. The minus button will remove the selected socket. The triangle at the bottom of the list has filtering functions to help finding nodes if the group has a large number of sockets.
- Name
The name of the socket to display in the node’s interface.
- Default
The value to use when nothing is connected to the node socket. Note, this will not affect the current node but will affect instances of the node.
- Min, Max
The minimum and maximum value for the UI button shown in the node interface. Note, this is not a minimum or maximum for the data that can pass through the node. If a socket passes a higher value than the maximum it will still pass into the node unchanged.
- Hide Value
Hide the socket value even when the socket is not connected.
Edit Group
Reference
- Mode
All Modes
- Menu
- Header
- Hotkey
Tab, Ctrl-Tab
With a node group selected, Tab expands the node to a frame, and the individual nodes within it are shown. You can move them around, play with their individual controls, re-thread them internally, etc. just like you can if they were a normal part of the editor view. You will not be able, though, to thread them to a node outside the group; you have to use the external sockets on the side of the node group. While Tab can be used to both enter and exit a group, Ctrl-Tab only exits.
Example of an expanded node group.
Make Group
Reference
- Mode
All Modes
- Menu
- Hotkey
Ctrl-G
To create a node group, select the nodes you want to include, then press Ctrl-G, . A node group will have a green title bar. All selected nodes will now be contained within the node group. Default naming for the node group is “NodeGroup”, “NodeGroup.001” etc. There is a name field in the node group you can click into to change the name of the group. Change the name of the node group to something meaningful. When appending node groups from one blend-file to another, Blender does not make a distinction between material node groups or composite node groups. So it is recommended to use some naming convention that will allow you to distinguish between the two types.
Tip
What not to include in node groups:
Remember that the essential idea is that a group should be an reusable, self-contained software component. Material node groups should not include:
- Input nodes
If you include a source node in your group, you will end up having the source node appearing twice: once inside the group, and once outside the group in the new material node tree.
- Output node
If you include an output node in the group, there will not be an output socket available from the group!
Ungroup
Reference
- Mode
All Modes
- Menu
- Hotkey
Ctrl-Alt-G
The Ctrl-Alt-G tool removes the group and places the individual nodes into your editor workspace. No internal connections are lost, and now you can link internal nodes to other nodes in your workspace.
- Separate P
Separate selected nodes from the node group.
- Copy
Copy to parent node tree, keep group intact.
- Move
Move to parent node tree, remove from group.
Group Insert
Reference
- Mode
All Modes
- Menu
Selecting a set of nodes, ending with the destination group node, and pressing will move those nodes into that group. The moved nodes are collected into a group of their own to preserve their connection context, having their own group input and output nodes. The group’s existing input and output nodes are updated with new sockets, if any, from the new nodes. The node group must be edited to contain a single Group Input and a single Group Output node.
Appending Node Groups
Reference
- Editor
Topbar
- Mode
All Modes
- Menu
Once you have appended a Node Tree to your blend-file, you can make use of it in a node editor by pressing Shift-A, , then selecting the appended group. The “control panel” of the Group include the individual controls for the grouped nodes. You can change them by working with the Group node like any other node.