Armature Deform Parent
Reference
- Mode
Object Mode and Pose Mode
- Menu
- Shortcut
Ctrl-P
Armature Deform Parenting is a way of creating and setting up an Armature Modifier.
To use Armature Deform Parenting you must first select all the child objects that will be influenced by the armature and then lastly, select the armature object itself. Once all the child objects and the armature are selected, press Ctrl-P and select Armature Deform in the Set Parent To pop-up menu.
The armature will be the parent object of all the other child objects and each child object will have an Armature Modifier with the armature associated (Object field).
Bone associated with Mesh Object.
With Empty Groups
When parenting it will create empty vertex groups on the child objects (if they do not already exist) for and named after each deforming bone in the armature. The newly created vertex groups will be empty. This means they will not have any weights assigned. Vertex groups will only be created for bones which are setup as deforming ().
You can then manually select the vertices and assign them to a particular vertex group of your choosing to have bones in the armature influence them.
Choose this option if you have already created (and weighted) all the vertex groups the mesh requires.
Example
For example, if you have an armature which consists of three bones named “BoneA”, “BoneB” and “BoneC” and cube mesh called “Cube”. If you parent the cube to the armature, the cube will get three new vertex groups created on it called “BoneA”, “BoneB” and “BoneC”. Notice that each vertex group is empty.
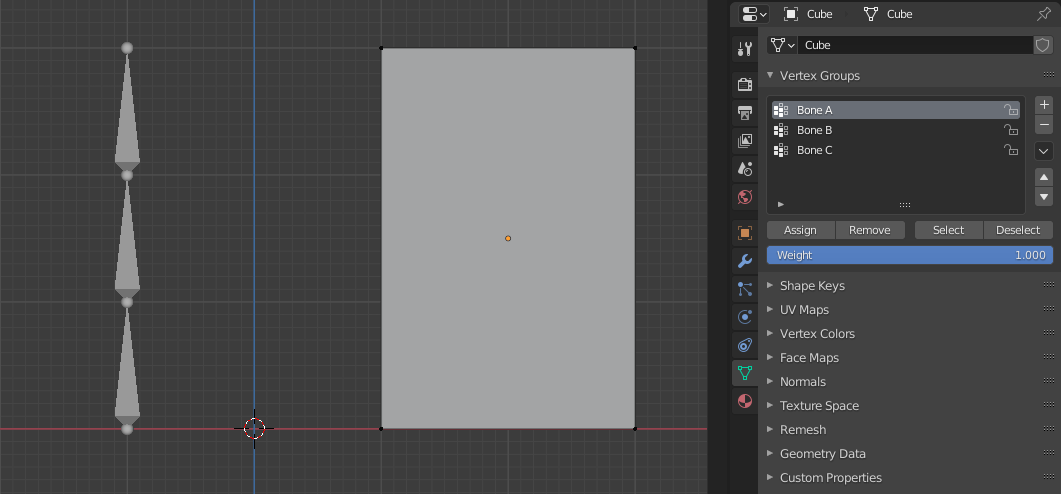
Cube in Edit Mode using Armature Deform with empty groups.
With Automatic Weights
With Automatic Weights parenting works similar to With Empty Groups, but it will not leave the vertex groups empty. It calculates how much influence a particular bone would have on vertices based on the distance from those vertices to a particular bone (“bone heat” algorithm). This influence will be assigned as weights in the vertex groups.
This method of parenting is certainly easier to setup, but it can often lead to armatures which do not deform child objects in ways you would want. Overlaps can occur when it comes to determining which bones should influence certain vertices when calculating influences for more complex armatures and child objects. Symptoms of this confusion are that when transforming the armature in Pose Mode, parts of the child objects do not deform as you expect; If Blender does not give you the results you require, you will have to manually alter the weights of vertices in relation to the vertex groups they belong to and have influence in.
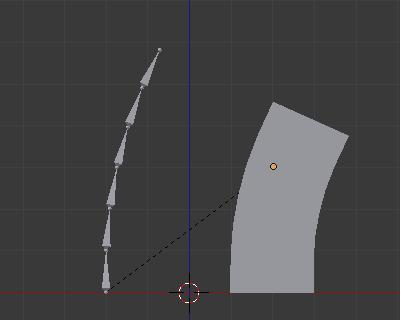
With Envelope Weights
Works in a similar way to With Automatic Weights. The difference is that the influences are calculated based on the Bone Envelopes settings. It will assign a weight to each vertex group the vertices that is inside its bone’s influence volume, depending on their distance to this bone.
This means newly included/excluded vertices or new envelope settings will not be taken into account. You will have to apply Armature Deform With Envelope Weights parenting again.
Tip
If you want the envelope setting to be used instantly, bind the Armature Modifier to Bone Envelopes.
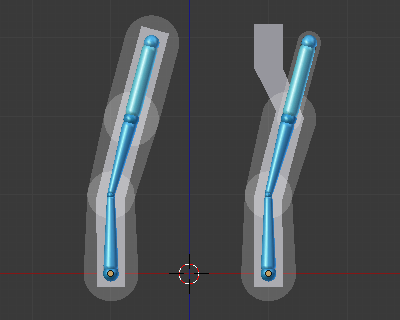
Two sets of armatures, each with three bones.
Warning
If you had defined vertex groups using same names as skinned bones, their content will be completely overridden by both Automatic and Envelope Weights. In this case With Empty Groups could be used instead.
See also