Workspaces
Workspaces are essentially predefined window layouts. Blender’s flexibility with Areas lets you create customized workspaces for different tasks such as modeling, animating, and scripting. It is often useful to quickly switch between different workspaces within the same file.

Workspaces are located at the Topbar.
Controls
- Tabs
Click on the tabs titles to switch between the workspaces. To cycle between workspaces use Ctrl-PageUp and Ctrl-PageDown. Double click to rename the workspace.
- Add
+ Click on the Add button to add a new workspace.
- Context menu RMB
The context menu contains options to duplicate, delete and reorder workspaces.
Default Workspaces
Blender’s default startup shows the “Layout” workspace in the main area. This workspace is a general workspace to preview your scene and objects and contains the following Editors:
3D Viewport on top left.
Outliner on top right.
Properties on bottom right.
Timeline on bottom left.
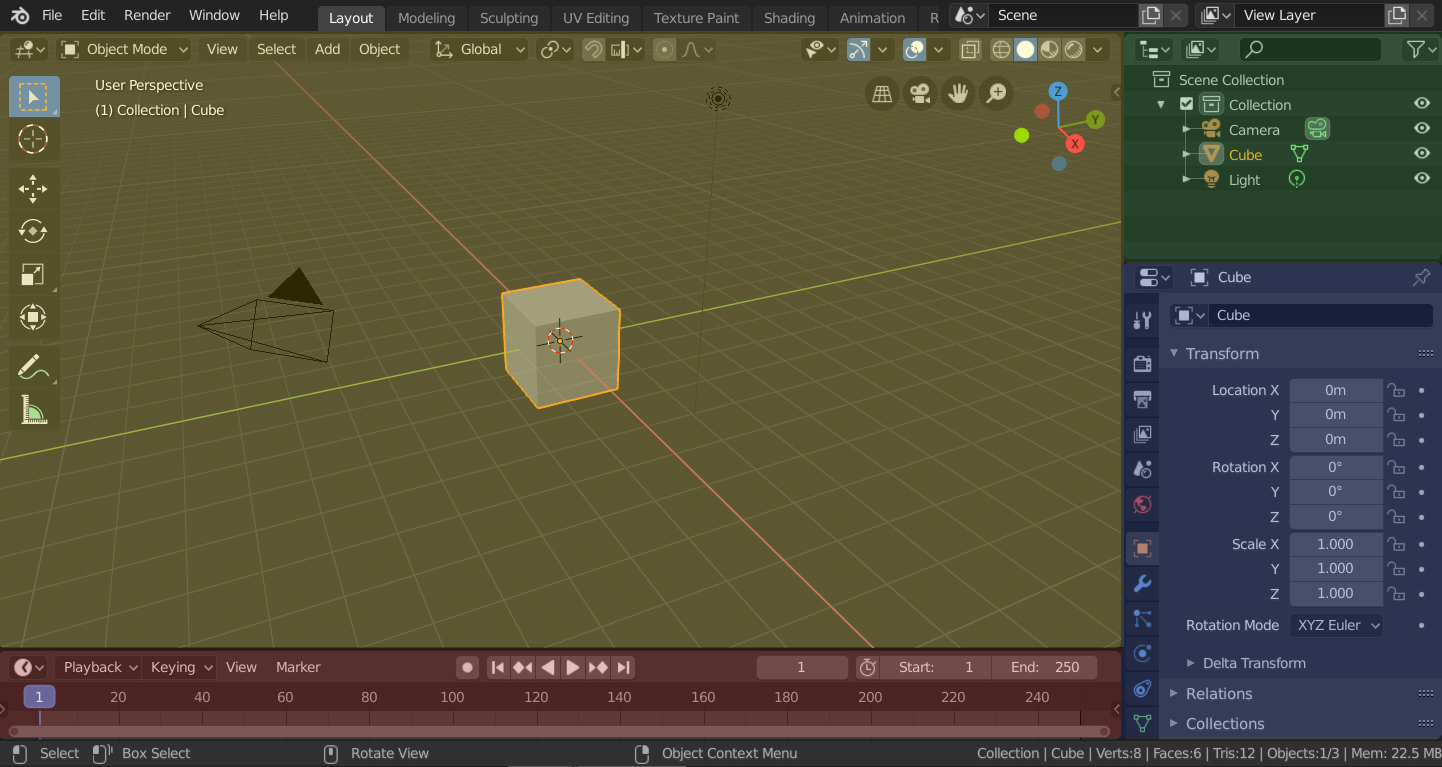
Blender’s ‘Layout’ Workspace with four editors.
3D Viewport (yellow), Outliner (green), Properties (blue) and Timeline (red).
Blender also has several other workspaces added by default:
- Modeling
For modification of geometry by modeling tools.
- Sculpting
For modification of meshes by sculpting tools.
- UV Editing
For mapping of image texture coordinates to 3D surfaces.
- Texture Paint
For coloring image textures in the 3D Viewport.
- Shading
For specifying material properties for rendering.
- Animation
For making properties of objects dependent on time.
- Rendering
For viewing and analyzing rendering results.
- Compositing
For combining and post-processing of images and rendering information.
- Geometry Nodes
For procedural modeling using Geometry Nodes.
- Scripting
For interacting with Blender’s Python API and writing scripts.
Additional Workspaces
Blender has a couple additional Workspaces to choose from when adding a new Workspace:
2D Animation
- 2D Animation
General workspace to work with Grease Pencil.
- 2D Full Canvas
Similar to “2D Animation” but contains a larger canvas.
VFX
- Masking
For creating 2D masks for compositing or video editing.
- Motion Tracking
For calculation camera motion and stabilizing video footage.
Video Editing
- Video Editing
For sequencing together media into one video.
Save and Override
The workspaces are saved in the blend-file. When you open a file, enabling the Load UI in the File Browser indicates that Blender should use the file’s screen layouts and overriding the current layout. See Load UI.
A custom set of workspaces can be saved as a part of the Defaults.
Workspace Settings
Reference
- Editor
Properties
- Menu
- Mode
Switch to this Mode when activating the workspace.
Filter Add-ons
Filters which Add-ons are enabled in the active workspace. Keeping the checkbox in the header enables all global add-ons, enabling the checkbox allows you to individually enable add-ons from the list.