3D Cursor
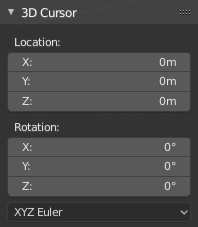
The 3D Cursor is a point in space that has both a location and a rotation. It’s used for a number of purposes. For example, it defines where newly added objects are placed, and can also be used to manually position and orient the transform gizmo (see Pivot Point and Transform Orientation). Some tools, such as Bend, also use the Cursor.
Placement
There are a few methods to position the 3D Cursor.
Direct Placement with the Mouse
Reference
- Mode:
Object, Edit, and Pose Mode
- Tool:
Cursor
- Shortcut:
Shift-RMB

Positioning the 3D Cursor with two orthogonal views.
The Cursor tool offers the most flexibility. Simply select it in the Toolbar and click a point in the scene with LMB to place the 3D Cursor there. In the tool settings, you can choose how it should be oriented: by default, it matches the view orientation, but you can also make it match the surface normal of a piece of geometry, or the transform orientation.
Alternatively, you can press Shift-RMB with any tool selected. In this case, the 3D Cursor will always be aligned to the view orientation.
For accuracy you should use two perpendicular orthogonal 3D Viewports, i.e. any combination of top Numpad7, front Numpad1 and side Numpad3. That way you can control the positioning along two axes in one view and determine the depth in the other.
By default, the depth of the geometry under the cursor is used. This can be disabled using the Cursor Surface Project toggle in the Preferences.
Snapping
Reference
- Mode:
Object, Edit, and Pose Mode
- Menu:
- Shortcut:
Shift-S
One more way of positioning the 3D Cursor is through the Snap menu, which allows you to move the Cursor to the origin of the selected object for example.
