Emparentando Objetos
Make Parent
Reference
- Mode
Object Mode
- Menu
- Hotkey
Ctrl-P
When modeling a complex object, such as a watch, you may choose to model the different parts as separate objects. Yet all the parts may be attached to each other. In these cases, you want to designate one object as the parent of all the children. Movement, rotation or scaling of the parent also affects the children.
To parent objects, select at least two objects (select the child objects first, and select the parent object last), and press Ctrl-P. The Set Parent To menu will pop up allowing you to select from one of several possible different parenting types. Selecting one of the entries in Set Parent To confirms, and the child/children to parent relationship is created.
The last object selected will be the active object (outlined in light orange), and will also be the parent object. If you selected multiple objects before selecting the parent, they will all be children of the parent and will be at the same level of the hierarchy (they are called “siblings”).
The Set Parent To pop-up menu is context-sensitive, which means the number of entries it displays can change depending on what objects are selected when the Ctrl-P shortcut is used.
Moving, rotating or scaling the parent will also usually transform the child/children. Yet transforming the child/children of the parent will not affect the parent. In other words, the direction of influence is from parent to child and not child to parent.
In general when using Ctrl-P or to parent objects, the child objects can only have one parent object. If a child object already has a parent object and you give it another parent then Blender will remove the previous parent relationship.
Parent Inverse
When objects are parented with Ctrl-P, the current transformation of the parent is stored in a hidden parent inverse matrix. By using that, the location, rotation and scale properties of the child can continue to be effectively interpreted in world space, as long as the parent doesn’t move.
For parenting without assigning the matrix, select the Without Inverse option in the Ctrl-P pop-up menu. This creates an alternative parent-child-relationship where child object’s properties are evaluated in the parent’s coordinate system. This is the better choice for CAD purposes, for example.
The matrix can also be cleared after parenting by using Clear Parent Inverse.
Parent Types
Blender soporta muchos tipos distintos de emparentado, listados más abajo:
Object (Objeto)
Bone (Hueso)
Vertex (Vértice)
Vertex (Triangle) (Vértice (Triángulo))
Setups
Besides parenting the selected objects, it adds a Modifier or Constraint to the child objects, with the parent as target object or activates a parent property i.e. Follow Path.
Emparentado a Object (Objeto)
Object Parent is the most general form of parenting that Blender supports. If will take selected objects and make the last selected object the parent object, while all other selected objects will be child objects. The child objects will inherit the transformations of the parent. The parent object can be of any type.
Emparentado a Object (Keep Transform) (Objeto (Mantener Transformación))
Object (Keep Transform) Parent works in a very similar way to Object Parent. The major difference is in whether the child objects will keep any previous transformations applied to them from the previous parent object.
Since explaining this in an easy to understand technical way is hard, let’s instead use an example to demonstrate.
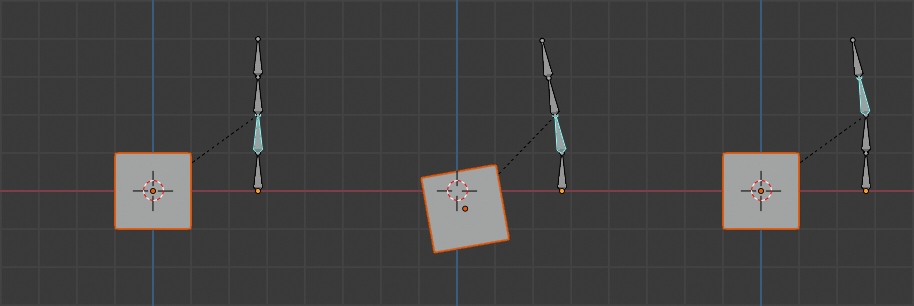
Assume that we have a scene consisting of three objects, those being two empty objects named «EmptyA» and «EmptyB», and a Monkey object. Fig. Escena sin emparentado. shows the three objects with no parenting relationships active on them.
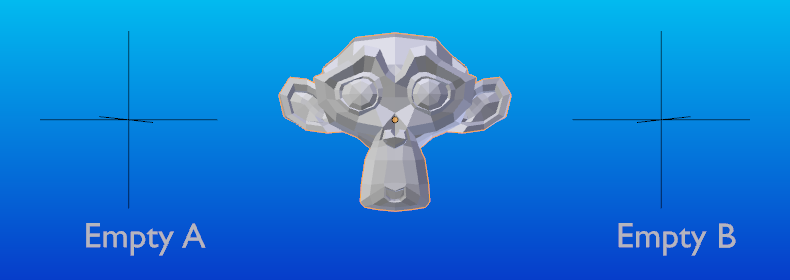
Escena sin emparentado.
If you select the Monkey object by LMB click and then Shift-LMB click «EmptyA» object and press Ctrl-P and finally select Object from the Set Parent To pop-up menu. This will result in «EmptyA» object being the parent object of the Monkey object. With only «EmptyA» selected rotating/scaling/moving it will result in the Monkey object being altered respectively.
Escale el objeto «EmptyA», de tal manera que la Mona se vuelva más pequeña y se mueva a la izquierda un poco.
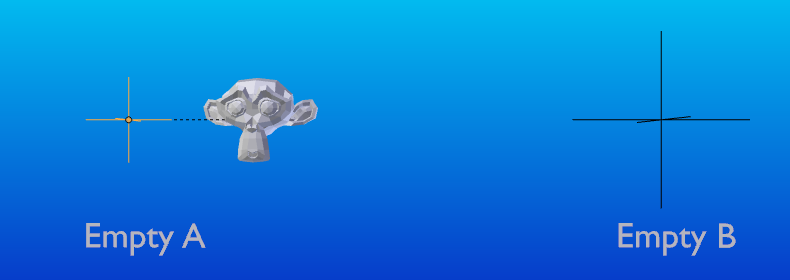
La mona es el objeto Hijo de «EmptyA».
If you select only the Monkey object by LMB click and then Shift-LMB click «EmptyB» object and press Ctrl-P and select Object from the Set Parent To pop-up menu. This will result in «EmptyB» object being the parent object of the Monkey object. Notice that when you change the parent of the Monkey the scale of the Monkey changed.
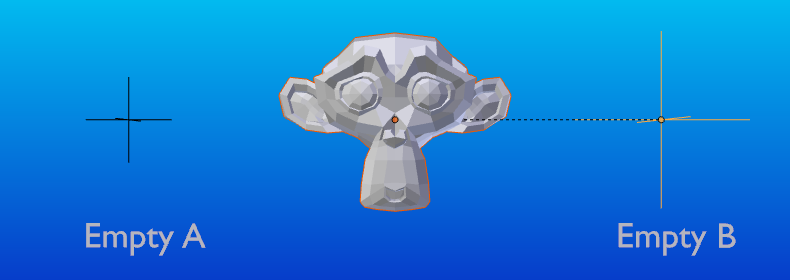
La mona es el Objeto Hijo de «EmptyB».
Esto sucede porque el objeto Mona nunca ha alterado su escala directamente, el cambio existía debido al hecho de que era el hijo de «EmptyA» el cual tenía su escala alterada. Cambiar el padre de la Mona a «EmptyB» resultó en la quita de aquellos cambios indirectos en la escala, debido a que «EmptyB» no tenía alterada su escala.
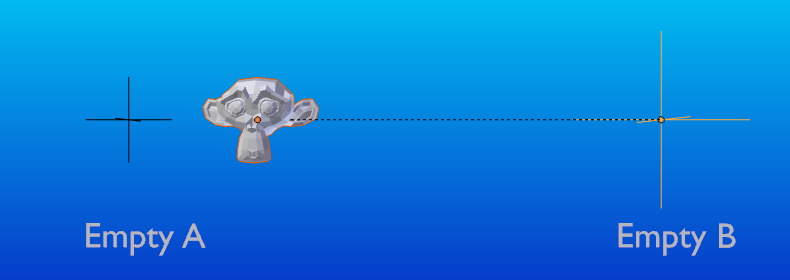
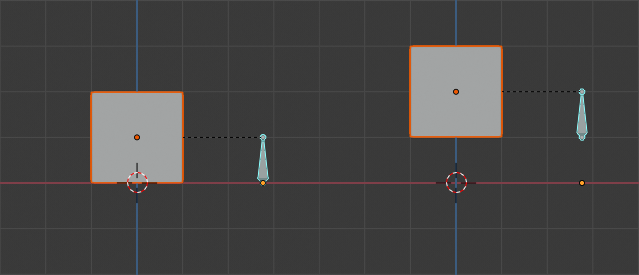
This is often the required behavior, but it is also sometimes useful that if you change your parent object that the child object keep any previous transformations it got from the old parent object; If instead when changing the parent object of the Monkey from «EmptyA» to «EmptyB» we had chosen parenting type Object (Keep Transform), the Monkey would keep its scale information it obtained from the old parent «EmptyA» when it is assigned to the new parent «EmptyB».
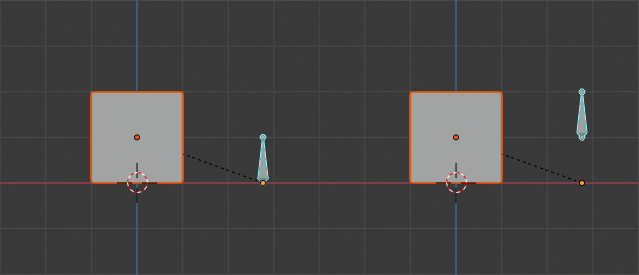
El método de emparentado Objeto (Mantener Transformación)
Si quiere seguir la descripción de arriba, aquí está el archivo blend usado para describir el método de emparentado Objeto (Mantener Transformación):
Emparentado a Bone (Hueso)
Bone parenting allows you to make a certain bone in an armature the parent object of another object. This means that when transforming an armature the child object will only move if the specific bone is the child object of moves.
Three pictures of armatures with four bones.
In Fig. Three pictures of armatures with four bones. with the 2nd bone being the bone parent of the child object cube. The cube is only transformed if the 1st or 2nd bones are. Notice altering the 3rd and 4th bones has no effect on the cone.
To use bone parenting, you must first select all the child objects you wish to parent to a specific armature bone, then Shift-LMB select the armature object and switch it into Pose Mode and then select the specific bone you wish to be the parent bone by LMB selecting it. Once done press Ctrl-P and select bone from the Set Parent To pop-up menu.
Now transforming that bone in Pose Mode will result in the child objects also transforming.
Emparentado Bone Relative (Relativo a Huesos)
Bone relative parenting is an option you can toggle for each bone. This works in the same way as bone parenting with one difference.
With bone parenting if you have parented a bone to some child objects and you select that bone and switch it into Edit Mode and then move that bone; When you switch back into Pose Mode on that bone, the child object which is parented to that bone will snap back to the location of the bone in Pose Mode.
Single armature bone which has a child object cube parented to it using bone parenting.
In Fig. Single armature bone which has a child object cube parented to it using bone parenting. the 1st picture shows the position of the cube and armature before the bone is moved in Edit Mode. 2nd picture shows the position of the cube and armature after the bone was selected in Edit Mode, moved and switched back into Pose Mode. Notice that the child object moves to the new location of the pose bone.
Bone relative parenting works differently; If you move a parent bone in Edit Mode, when you switch back to Pose Mode, the child objects will not move to the new location of the Pose Bone.
Single bone with bone relative parent to a cube.
In Fig. Single bone with bone relative parent to a cube. the 1st picture shows the position of the cube and armature before the bone is moved in Edit Mode. 2nd picture shows the position of the cube and armature after the bone was selected in Edit Mode, moved and switched back into Pose Mode. Notice that the child object does not move to the new location of the pose bone.
Nota
When using Ctrl-P to set parents, choosing «Bone» or «Bone Relative» will respectively clear and set the bone’s «Relative Parenting» option. Since «Relative Parenting» is an option that is set per bone, this influences all child objects of that bone at once.
Emparentado a Vertex (Vértice)
For objects of type curve, surface, mesh and lattice, there is the possibility to use one of its vertices or points as the parent of other objects. You can parent an object to a single vertex or a group of three vertices as well; that way the child/children will move when the parent mesh is deformed.
Emparentado a Vértice desde el Modo Edición
En el Modo Objeto, seleccione los objetos hijo, y luego el objeto padre. Presione Tab para ingresar al Modo Edición, y en el objeto padre seleccione un único vértice que defina un punto, o tres vértices que definan un área (los tres vértices no necesitan conformar una cara completa; estos pueden ser tres vértices cualesquiera del objeto padre), y luego presione Ctrl-P y confirme.
En este punto, si ha sido seleccionado un único vértice, se dibujará una línea de relación/emparentado desde el vértice hasta el objeto hijo. Si fueron seleccionados tres vértices, entonces se dibujará una línea de relación/emparentado desde el centro promedio de los tres puntos (del objeto padre) hasta el objeto hijo. Ahora, a medida que se deforme la malla del objeto padre, y los vértices padre elegidos, el objeto hijo también se moverá.
Emparentado a Vértice desde el Modo Objeto
Vertex parenting can be performed from Object Mode, this is done like regular object parenting, press Ctrl-P in Object Mode and select Vertex or Vertex (Triangle).
Se usarán los vértices más cercanos de cada objeto, que es lo que normalmente querrá que suceda.

Los cubos pequeños se pueden emparentar automáticamente a una tríada de vértices cercanos en la Esfera Geodésica usando la opción Vertex (Triangle) (Vértice (Triángulo)) desde el menú emergente Set Parent To (Definir como superior).¶ |
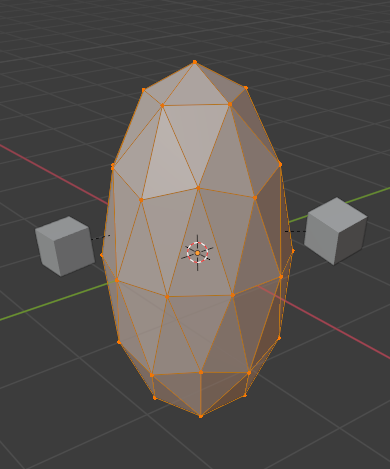
Reshaping the object in Edit Mode then means each of the cubes follows their vertex parent separately.¶ |

Scaling the parent icosphere in Object Mode means the child cubes are also scaled as expected.¶ |
El elemento del menú contextual del emparentado significa que los usuarios pueden establecer rápidamente una gran cantidad de relaciones de vértices padre, y evitar el tedioso esfuerzo de establecer cada relación de vértice padre-hijo separadamente.
Nota
It is in fact a sort of «reversed» hook.
Opciones
Move Child
Puede mover un objeto hijo a la posición de su objeto padre al limpiar su origen. La relación entre el padre y el hijo no es afectada. Seleccione el objeto hijo y presione Alt-O. Al confirmar, el objeto hijo se ajustará a la ubicación del padre. Use las vistas del Outliner (Listado) para verificar que el objeto hijo aún está emparentado.
Clear Parent (Eliminar superior)
Reference
- Mode
Object Mode
- Menu
- Hotkey
Alt-P
You can remove a parent-child relationship via Alt-P.
- Clear Parent (Eliminar superior)
If the parent in the group is selected, nothing is done. If a child or children are selected, they are disassociated from the parent, or freed, and they return to their original location, rotation, and size.
- Clear and Keep Transformation (Eliminar y mantener transformación)
Libera a los hijos del padre, y mantiene la ubicación, rotación y escala dadas a ellos por el padre.
See Non-Uniform Scale which may apply here.
- Clear Parent Inverse (Eliminar compensación jerárquica)
Instead of removing the hierarchical parent-child relationship, this clears the Parent Inverse matrix from the selected objects. With an empty matrix, the location, rotation and scale properties of the children are interpreted in the coordinate space of the parent.
Consejo
Use the Outliner
There is another way to see the parent-child relationship in groups and that is to use the Outliner view of the Outliner editor.
Known Limitations
Non-Uniform Scale
A parent with non-uniform scale and rotation in relation to its child may cause a shear effect.
While this is supported by parenting, the shear will be lost when the parent is cleared since it can’t be represented by location, scale and rotation.
If Clear and Keep Transformation moves the object, non-uniform scale is the most likely cause.