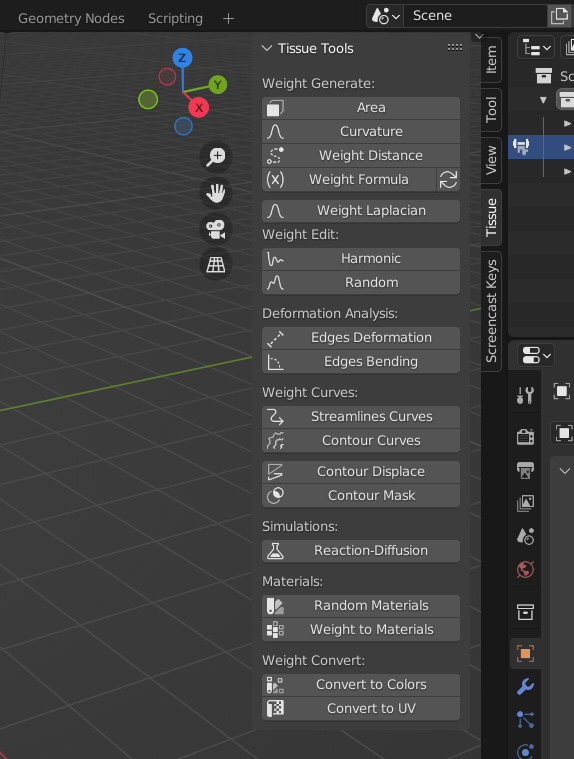
Tissue

Tissue es una colección de herramientas que facilitan el uso de técnicas de diseño computacional dentro de Blender. Consta de diferentes herramientas, visibles en el panel derecho. Según el modo activo, se muestran diferentes herramientas:
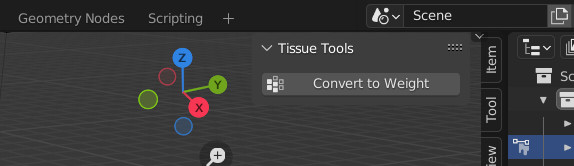
Tissue Tools (visible in Edit Mode and Object Mode)
Tissue Weight Tools (visible in Weight Paint Mode)
Tissue Color Tools (visible in Vertex Weight Mode)
Activación
Abra Blender y vaya a Preferencias, luego a la pestaña Complementos.
Selecciona Mesh: Tissue para habilitar el script.
Herramientas de Tejido
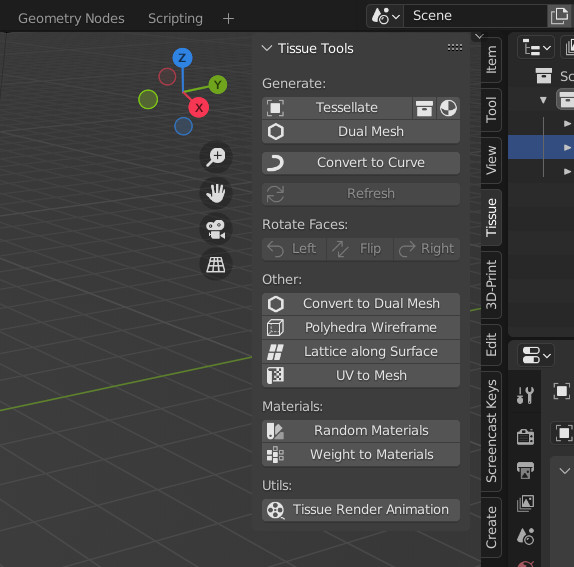
Generators
Generadores son funciones no destructivas que generan nuevos objetos a partir de objetos de entrada. Incluyen Teselada, Malla Dual (una Teselada especial) y Convertir a Curva. Para todos ellos se puede utilizar un operador Actualizar para recargar los cambios desde los objetos de entrada.
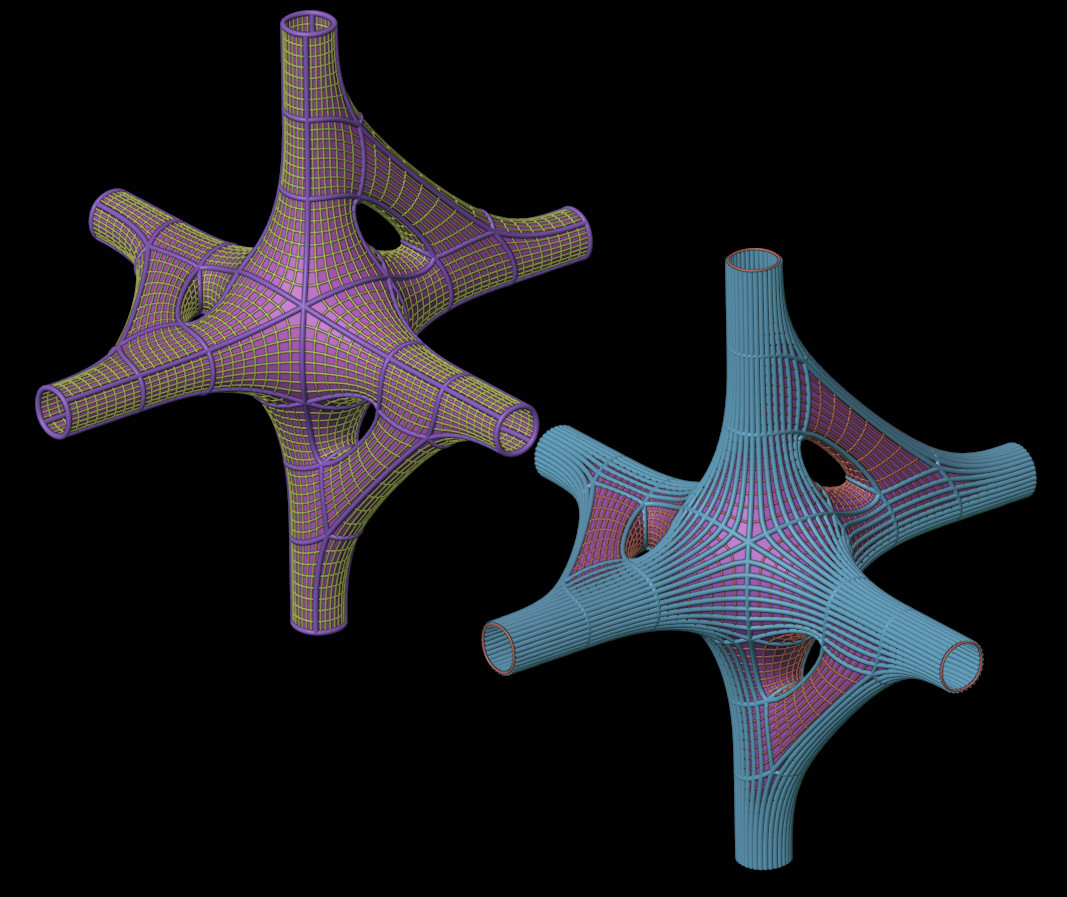
Tessellate
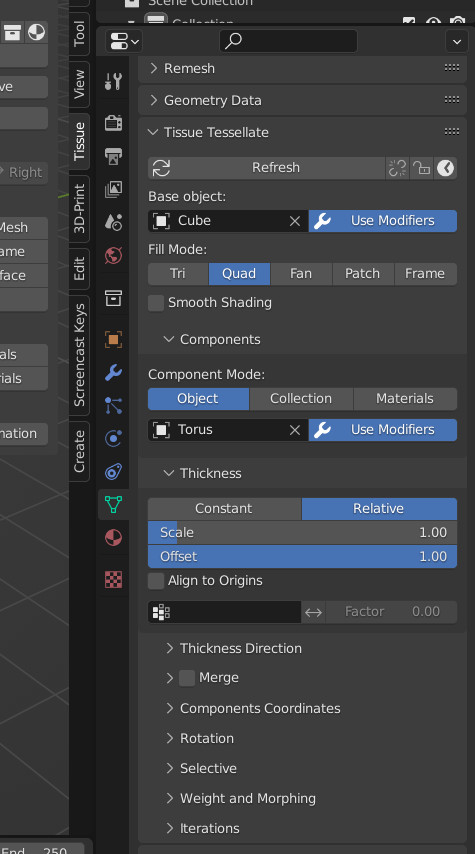
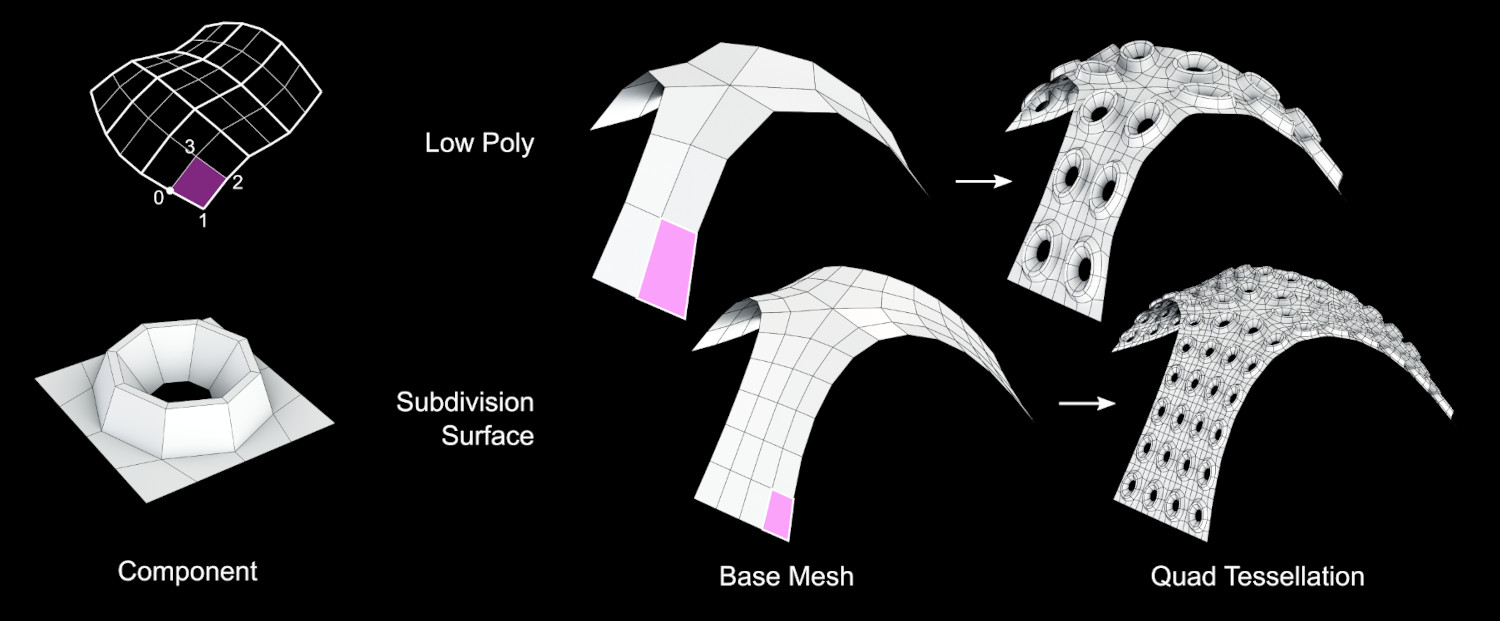
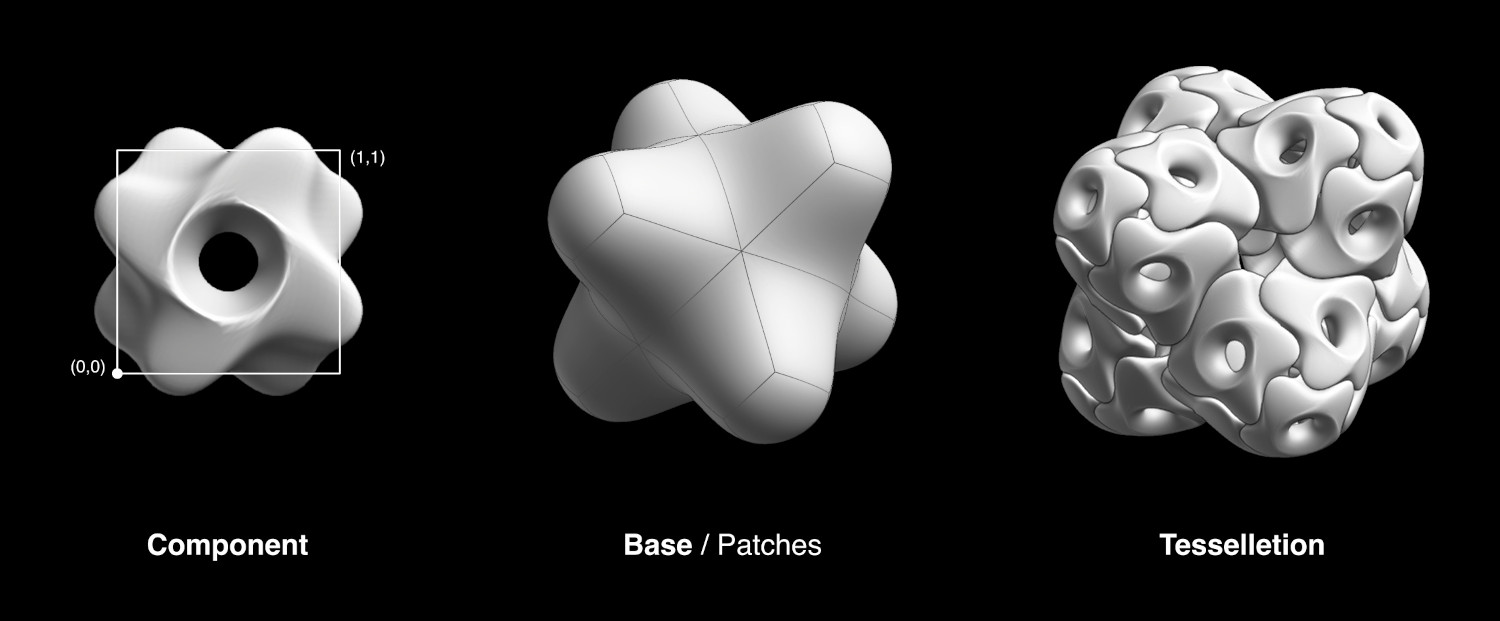
La herramienta Teselado permite al usuario copiar un objeto seleccionado (Componente) en las caras del objeto activo (Base), adaptando su volumen delimitador a la forma de las caras cuádruples. Es posible utilizar como objetos de entrada Malla, Curva, Superficie y Texto y Meta objetos. Al usar Teselado, se deben seleccionar dos objetos. Una vez presionado el botón Teselado, aparecerán más opciones en los parámetros de la herramienta.
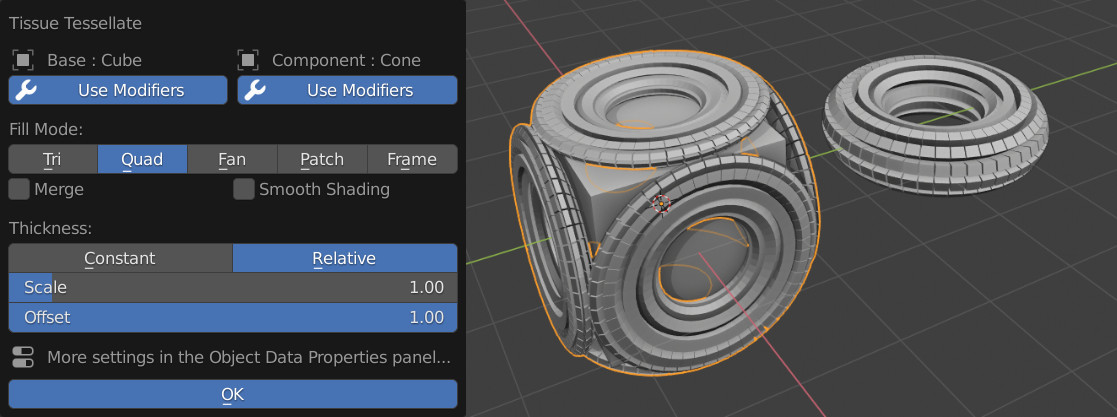
Posteriormente será posible cambiarlos, junto con configuraciones más avanzadas desde el Panel de Datos del Objeto del objeto generado.
- Usar Modificadores
Esta opción está disponible para objetos Base y Componente y permite el uso de los respectivos modificadores. Si esta opción está deshabilitada, solo se utilizarán los datos del objeto original.
- Fill Mode
Estrategia de teselado utilizada para mapear las coordenadas del Componente en las caras de la Base.
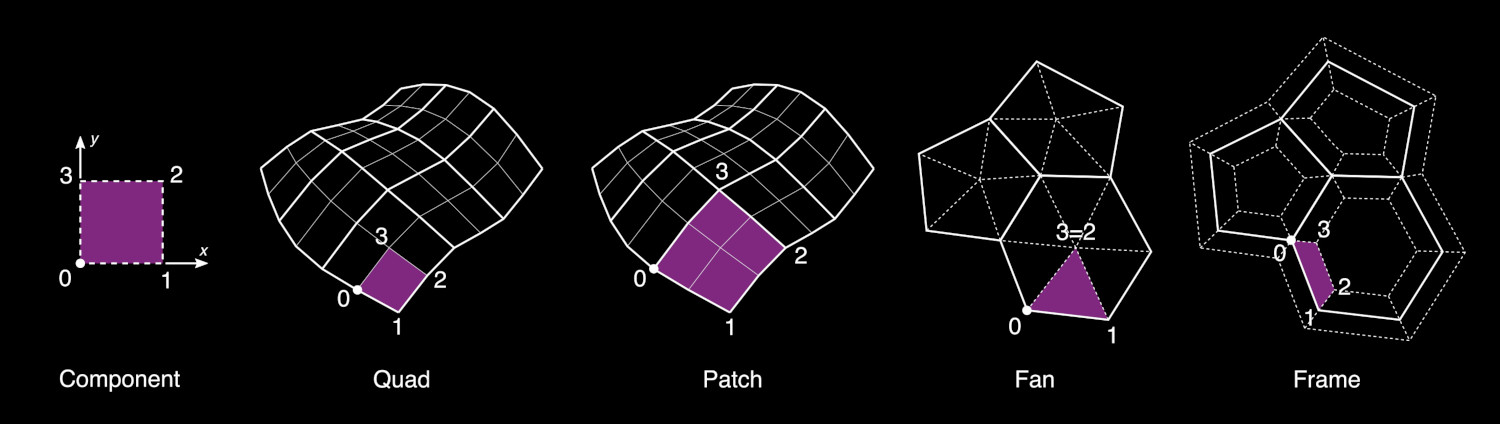
- Tri
Esta opción triangulará automáticamente el objeto Base y asignará el componente a las caras triangulares. El dominio de entrada se considerará rectangular, pero el dominio de destino tendrá dos vértices coincidentes.
- Cuádruple (por defecto)
Este es el método predeterminado y asignará el dominio Componente a cada cara cuádruple del objeto Base. Si una cara tiene más de 4 vértices, se separará automáticamente en caras cuádruples o triangulares.
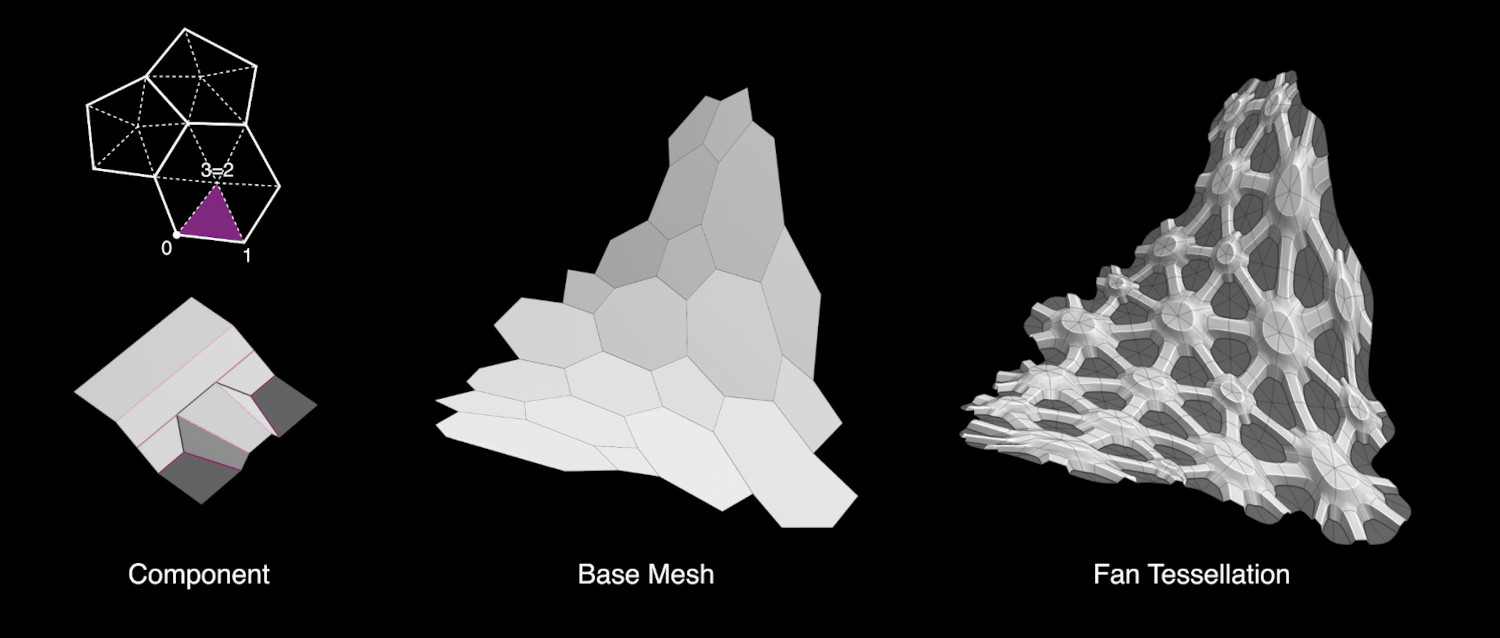
- Fan
Esta opción dividirá cada cara del objeto Base en triángulos que conectan cada lado de la cara con su centro.
- Patch
Esta opción requiere el uso de un modificador Subdivisión de Superficie en el objeto Base. Es similar al método Quad, pero permitirá utilizar dominios curvos, basados en los parches subdivididos. Si se usan más superficies de subdivisión (o modificadores de resolución múltiple), solo se usará la última para definir los parches de destino.
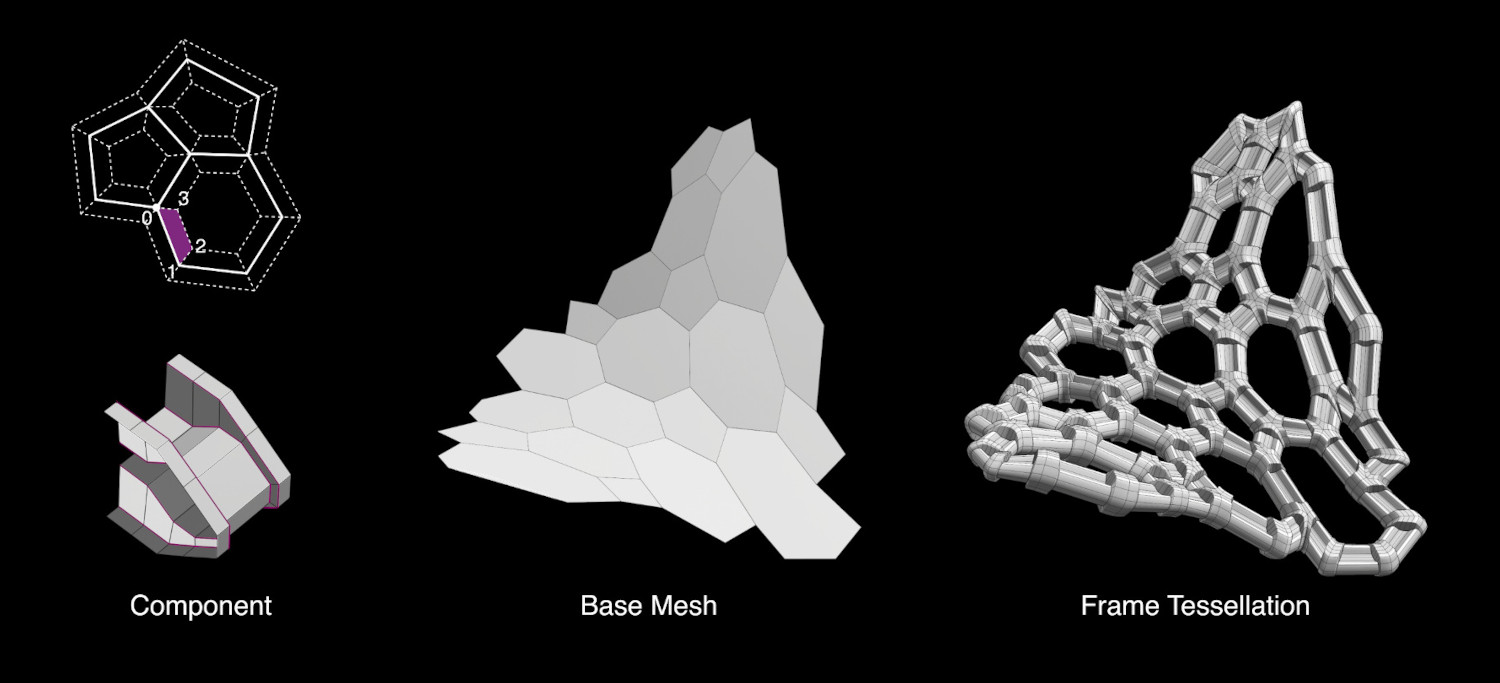
- Fotograma
De manera similar a un operador de Cara Incrustada (Inset Face), esta opción permitirá aplicar los componentes a lo largo de caras desplazadas de un Espesor dado.
- Merge
Combinar automáticamente todos los componentes generados.
- Smooth Shading
Establece automáticamente el sombreado de la geometría generada como Suave. Si el objeto Componente ya está configurado como Suave, esta opción no es necesaria.
- Componentes
Three different method can be used to assign the components.
- Objeto
Repeat the same object on all the target faces.
- Colección
Assign the objects contained in a given Collection. The components can be assigned either randomly or according to a Vertex Group.
- Materiales
Assign the components according to the name of the materials assigned to each face. If for a given material, there is no an object with the same name, then the face is not used.
Watch the Tutorial (it is based on an old version of Tissue, the procedure is slightly different now)
- Grosor
- Scale Mode
- Constante
Genera componentes con un espesor fijo y uniforme en la dirección normal.
- Relativo
Genera componentes con un grosor proporcional a la dimensión de la cara de destino. Esto producirá componentes con una relación de aspecto similar al objeto Componente original.
- Escala
control the scaling factor of the components” Thickness
- Desplazamiento
Permite controlar la alineación de los componentes en relación con la superficie del objeto Base.
- Components Coordinates
Strategy used to determine the component’s domain for mapping it on the target faces.
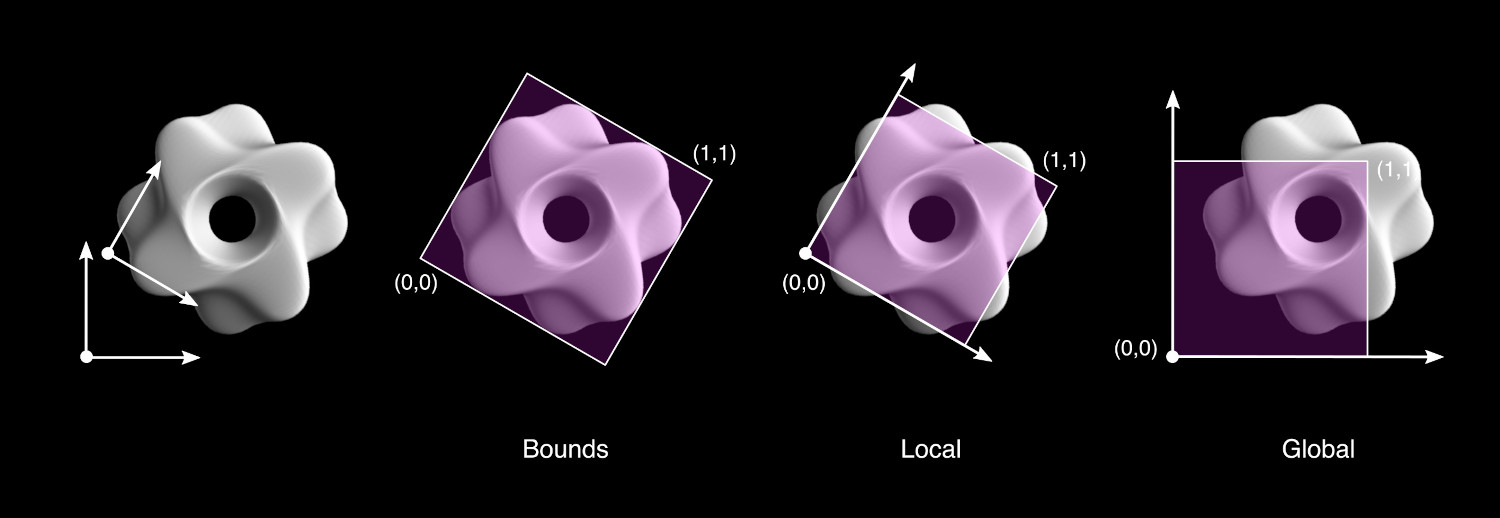
- Volumen Delimitador (por defecto)
Automatically defines the domain according the Bounding Box of the component object.
- Local
Defines the domain according to the local coordinates of the component object. The face domain is considered from 0 to 1 in both Local X and Local Y directions. This method allows a customization of the mapping strategies, maintaining the result independent from Location/Rotation/Scale of the component object.
- Global
Similar to Local, but based on the Global coordinates of the component. This allows to easily produce animations changing the Location/Rotation/Scale of the component.
Watch the Tutorial
- Extend (Local and Global coordinates)
Extend the domain of the components with a domain bigger than 0-1.
- Clip (Local and Global coordinates)
Truncate the component according to the domain 0-1.
- Cyclic (Local and Global coordinates)
Cut and move to the other side the parts of the component that exceed the domain 0-1.
- Weight and Morphing
Combine the Vertex Groups of the base object with the Shape Keys from the component, in order to generate morphing components.
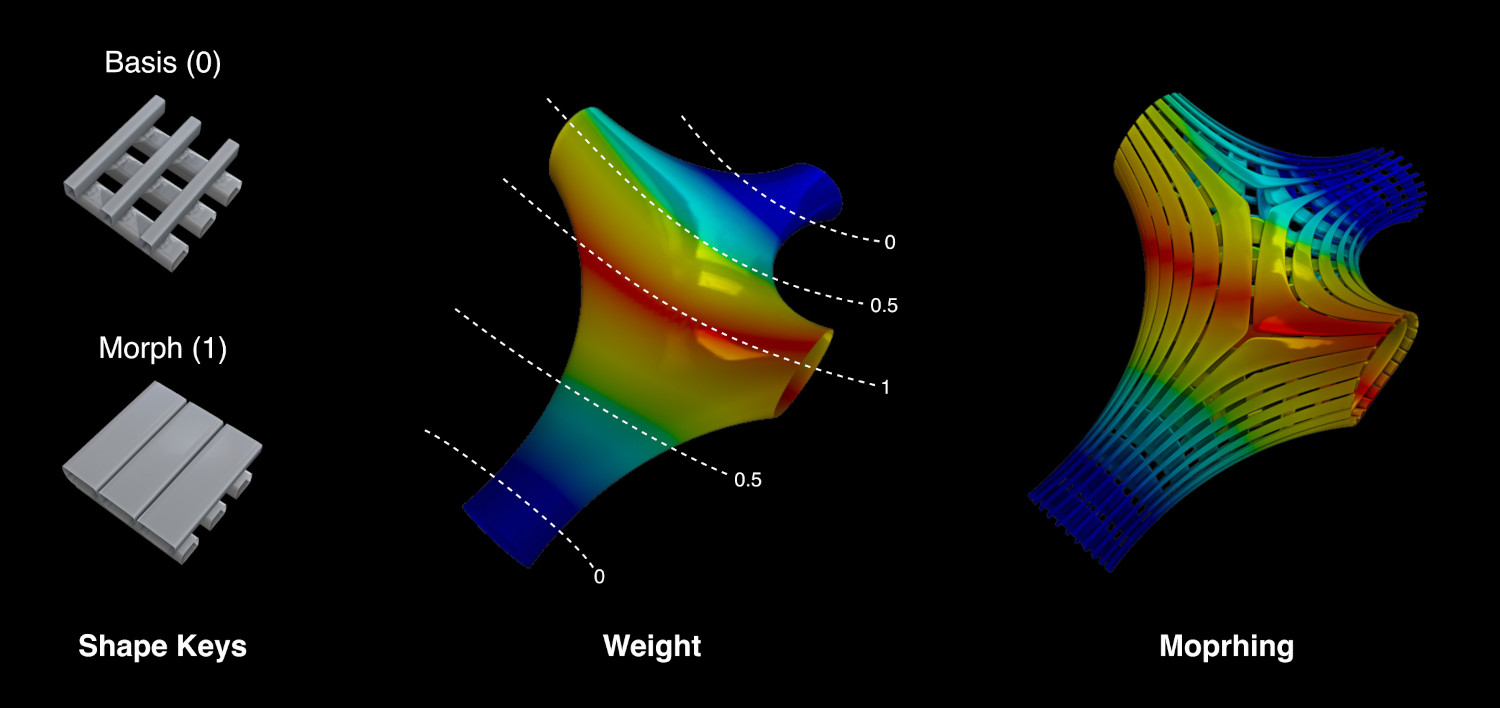
- Map Vertex Groups
Remap each Vertex Group from the base mesh to the generated geometry
- Use Shape Keys
Transfer the Shape Keys from the component object to the generated object. If the name of the base’s vertex groups and the Shape Keys match, then they will be automatically assigned in order to control their morphing behavior.
Watch the Tutorial
- Iterations
Automatically repeat the tessellation using as base the result of the previous iteration.
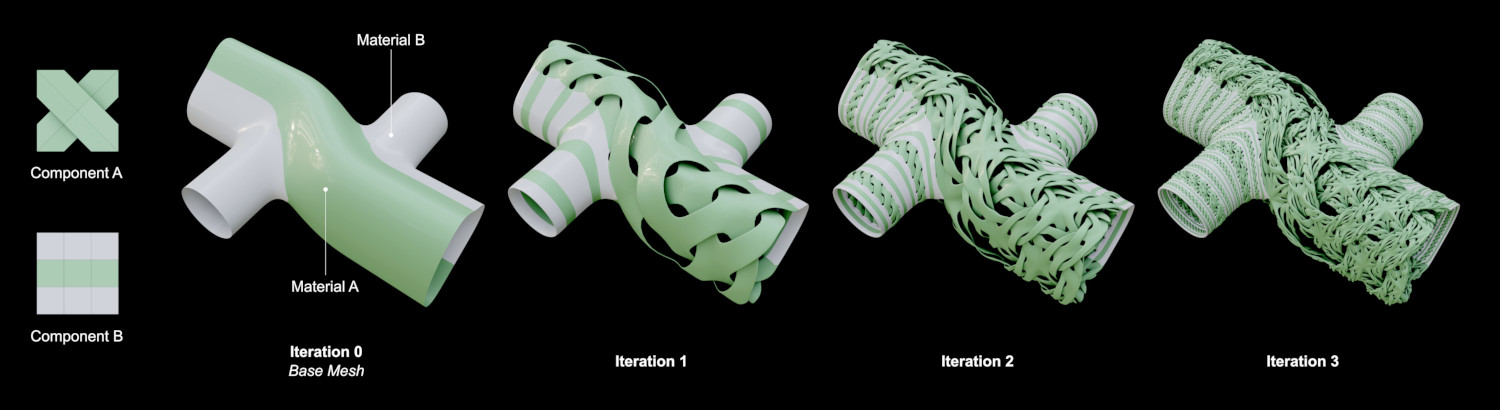
- Repetir
Número de interacciones.
- Combine iterations
Combine the resulting tessellation with part or all of the previous iteration:
- Last
Ignore the previous iterations.
- Unused
Combine the tessellation with the faces of the previous iteration that are not generating components.
- Todo
Combine the tessellation with all the faces from the previous iteration.
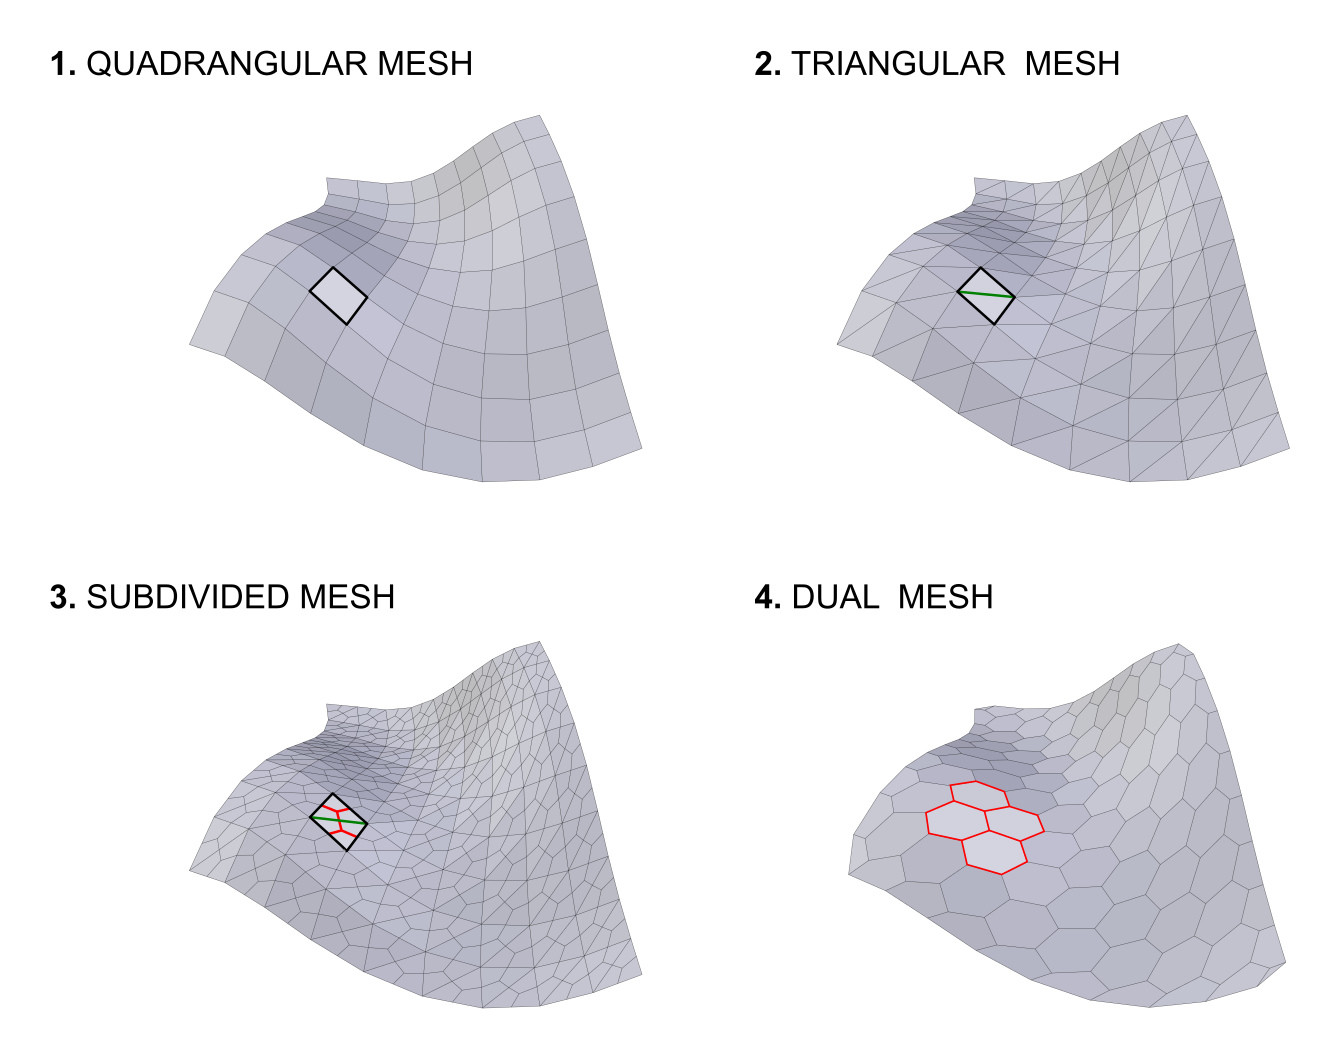
Dual Mesh
Dual Mesh modifica las mallas seleccionadas, creando mallas dobles. La salida de Dual Mesh es una malla poligonal derivada a partir de una malla triangular. Antes, las mallas cuadrangulares son convertidas automáticamente a triangulares.
- Quad Method
Métodos para dividir los cuadriláteros en triángulos. (Heredado de la herramienta Triangulate Faces.)
- Polygon Method
Métodos para dividir polígonos en triángulos. (Heredado de la herramienta Triangulate Faces.)
- Preserve Borders
Evita la alteración de los límites abiertos de la malla.
Convertir a Curva
Generate a Curve object from the Loops, Edges or Particles of the active object. This is a non-destructive operation, meaning that in any moment it will be possible to reload the changes from the base object and change the parameters of the conversion. It will be possible to convert specific edges/loops according to different criteria, together with the addition of a pattern effect.
(Por hacer)
Refrescar
Update the active object according to the changes in the base geometries. This operator works on the objects generated through Tessellate and Convert to Curve.
Rotar Caras
Rotate the indexes of the selected faces (in Edit-Mode). This allows to control the rotation of the components of Tessellated objects, when using Default rotation. Once the operator is executed, then the interested Tessellated objects are automatically refreshed.
Convertir a Malla Dual
Destructive version of the Dual-Mesh operator. This directly convert the active object to its Dual-Mesh.
Estructura de Poliedros
(Por hacer)
Enrejado a lo Largo de la Superficie
(Por hacer)
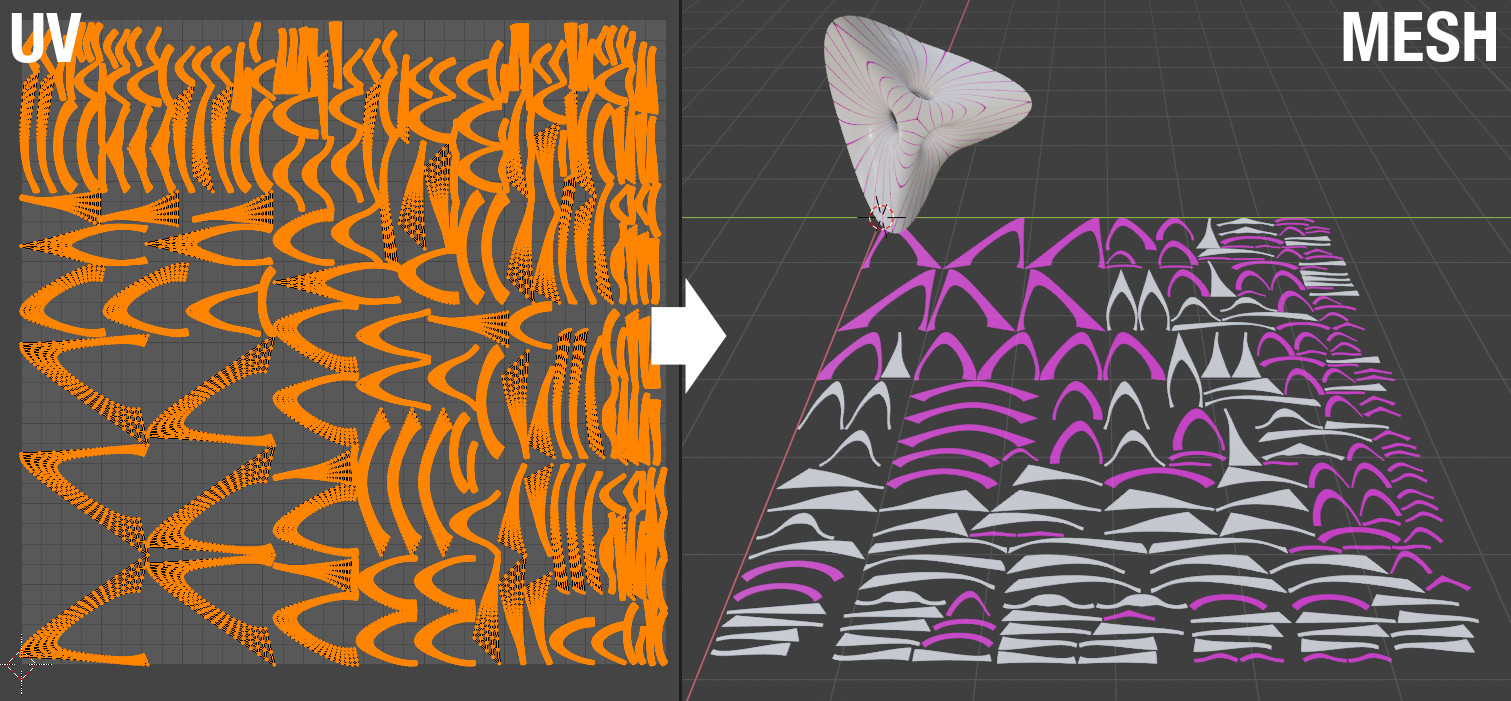
UV a Malla
Convierta el mapa UV activo en malla tratando de preservar el área de superficie total del modelo 3D original.
Materiales Aleatorios
Assign random materials to the face’s of the active mesh object.
Influencia a Materiales
Distribute existing materials according to the weight of the active vertex group. It is also possible to automatically create new materials.
Animación de Procesamiento de Tejido
(Por hacer)
Herramientas de Influencia de Tejidos
Área
Influencia del área Caras (Límites automáticos, Límites manuales)
Curvatura
Weight from Curvature (Based on Dirty Color Attributes)
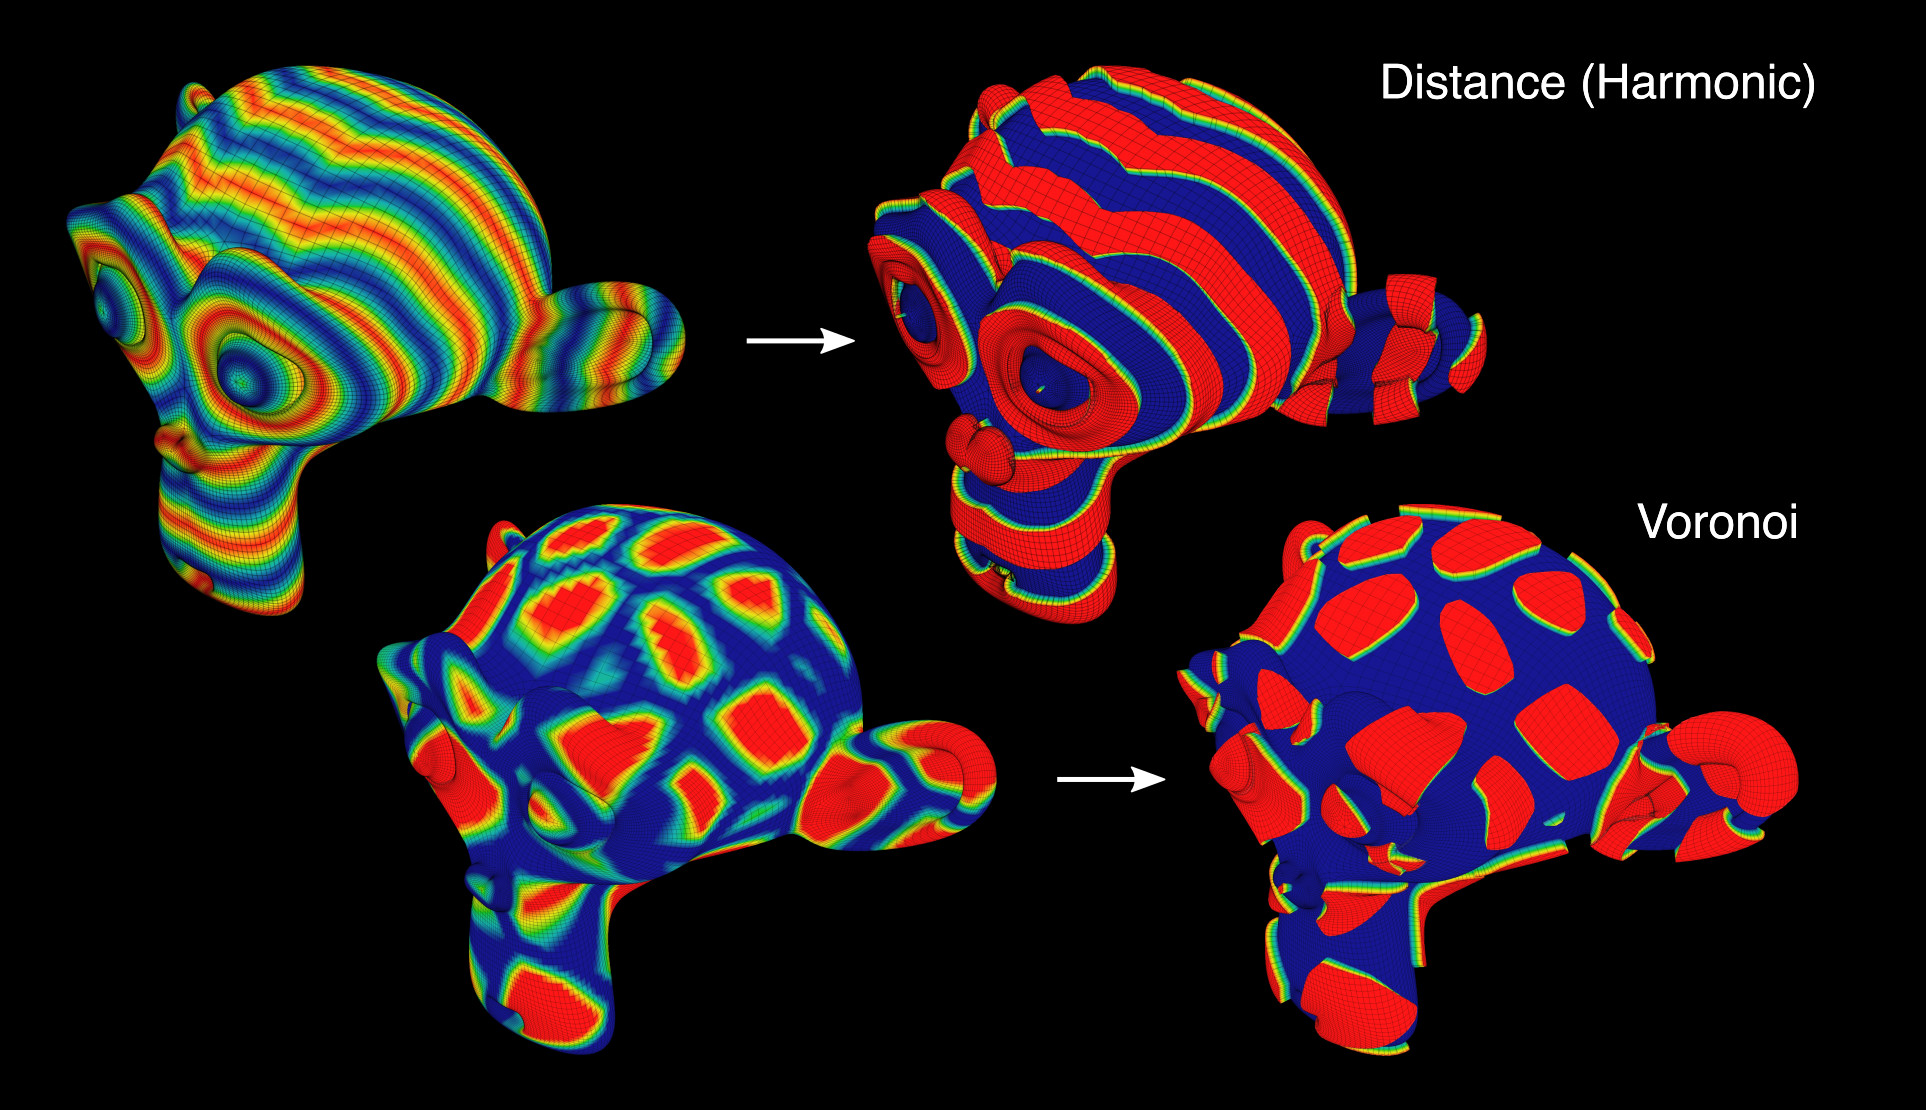
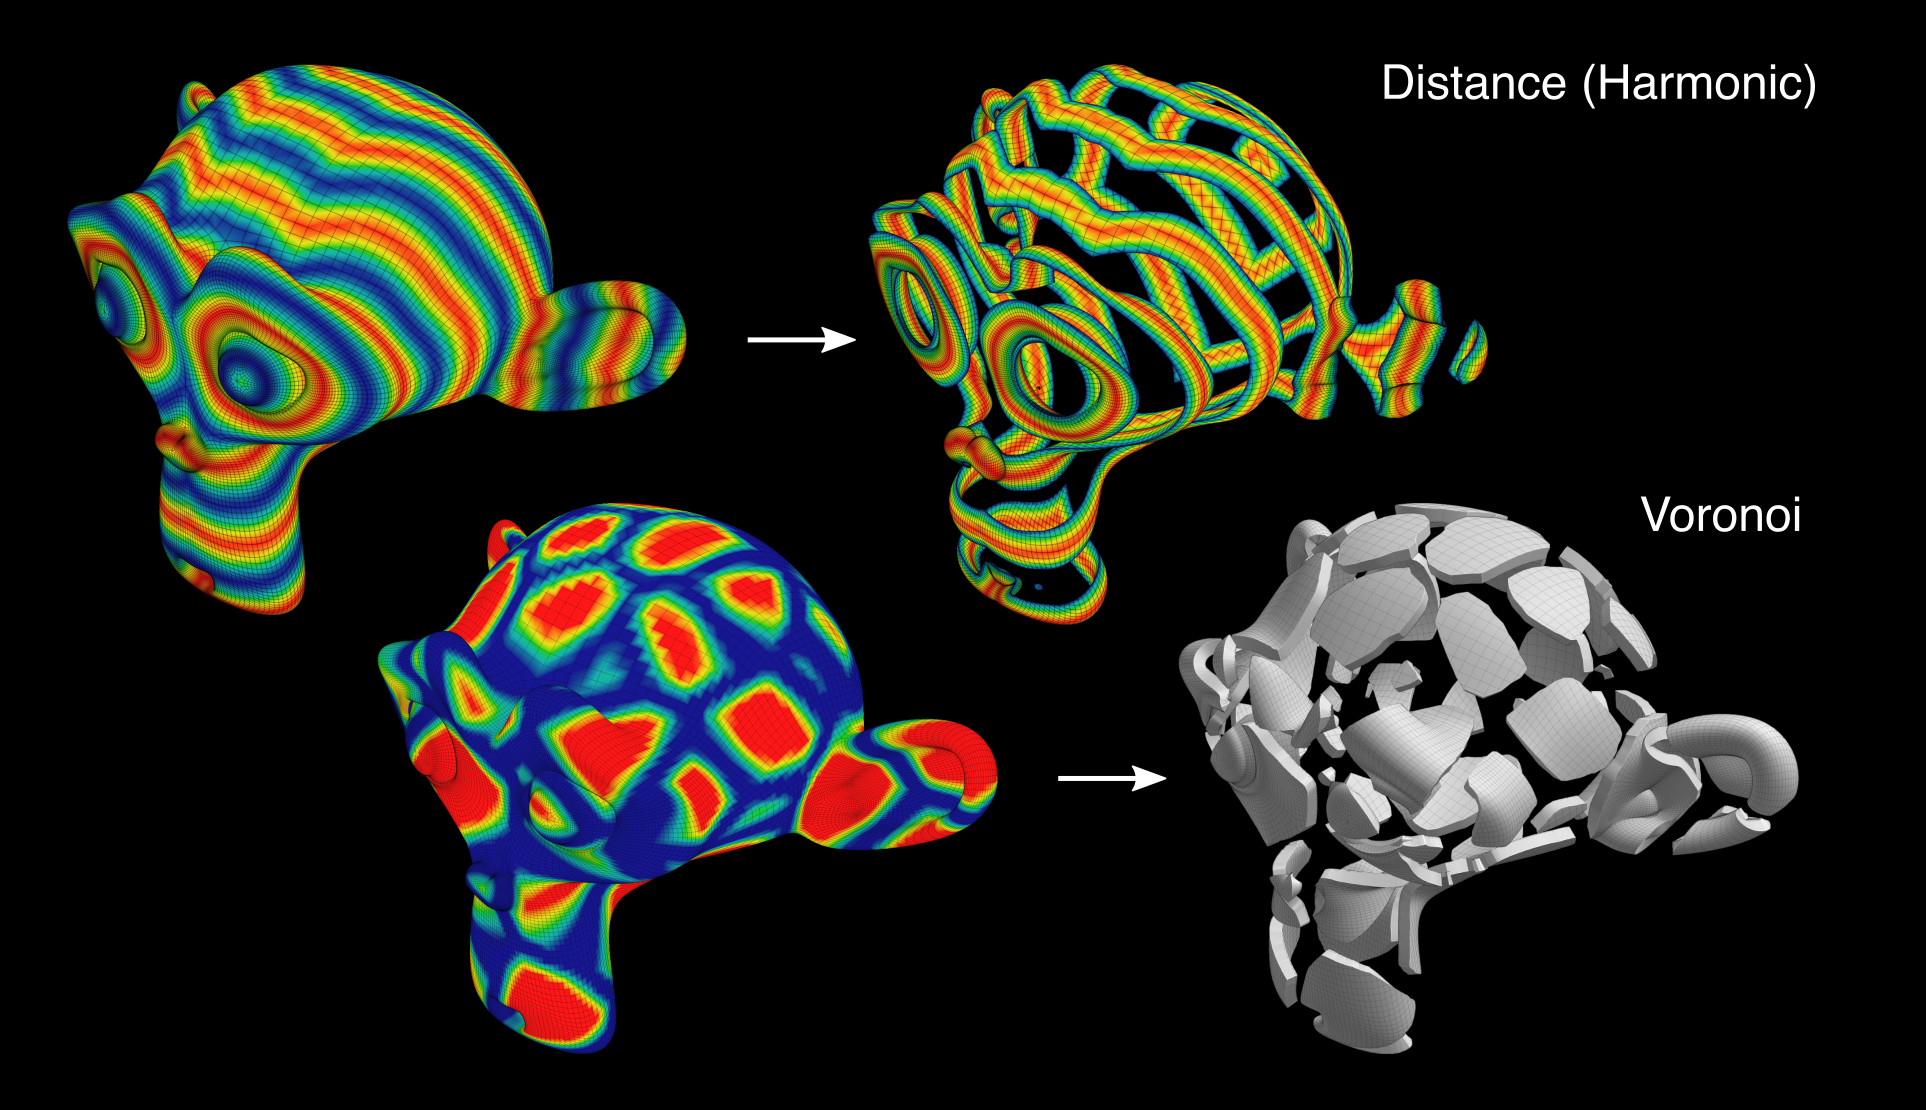
Distancia de Influencia
Generate a vertex group according to the distance from the selected vertices. Different methods can be used: Geodesic, Euclidean or Topology distance.
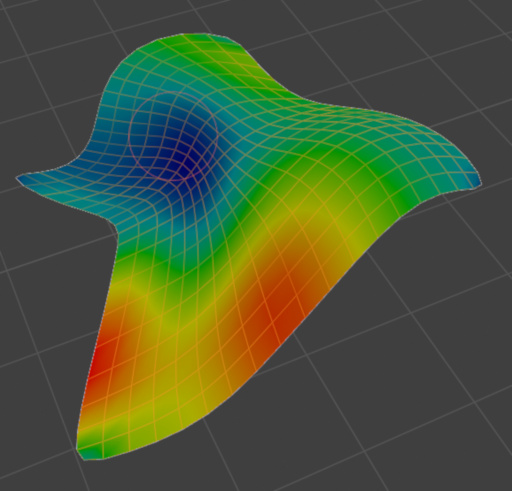
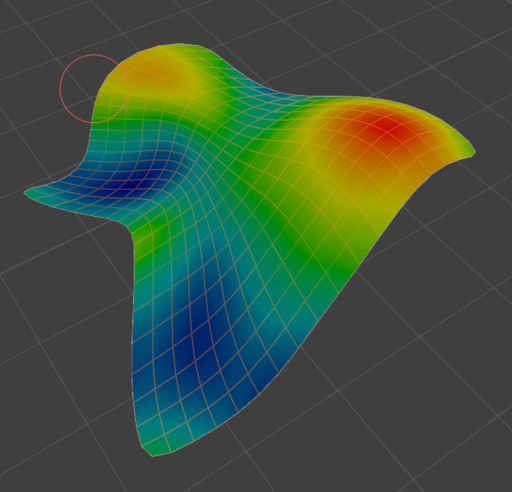
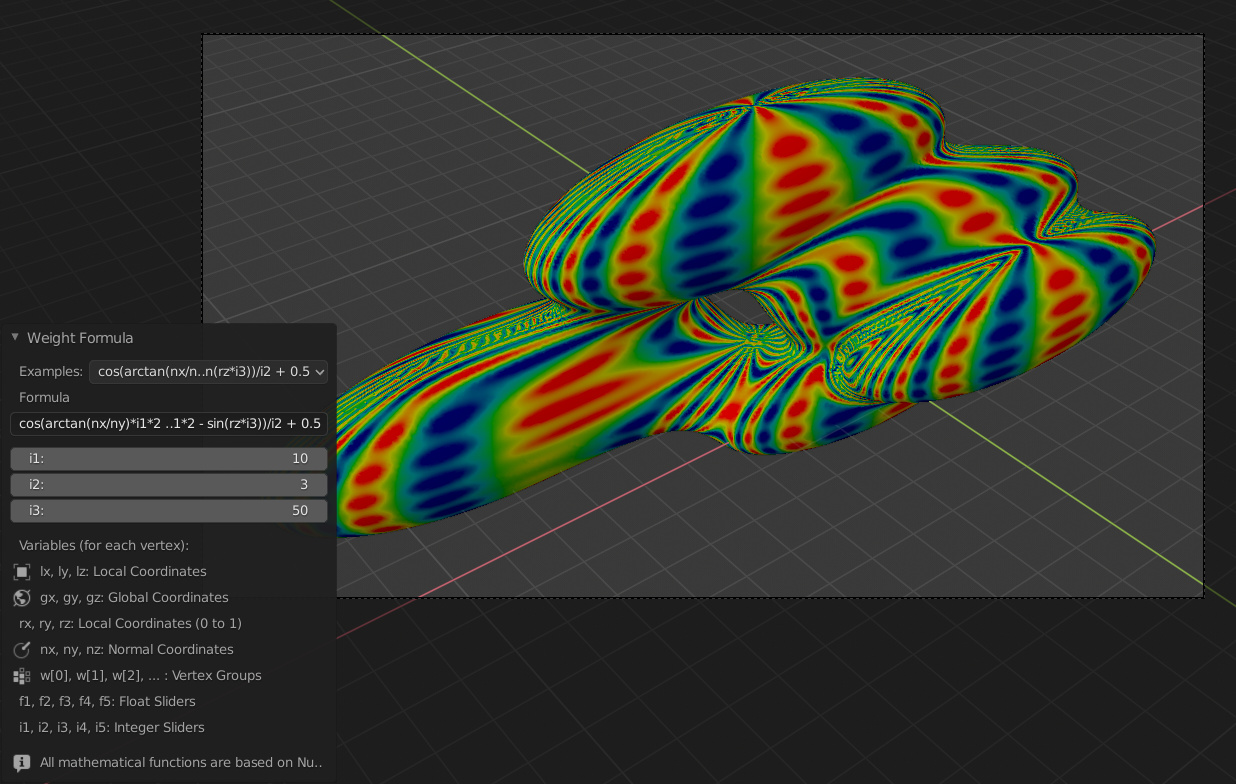
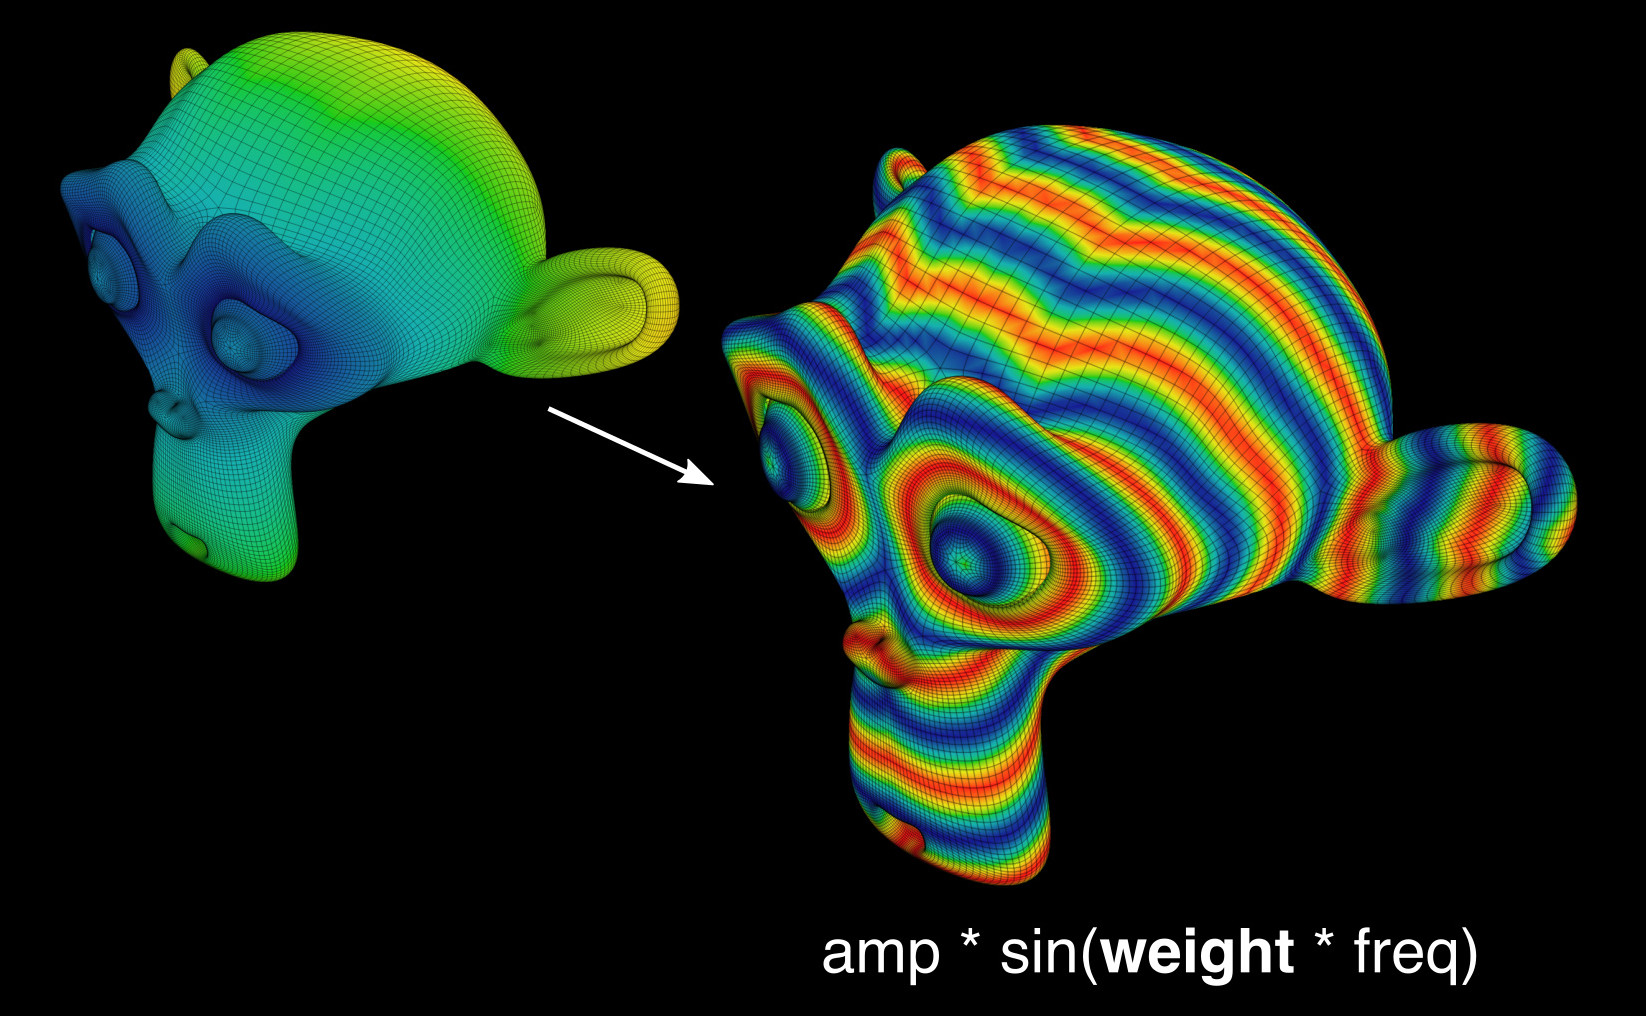
Fórmula de Influencia
Influencia basada en parámetros de vértices. Permite utilizar las coordenadas de los vértices y la dirección de las normales. Se pueden crear controles deslizantes de números enteros y flotantes para encontrar los parámetros adecuados más fácilmente.
Influencia Laplaciana
(Por hacer)
Harmonic
Función harmónica basada en la Influencia activa
Aleatorio
(Por hacer)
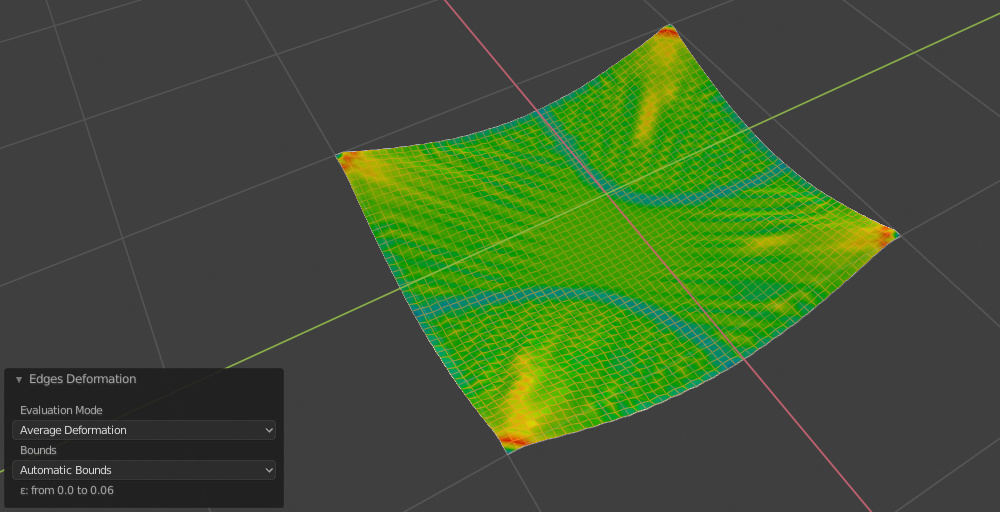
Deformación de los Bordes
Generate a Vertex Group based on Edges Deformation evaluated on the Modifiers result (Deformation Modifiers and Simulations)
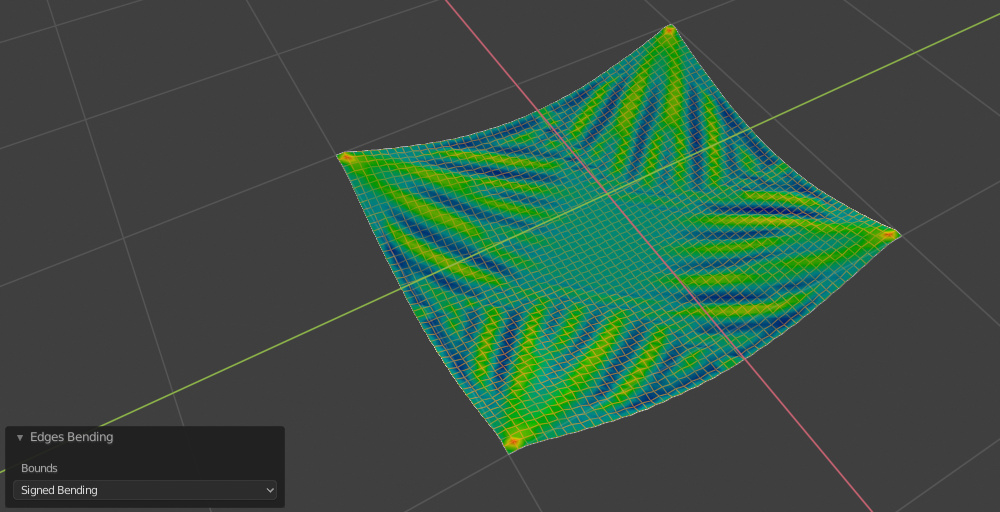
Curvatura de los Bordes
Genera un grupo de vértices basado en la flexión de los bordes evaluados en el resultado de los modificadores (modificadores de deformación y simulaciones).
Curvas Aerodinámicas
(Por hacer)
Curvas de Contorno
Genera isocurvas basadas en la Influencia Activa.

Desplazamiento de Contorno
Corta la malla de acuerdo a la Influencia activa en un número variable de isocurvas y agrega automáticamente un modificador de desplazamiento.
Máscara de Contorno
Recorte la malla de acuerdo con el peso activo.
Difusión de Reacción
Tissue implements the Gray-Scott model for the Reaction-Diffusion simulation. This allows to simulate through the vertex groups the distribution of the two substances that generate the various patterns of many living organisms.
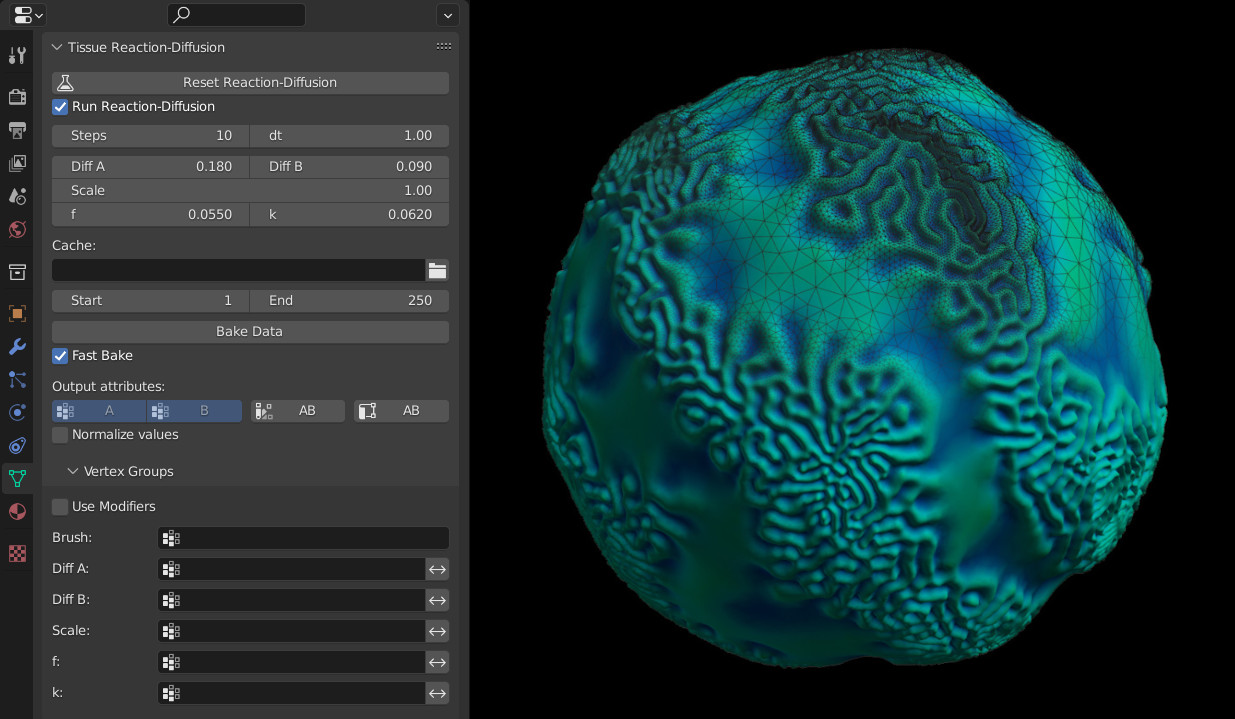
See this video for an example of the Reaction-Diffusion simulation with Tissue.
Materiales Aleatorios
(Por hacer)
Influencia a Materiales
(Por hacer)
Convertir a Colores
- Convert To
Value Channel, Red Channel, Green Channel, Blue Channel, False Color
- Invertir
Invierte los valores leídos del peso del vértice.
Convertir a UV
(Por hacer)
Herramientas de Color de Tejido
Convertir a Influencia
- Red Channel
Add a vertex group derived to red channel of the active Color Attribute.
- Green Channel
Add a vertex group derived to green channel of the active Color Attribute.
- Blue Channel
Add a vertex group derived to blue channel of the active Color Attribute.
- Canal de Valor
Add a vertex group derived to value channel of the active Color Attribute.
- Invertir
Invierte los valores leídos del peso del vértice.
Ejemplo
See this video for an example of the Tissue add-on in action.
Referencia
- Categoría
Malla
- Descripción
Herramientas para diseño computacional.
- Ubicación
Pestaña
- Archivo
carpeta mesh_tissue
- Autor
Alessandro Zomparelli (Co-de-iT)
- Licencia
GPL
- Nota
Este complemento está empaquetado con Blender.