Annotate Tool
The annotation tool is available in multiple editors. It can be used to add notes to e.g. 3D objects or node setups.
The annotation tool can be activated in the Toolbar on the left side. It has a couple of sub-tools listed below.
- Annotate
Draw free-hand strokes in the main window.
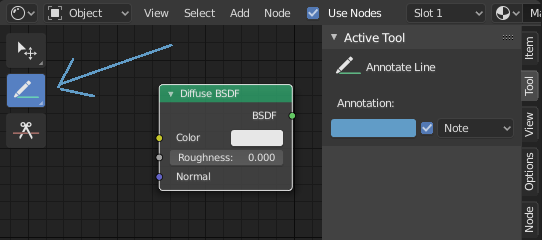
- Annotate Line
Click and drag to create a line.
- Annotate Polygon
Click multiple times to create multiple connected lines. The current polygon is finished when Esc or RMB is pressed.
- Annotate Eraser
Click and drag to remove lines drawn previously.
The eraser has a Radius setting found in .
Settings
Common
There is a panel, , in it multiple annotation layers can be managed.
- Color
Adjusts the color of existing and new strokes.
- Thickness
Adjusts the thickness of existing and new strokes.
- Onion Skin
Shows a ghosted image of strokes made in frames before and after the current frame. Onion skinning only works in the 3D Viewport and Sequencer. See the Grease Pencil documentation for an explanation of Onion Skinning.
3D Editor
When creating new annotations in the 3D View, there is one tool setting.
- Placement
The Placement option determines where the line is drawn in 3D space.
- 3D Cursor
Draw on an imaginary plane that goes through the 3D cursor.
- View
Draw in screen space instead of in 3D space. That means, that the line will stay on the same position in the screen, even when e.g. the camera rotates.
- Surface
Project the line on the surface under the mouse.