Introduction
Une texture UV est une illustration (image, séquence ou film) qui est utilisée pour colorer la surface d’un maillage. La texture UV est reportée sur le maillage à travers un ou plusieurs UV maps. Il y a trois manières d’établir l’image utilisée par la texture UV.
Paint a flat image in the Image Editor onto the currently selected UV texture, using its UV map to transfer the colors to the faces of the mesh.
Paint the mesh in the 3D View, and let Blender use the currently selected UV map to update the UV texture (see Projection Painting).
Use any image editing program to create an image. In the Image Editor, select the UV texture and load the image. Blender will then use that texture’s UV map to transfer the colors to the faces of the mesh.
Blender features a built-in paint mode called Texture Paint which is designed specifically to help you edit your UV textures and images quickly and easily in either the Image Editor or the 3D Viewport. Since a UV texture is just a special-purpose image, you can also use any external paint program, like GIMP or Krita.

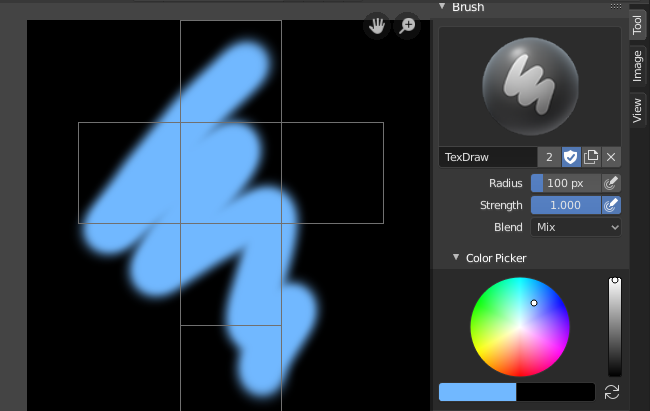
Peinture de texture dans Blender.
Étant donné qu’un maillage puisse avoir des calques de textures UV, il se peut qu’il y ait beaucoup d’images qui colorent le maillage. Cependant, chaque texture UV a une seule image.
Texture Paint works in both a 3D Viewport and the Image Editor. In the 3D Viewport in Texture Paint Mode, you paint directly on the mesh by projecting onto the UVs.
Astuce
Memory Optimization
Texture Paint is fast and responsive when working in the 3D Viewport and when your image is sized as a square where the side lengths are a power of two, e.g. 256×256, 512×512, 1024×1024, etc.
Mise en route
The object to be painted on must first be unwrapped. UVs can be added traditionally, with standard Unwrapping Tools, or by adding Simple UVs in Texture Paint mode.
Note
When no UV layers can be detected, Blender will display a warning message.
Once you have unwrapped your model to a UV map, you can begin the texturing process. To use texture paint you may do any of the following:
Activate the Texture Paint workspace. Here the 3D Viewport has the Texture Paint Mode enabled and the Image Editor is already switched to Paint mode.
Dans la Vue 3D, sélectionnez Texture Paint Mode dans le sélecteur de mode dans l’entête, et vous pouvez peindre directement sur le maillage.
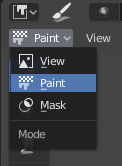
In the Image Editor, switch the mode to Paint (shown to the right).

Enabling Paint mode.
Once you enable Texture Painting, your mouse becomes a brush. As soon as you enable Texture Painting or switch to Texture Paint Mode, different tools become available in the Toolbar.
In the Image Editor, you paint on a flat canvas that is wrapped around the mesh using UV coordinates. Any changes made in the Image Editor show up immediately in the 3D View, and vice versa. To work with the UV layout (for example, to move coordinates) you must go back to View mode.
A full complement of brushes and colors can be selected from the Sidebar region in the Image Editor. Brush changes made in either panel are immediately reflected in the other panel. However, the modified texture will not be saved automatically; you must explicitly do so by .
Prévisualisation de texture
Si votre texture est déjà utilisée pour color, bump map, displace, alpha-transparent, etc., une surface d’un modèle dans votre scène (en d’autres termes techniques, est quelque aspect d’une texture via un canal de texture utilisant UV comme une entrée de map), vous pouvez voir les effets de votre peinture dans le contexte de votre scène pendant que vous peignez.
To do this, set up side-by-side areas, one Area in 3D Viewport set to Texture shading option, and in the second Area the Image Editor loaded with your image. Position the 3D Viewport to show the object that is UV-mapped to the loaded image. In the image to the right, the texture being painted is mapped to the « Normal » attribute, and is called « bump mapping », where the grayscale image is used to make the flat surface appear bumpy. See Texture Mapping Output for more information on bump mapping.
Enregistrement
Si l’image de l’élément de menu d’entête a un astérisque près de lui, cela signifie que l’image a été modifiée, mais pas sauvegardée. Utilisez l’option pour enregistrer votre travail avec un nom différent ou écraser l’image d’origine.
Note
Textures UV
Puisque les images utilisées comme textures UV sont fonctionnellement différentes des autres images, vous devriez les ranger dans un dossier distinct de ceux des autres images.
Le format d’image pour la sauvegarde est indépendant du format de rendu. Le format pour enregistrer une image UV est sélectionné dans l’entête du Navigateur de fichiers, et est par défaut PNG (.png).
Si Packing est activé dans l’entête du Navigateur de fichiers, ou si manuellement vous , la sauvegarde de vos images dans un fichier distinct n’est pas nécessaire.
Utilisation d’un éditeur d’image externe
Si vous utilisez un éditeur d’image externe pour éditer votre Texture UV, vous devez :
Run that paint program (GIMP, Krita, etc.).
Charger l’image ou en créer une nouvelle.
Modifier l’image.
Et sauvegarder de nouveau dans ce programme.
Back in Blender, you reload the image in the Image Editor.
Vous voulez utiliser un programme externe si vous avez des équipes utilisant différents programmes qui développent les textures UV, ou si vous voulez appliquer des effets spéciaux que Texture Paint ne présente pas, ou si vous êtes beaucoup plus familier avec votre programme de peinture favorite.
Limitations connues
UV Overlap
En général, le superposition d’UV ne sont pas prises en charge (comme le précalcul de texture).
Cependant, c’est seulement un problème quand un unique trait de brosse peint sur plusieurs faces qui partagent une texture.
Perspective View & Faces Behind the View
When painting onto a face which is partially behind the view (in perspective mode), the face cannot be painted on. To avoid this, zoom out or use an orthographic viewport.
Perspective View & Low Poly
La peinture sur une face en perspective sur un objet faiblement polygonal avec des normales pointant loin de la vue peut échouer ; pour résoudre ce problème, désactivez l’option Normal dans le panneau Paint.
Typiquement ceci se produit losque vous peignez sur le côté d’un cube (Voir le rapport de bogue T34665).