Shading
Shade Smooth
Référence
- Mode:
Mode Objet
- Menu:
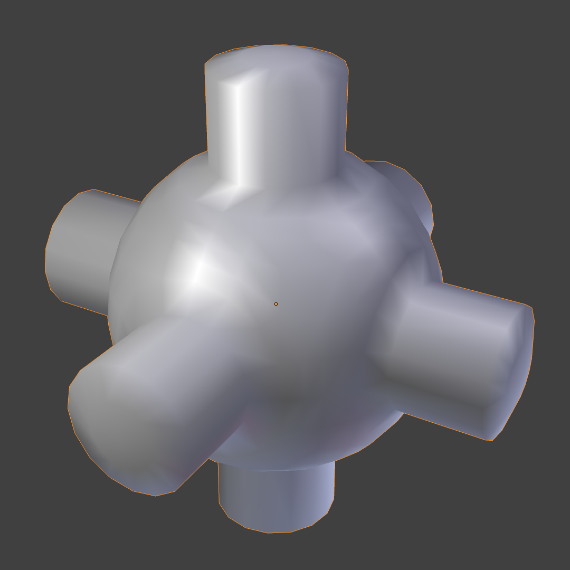
The easiest way is to set an entire object as smooth or faceted by selecting a mesh object, and in Object Mode, select Shade Smooth in the Object menu. This forces the assignment of the « smoothing » attribute to each face in the mesh, including when you add or delete geometry.
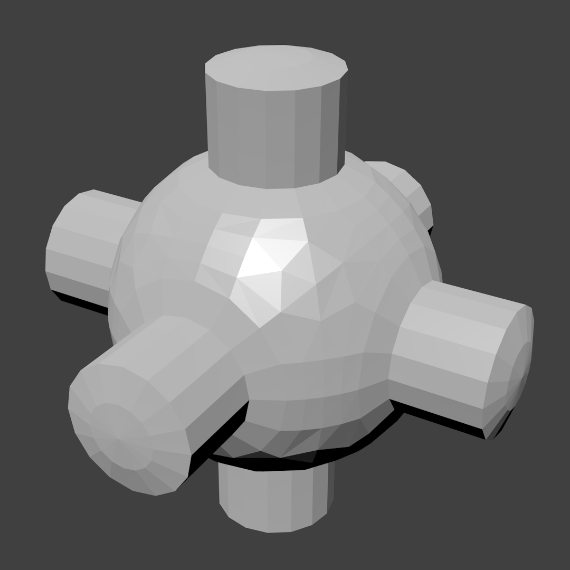
Remarquez que le contour de l’objet est encore fortement facetté. L’activation des fonctions de lissage ne modifie pas réellement la géométrie de l’objet ; elle modifie la façon dont l’ombrage est calculé sur les surfaces (les normales seront interpolées), donnant l’illusion d’une surface lisse.
Select the Shade Flat item in the Object menu to revert the shading back (normals will be constant) to that shown in the first image below.
|
|
Shade Auto Smooth
Référence
- Mode:
Mode Objet
- Menu:
Automatically applies smooth shading to faces with a defined shallow angle and all other faces are sharp. This method works great for objects with both sharp and smooth areas.
Selecting the Shade Flat will revert the shading back to flat; additionally, pressing Shade Smooth will disable all flat normals, making the entire object appear smooth again.
When this operator is used it enables the Auto Smooth property. See Advanced Smooth Shading & Sharp Edges for more details.
Shade Flat
Référence
- Mode:
Mode Objet
- Menu:
As seen in the previous sections, polygons are central to Blender. Most objects are represented by polygons and truly curved objects are often approximated by polygon meshes. When rendering images, you may notice that these polygons appear as a series of small, flat faces. Sometimes this is a desirable effect for hard surfaces, but for organic surfaces you usually want your objects to look smooth.