Configurazione delle periferiche
Schermi
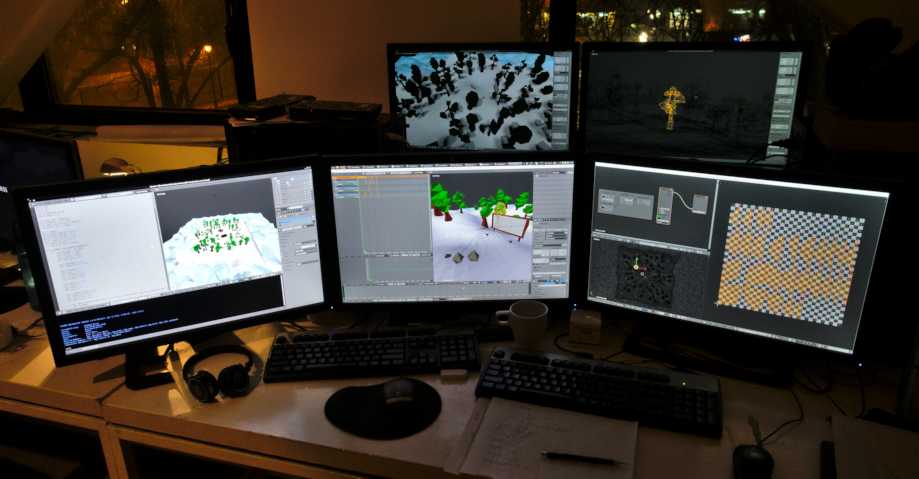
Si consiglia uno schermo Full HD o superiore. Sono supportate le configurazioni multi-monitor e le aree di lavoro possono essere configurate per estendersi su più monitor.

Esempio di supporto multi-monitor di Blender.
Dispositivi di input
Blender supporta vari tipi di dispositivi di input:
Tastiera (consigliata: tastiera con tastierino numerico, il layout inglese funziona meglio)
Mouse (consigliato: mouse a tre pulsanti con rotellina di scorrimento)
Tavoletta Grafica
Touchpad
Dispositivo NDOF (noto anche come Mouse 3D)
Nota
If you don’t have a middle mouse button or numpad, you can emulate these in the Input Preferences.
Mouse
Tastiera
Emulazione Numpad
If you do not have a numpad on the side of your keyboard, you may want to emulate one. You can then use the number row at the top of the keyboard instead, but will no longer have access to these keys” original functions (such as switching between vertex/edge/face selection in Edit Mode).
Vedi anche
Maggiori informazioni su Emulazione Numpad in Preferenze.
Tastiere non inglesi
If you use a keyboard with a non-English layout, you may still benefit from switching to the UK or US layout while working with Blender.
Nota
You can also change the keymap from the Preferences. However, this manual assumes you are using the default keymap.
Tavoletta Grafica
Le tavolette grafiche possono essere usate per fornire un metodo più tradizionale per controllare il cursore del mouse usando una penna. Ciò può aiutare a offrire un’esperienza più familiare agli artisti abituati a dipingere e disegnare con strumenti simili, oltre a fornire controlli aggiuntivi come la sensibilità alla pressione.
Nota
Se stai usando una tavoletta grafica invece di un mouse e la sensibilità alla pressione non funziona correttamente, prova a posizionare il puntatore del mouse nella finestra di Blender, quindi scollega / ricollega la tavoletta grafica. Questo potrebbe aiutare.
Touchpad
Touchpad controls are available on Windows, macOS and Linux with Wayland. If you are working from a laptop without a mouse, you can emulate controls using multi-touch gestures with the trackpad from Preferences.
Gesture |
Effect |
|---|---|
Pan |
Hold the Shift key while dragging two fingers on the pad. |
Zoom |
Hold the Ctrl or OSKey key while dragging two fingers on the pad. |
Orbita |
Drag two fingers on the pad. |
Emulate right-click |
Tap two fingers on the pad. |
NDOF (Mouse 3D)
3D mice or NDOF devices are hardware that you can use to navigate a scene in Blender. Currently only devices made by 3Dconnexion are supported. These devices allow you to explore a scene, and make Fly/Walk Navigation easier to control. The NDOF device can be configured in the Preferences. These settings can also be accessed directly from the viewport using the NDOFMenu button on the NDOF device.
Vedi anche
Vedi Preferenza di input per maggiori informazioni sulla configurazione delle periferiche.
Display montati sulla testa (realtà virtuale)
HMDs permettono di collocare gli utenti in un ambiente virtuale interattivo. Attaccati alla testa, tracciano i movimenti della testa per proiettare un mondo apparentemente circostante su piccoli schermi davanti agli occhi dell’utente. Se il sistema funziona bene, vivono l’ambiente virtuale come se fossero davvero al suo interno.
Piattaforme supportate
Il supporto della realtà virtuale in Blender è implementato attraverso lo standard OpenXR multipiattaforma. Questo standard è nuovo e quindi il supporto è ancora limitato.
Piattaforma |
Sistema Operativo |
Note |
|---|---|---|
Windows |
||
Windows |
||
GNU/Linux |
Not recommended for general use yet. |
|
Meta (formerly Oculus) (Rift and Quest) |
Windows |
Requires Oculus v31 Software Update. Oculus Link required for Quest. |
Windows, GNU/Linux |
Requires SteamVR 1.16 or greater. |
|
Windows |
– |
|
Windows |
Requires Windows 10 May 2019 Update (1903). |
Getting Started
Le seguenti sottosezioni descrivono come un HMD può essere impostato per l’uso con le piattaforme supportate. Se ciò non avviene, Blender segnalerà un errore quando tenta di avviare una sessione di realtà virtuale.
HTC Vive Cosmos
The dedicated platform for the HTC Vive Cosmos is currently targeted at developers and may lack features found in other platforms.
Follow the steps from the Vive Developer Forums.
Enable the VR Scene Inspection add-on in Blender.
HTC Vive Focus 3
The dedicated platform for the HTC Vive Focus 3 is currently targeted at developers and may lack features found in other platforms.
Follow the steps from the Vive Developer Forums.
Enable the VR Scene Inspection add-on in Blender.
Monado
Monado is a free and open source XR platform for Linux. It is not yet ready for production usage and should only be used for testing purposes.
Packages are available for the following distributions:
Ubuntu (Eoan, Focal)
For other systems, it has to be compiled from source, which in this case is not recommended for people with little experience in compiling software. Follow the Getting Started Guides from Monado to do so nevertheless.
Enable the VR Scene Inspection add-on in Blender.
Meta (formerly Oculus)
Meta (formerly Oculus) provides full support for OpenXR as of the Oculus v31 Software Update.
Download and install the Oculus Rift/Oculus Link software.
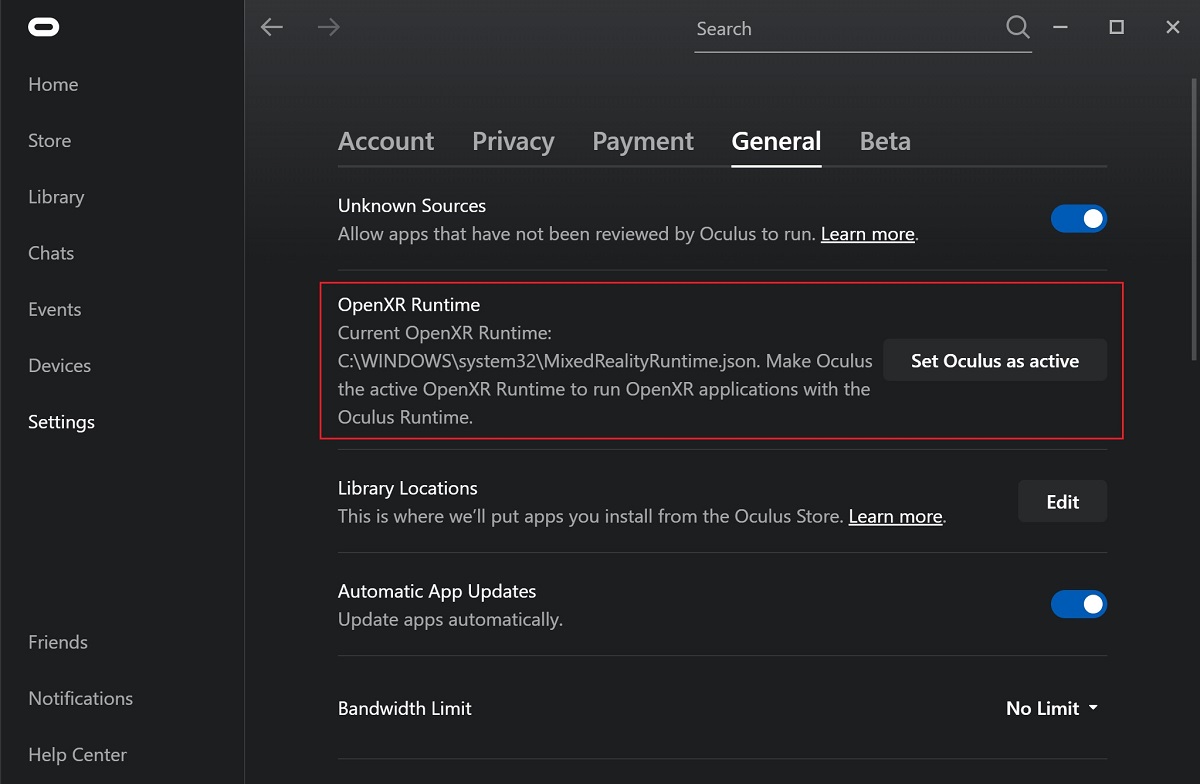
Set Oculus as the active OpenXR runtime via the General tab in the Oculus App Settings.

Enable the VR Scene Inspection add-on in Blender.
SteamVR
SteamVR provides full support for OpenXR as of SteamVR 1.16.
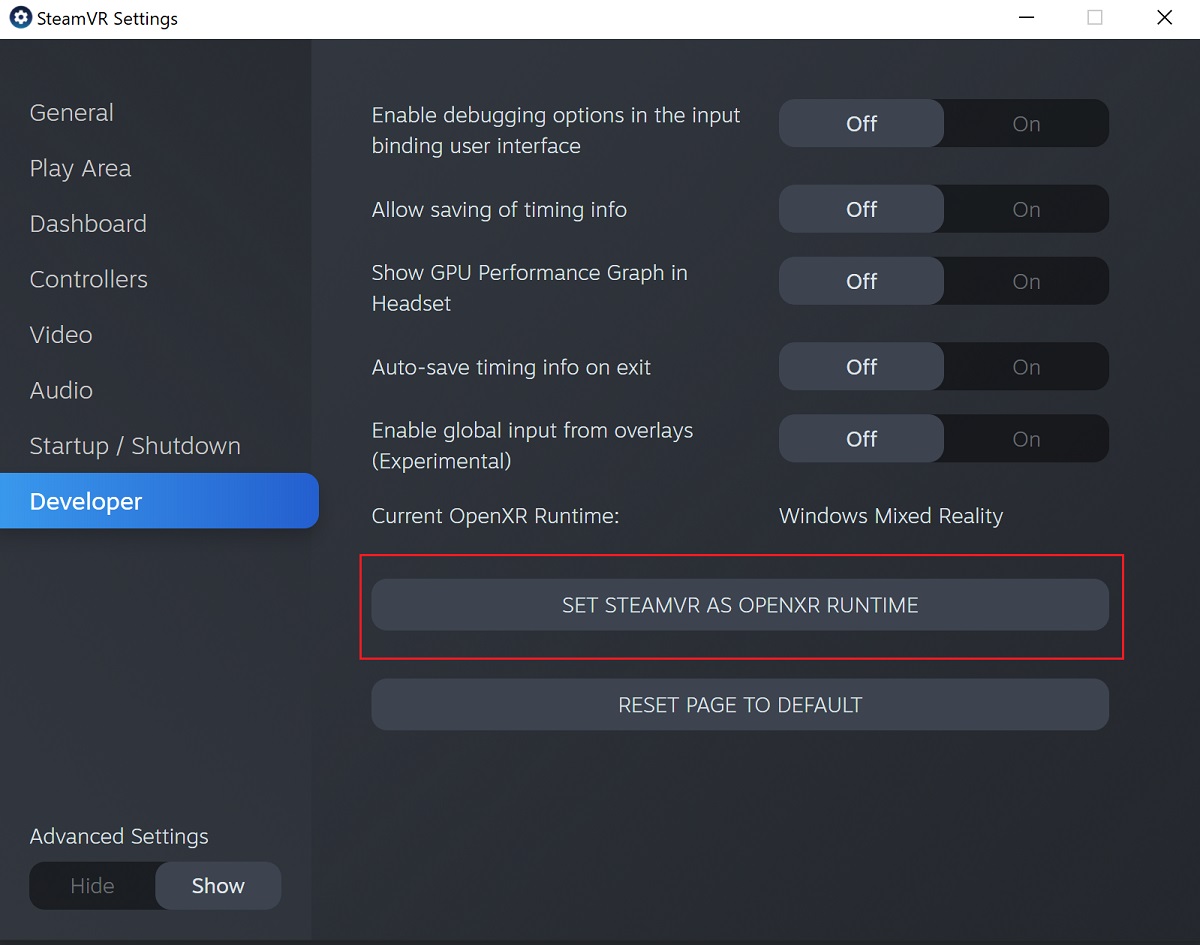
Set SteamVR as the active OpenXR runtime via the Developer tab in the SteamVR Settings.

Enable the VR Scene Inspection add-on in Blender.
Nota
The SteamVR runtime can also be used for HTC Vive Cosmos, Oculus, and Windows Mixed Reality HMDs.
Varjo
Varjo includes full OpenXR support with its required Varjo Base software.
Enable the VR Scene Inspection add-on in Blender.
Windows Mixed Reality
Windows Mixed Reality provides full support for OpenXR. To check if a PC meets the requirements to run the software, Microsoft offers the Windows Mixed Reality PC Check application.
Assicurati che Windows 10 Maggio 2019 Update (1903) sia installato.
If the system meets all requirements, the Mixed Reality Portal should already be installed. It is also available in the Microsoft Store.
Launch the Mixed Reality Portal. Click the menu button
...in the lower left corner. In the menu it opens, select the Set up OpenXR.Enable the VR Scene Inspection add-on in Blender.
Nota
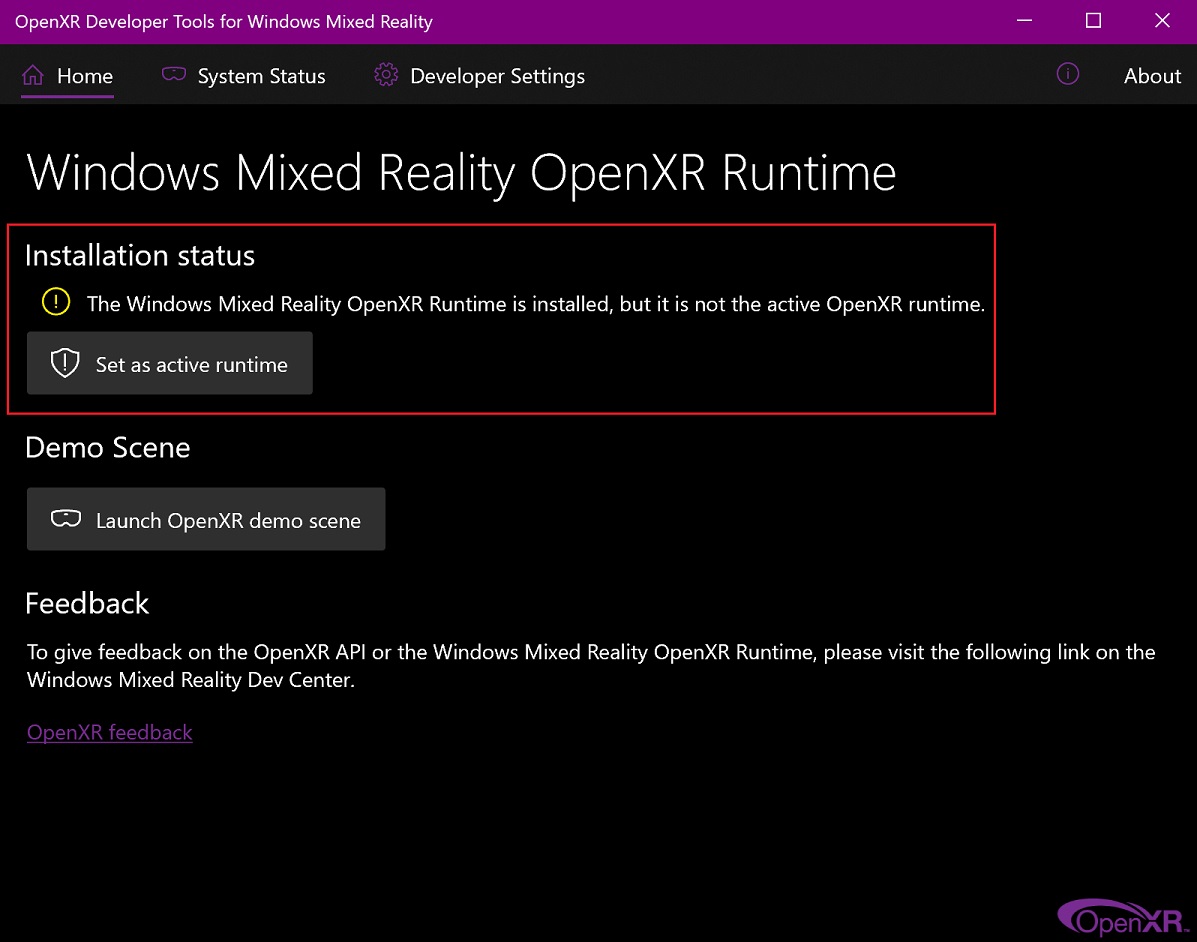
To switch to Windows Mixed Reality from another OpenXR runtime (e.g. SteamVR), download the OpenXR Developer Tools from the Microsoft Store and set Windows Mixed Reality as the active runtime.
