Object
Visibility
Reference
- Panel
参考
There are several other general visibility properties.
Shadow Catcher
Enables the object to only receive shadow rays. It is to be noted that shadow catcher objects will interact with other CG objects via indirect light interaction. This feature makes it really easy to combine CGI elements into a real-world footage.
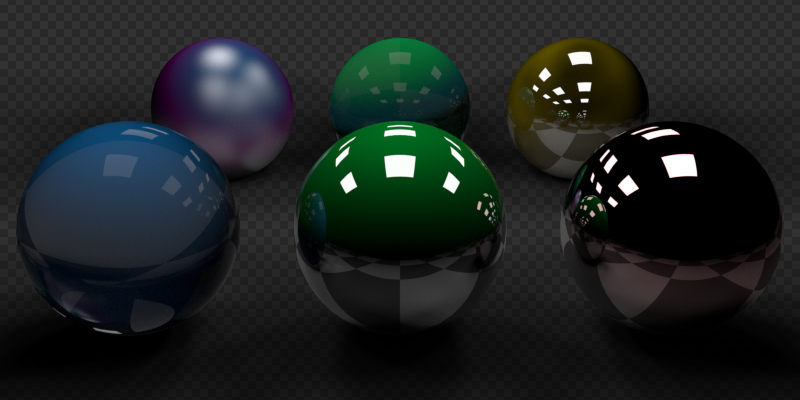
Example of the shadow catcher. Note how the material of the plane can still be viewed in the spheres.
Ray Visibility
Objects can be set to be invisible to particular ray types:
- Camera
Makes the object visible in camera rays.
- Diffuse
Makes the object visible in diffuse rays.
- Glossy
Makes the object visible in glossy rays.
- Transmission
Makes the object visible in transmission rays.
- Volume Scatter
Makes the object visible in transmission rays.
- Shadow
Enables the object to cast shadows.
This can be used, for example, to make an emitting mesh invisible to camera rays. For instancers, visibility is inherited; if the parent object is hidden for some ray types, the children will be hidden for these too.
In terms of performance, using these options is more efficient that using a shader node setup that achieves the same effect. Objects invisible to a certain ray will be skipped in ray traversal already, leading to fewer rays cast and shaders executed.
Culling
In order to activate these options the respectively camera cull options have to be enabled in the scene simplify panel.
- Use Camera Cull
Ignore and this way make objects invisible to rays outside of the camera frustum.
- Use Distance Cull
Will cull any objects further from the camera than a given distance. When used in combination with camera frustum culling, this can be used to avoid culling nearby objects that are outside the camera frustum, but still visible in reflections. It is also useful to cull small objects far from the camera.
Motion Blur
Reference
- Panel
Each object has its own motion blur settings along with the Scene Level Motion Blur These settings can be found in the Object Properties tab of the Properties editor.
- Deformation
Enables motion blur for deformed meshes such as animated characters, including hair.
- Steps
Controls accuracy of deformation motion blur, more steps gives more memory usage. The actual number of time steps is \(2^{steps -1}\).
警告
An object modifier setup that changes mesh topology over time can not render deformation motion blur correctly. Deformation blur should be disabled for such objects.
Common examples of this are animated Booleans, Deformation before Edge Split, Remesh, Skin or Decimate modifiers.