Luminance Key Node

Luminance Key Node.
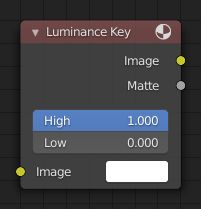
The Luminance Key node determines background objects from foreground objects by the difference in the luminance (brightness) levels.
Stock footage of explosions, smoke or debris are normally shot against a solid, dark background rather than a green screen. This node can separate the foreground effect from the background. It can also be used for sky replacement for overexposed or gray skies that aren't suitable for chroma keying.
ちなみに
When compositing footage of something that emits light and has a dark background, like fire, a Mix Node using a Screen or Add operator will produce better results.
Inputs
- Image
Standard image input.
Properties
- Limit
- High
Determines the lowest values that are considered foreground. (Which is supposed to be -- relatively -- light: from this value to 1.0.)
- Low
Determines the highest values that are considered to be background objects. (Which is supposed to be -- relatively -- dark: from 0.0 to this value.)
注釈
Brightness levels between the two values form a gradient of transparency between foreground and background objects.
Outputs
- Image
Image with an alpha channel adjusted for the keyed selection.
- Matte
A black-and-white alpha mask of the key.
Example
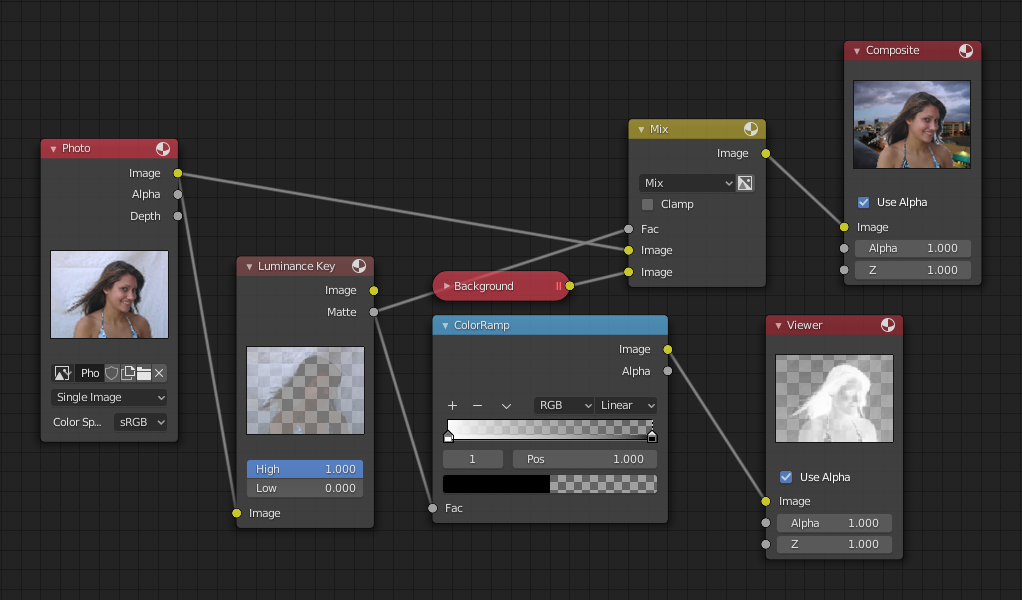
For this example the model was shot against a white background. Using the Luminance Key node, we get a matte out where the background is white, and the model is black; the opposite of what we want. If we wanted to use the matte, we have to switch the white and the black. How to do this? Color Ramp node to the rescue -- we set the left color to White Alpha 1.0, and the right color to be Black Alpha 0.0. Thus, when the Color Ramp gets in black, it spits out white, and vice versa. The reversed mask is shown; its white outline is usable as an alpha mask now.

Using Luma Key with a twist.
Now to mix, we do not really need the Alpha Over node; we can just use the mask as our Factor input. In this kinda weird case, we can use the matte directly; we just switch the input nodes. As you can see, since the matte is white (1.0) where we do not want to use the model picture, we feed the background photo to the bottom socket (recall the Mix node uses the top socket where the factor is 0.0, and the bottom socket where the factor is 1.0). Feeding our original photo into the top socket means it will be used where the Luminance Key node has spit out Black. Voilà, our model is teleported from Atlanta to aboard a cruise ship docked in Miami.