World Settings
Mist Pass (ミストパス)
参照
- Panel(パネル)
注釈
The mist pass must be enabled in the View Layer tab of the Properties Editor before the settings below are available in the World tab.
Mist can greatly enhance the illusion of depth in your rendering. To create mist, Blender generates a render layer with a depth map ranging between 0.0 and 1.0 that can be used in the Compositor to generate a mist effect.
- Start(開始)
The distance from the camera at which the mist starts to fade in.
- Depth(深度)
The distance from Start of the mist, that it fades in over. Objects further from the camera than Start + Depth are completely hidden by the mist.
- Falloff(減衰)
The curve function that controls the rate of change of the mist's strength further and further into the distance.
- Quadratic(二次式)
Uses the same calculation as light falloff (\(1\over{x^2}\)) and provides the smoothest transition from transparent (0.0) to opaque (1.0).
- Linear(リニア)
Has a steeper start than quadratic (\(1\over{x}\)).
- Inverse Quadratic
Has the steepest start (\(1\over{\sqrt{x}}\)) and approaches 1.0 faster than the other two functions.
Tip
A visualization can be activated in the panel.
Mist example (blend-file).
Ray Visibility (光線の可視性)
参照
- Panel(パネル)
他のオブジェクト同様、Ray Visibility によって他のシェーダーがその環境を 認識 できるかをコントロールできます。
便利な小技
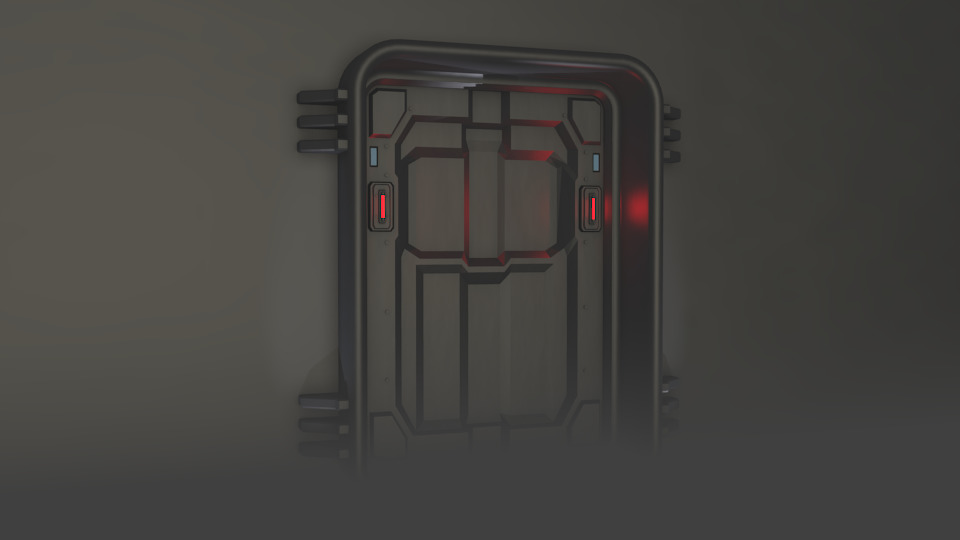
Sometimes it may be useful to have a different background that is directly visible versus one that is indirectly lighting the objects. A simple solution to this is to add a Mix node, with the Blend Factor set to Is Camera Ray. The first input color is then the indirect color, and the second the directly visible color. This is useful when using a high-res image for the background and a low-res image for the actual lighting.
同様に、Is Camera Ray と Is Glossy Ray との加算は反射として高解像度の画像を視認できるようにする事を意味します。
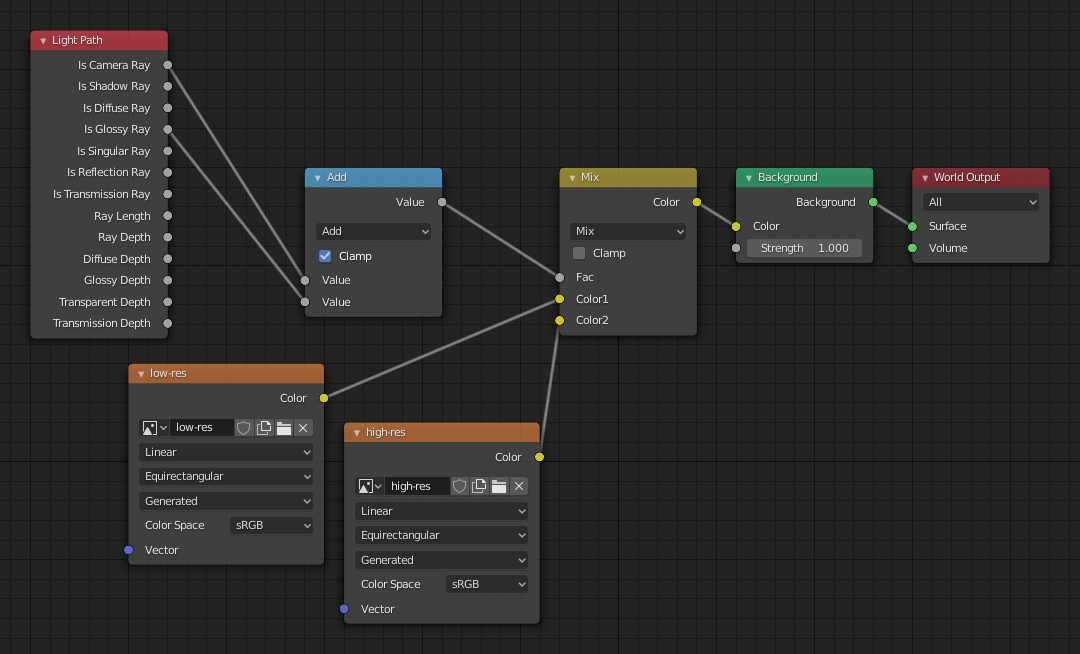
この小技で用いるノードは上のようになります。
設定
参照
- Panel(パネル)
Surface(サーフェス)
- Sampling(サンプリング)
Controls the sampling method for the world material. Selecting Auto or Manual enables Multiple Importance Sampling while None disables it. Multiple Importance Sampling is a method to sample the background texture such that lighter parts are favored, creating an importance map. It will produce less noise in the render in trade of artifacts (Fireflies). Enable this when using an image texture with small area lights (like the sun), otherwise noise can take a long time to converge.
Below is a comparison between Multiple Importance Sample off and on. Both images are rendered for 25 seconds (Off: 1,500 samples, On: 1,000 samples).
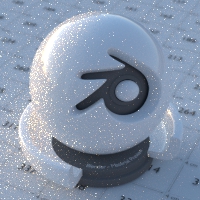
Multiple Importance Sample 無効。
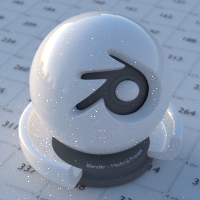
Multiple Importance Sample 有効。
- Map Resolution (マップ解像度)
Sets the resolution of the importance map. A higher resolution will better detect small features in the map and give more accurate sampling but conversely will take up more memory and render slightly slower. Higher values also may produce less noise when using high-res images.
- Max Bounces (最大バウンス回数)
背景から入射する光線がバウンスする上限回数でありレンダリング結果に影響します。
参考
ノイズをどのように低減させるかについてのより詳細な情報は Reducing Noise を参照下さい。
- Shadow Caustics
Mark the World Shader as a refractive caustic caster. This setting can be used in conjunction with the Cast and Receive caustics object settings to selectively speed up refractive caustic rendering of select objects.
Volume(ボリューム)
- サンプリング方式
- Distance(距離)
For dense volumes lit from far away Distance sampling is more efficient in most cases. Usually this shouldn't be used for World volumes.
- Equiangular (等角)
光源がボリュームの内部もしくは近くに存在する場合 Equiangular サンプリングの利用がより望ましいでしょう。
- Multiple Importance (多重重点)
これらの状況が混在している場合は、多重重点サンプリングを利用した方が良いでしょう。
- Interpolation(補間)
ボリュームに用いる補間方式です。
- Linear(リニア)
Simple interpolation which gives good results for thin volumes.
- Cubic(三次式)
Smoothed high-quality interpolation needed for more dense volumes, but slower.
- Homogeneous
Assume volume has the same density everywhere (not using any textures), for faster rendering. Usually this is automatically determined by the renderer. This settings provides a manual control for cases where it is not detected.
- Step Size(ステップサイズ)
Distance between volume shader samples for world volume shaders. See Volume Render Settings for more information.
Light Group
- Light Group Cycles only
Select the Light Group to add the current World Surface Shader too.
- Add Light Group
If the name input into the Light Group field does not align with an existing Light Group, then pressing this button will create a Light Group with that name and assign this World Shader to it.