Primitives(プリミティブ)
参照
- Mode(モード)
Object Mode(オブジェクトモード)とEdit Mode(編集モード)
- Menu(メニュー)
- ショートカットキー
Shift-A
参考
カーブを追加する場合、他の オブジェクト のようにいくつかの一般的なオプションがあります。
注釈
Eventually all the primitive curves will be replaced to use the same curve system used for hair curves. Until this is done, their features will diverge.
They can be converted interchangeably to access the full range of edit and sculpting functionalities.
In Object/Edit Mode, the Add Curve menu, provides a few different curve primitives:
Bézier Curve(ベジェカーブ)
2つの制御点を持つ開いた2Dベジエカーブを追加します。
Bézier Circle(ベジエ円)
閉じた円の形をした2Dベジエカーブ(4つの制御点で構成)を追加します。
NURBS Curve(NURBSカーブ)
均一な 結び目を持つ、4つの制御点を持つオープンな2D NURBS カーブを追加します。
NURBS Circle(NURBS円)
閉じた円の形をした2D NURBS カーブ(8つの制御点で構成)を追加します。
Path(パス)
エンドポイント の結び目と カーブパス 設定を有効にして、5つの位置合わせされた制御点で構成される NURBS オープン3Dカーブを追加します。
Empty Hair
Adds an empty high-performance curves object and automatically:
Assigns the active object as the Surface.
Set the surface object as the parent of the new object.
Adds a Geometry Nodes modifier to deform the curves on the surface.
The curves can be edited via sculpting.
注釈
Hair curves currently have the following limitations:
No Edit Mode.
Not supported in Wireframe viewport shading.
Properties(プロパティ)
Hair Curves have different properties than regular Curve objects; these properties are documented below.
Attributes(属性)
The Attributes panel contains different hair characteristics such as the position and color of hair strands.
Use the List View to manage attributes.
参考
See the Attribute Reference for details on attributes.
Surface(サーフェス)
- Surface(サーフェス)
The curve surface is an optional mesh that is used to anchor the curves, and behave as a scalp for hair grooming. When adding a new Curves object via the Add Menu the active object is automatically set as the surface.
To set a new surface press Ctrl-P and select Object (Attach Curves to Surface) in the Set Parent To pop-up menu. This option can be seen as part of the Curves settings in the Properties Editor.
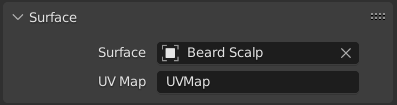
- Surface UV Map
The name of the attribute on the surface mesh used to define the attachment of each curve.
注釈
If the UV from the surface changed, run Snap to Nearest Surfaces to re-attach the curves.