Editing
Active Element
Reference
| Mode: | Object or Edit Modes |
|---|---|
| Panel: |
When in Edit Mode, the Active Element panel appears. These settings apply only to the selected meta element.
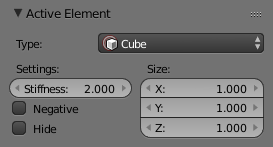
Active element panel.
Type
The Type menu lets you change the shape of the meta object.
Stiffness
Together with Threshold, Stiffness controls the influencing range. While the threshold is common to all metas in the same object (or even the same Object Families), the stiffness is specific to each meta.
Scaling the inner green circle changes the Stiffness value. Stiffness defines how much the meta object is filled. This essentially defines how sensitive a meta is to being affected by other metas. With a low stiffness, the meta will begin to deform from further away. A higher value means the meta needs to be close to another one to begin merging.
When a Meta object comes within «range» of another meta, the two will begin to interact with each other. They do not necessarily need to intersect, and depending on the Threshold and Stiffness settings, they most likely will not need to. Stiffness is materialized by the green ring.
The range is from (0.0 to 10.0). But to be visible, the Stiffness must be slightly larger than the Threshold value. You can also visually adjust the Stiffness ring by using the RMB to select it and activate Scale mode with S.
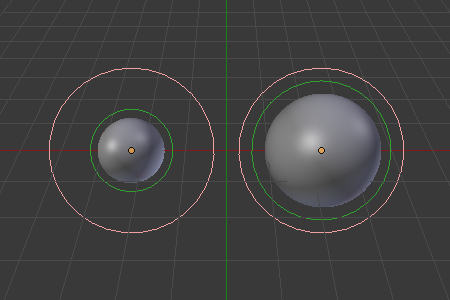
Stiffness.
In Fig. Stiffness., the left meta ball, has a smaller Stiffness value than the right one. As you can see, the radius (green ring) is different for each of them.
Negative Influence
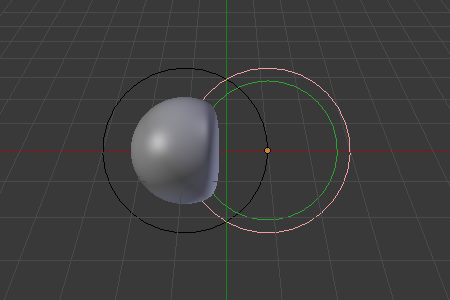
Negative.
The opposite effect of a positive influence would be a negative influence: the objects repel each other. Fig. Negative. shows a meta ball and a meta plane where the first is negative and the second, positive. Notice how the negative meta is not visible: only the surrounding circles appear. This is how Blender indicates that the object is negative.
Moving the sphere to the plane causes the plane’s mesh to «cave in» or collapse inward. If you move the plane away from the sphere, the plane’s mesh will restore itself.
To make a meta negative, just select the meta in edit mode, and check negative in the Active element panel.
Deleting Elements
There is no Erase menu for metas, just a confirmation pop-up asking you if you want to delete the selected metas. Clear and simple!
Conversion
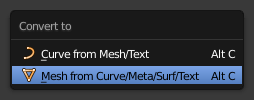
Convert menu.
You can only convert metas to meshes, but here you have the option to keep the original Meta object (i.e. create a new Mesh one, instead of a «real» conversion…). Note that the resolution used for the new mesh is the Wiresize one, not the Rendersize one.
To convert the meta, press Alt-C in Object Mode, and select Mesh/Text.
Object Families
Meta objects have different behavior in Object Mode than other object types. They can be «regrouped» into so-called «families».
A «family» is a way to regroup several meta objects, producing something very similar to having several metas inside the same object.
A family is defined by the left part of an object’s name (the one before the dot). Remember,
an object’s name is the one in the Object name field, in most panels,
not the Metaball name field, which is the meta data-block’s name… For example,
the family part of «MetaPlane.001» is MetaPlane.
Each meta object in the same «family» is associated with one another as discussed below.
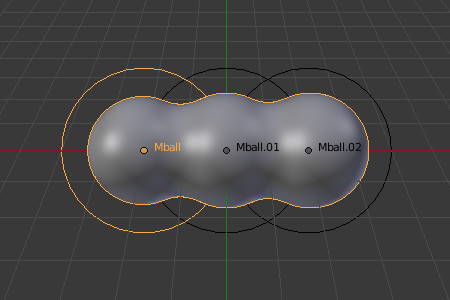
Meta ball family.
Families of metas are controlled by a base meta object which is identified by an object name without a right number part. For example, if we have five metas called «MetaThing», «MetaThing.001», «MetaThing.002», «MetaThing.003» and «MetaThing.004», the base meta object would be «MetaThing».
The base meta object determines the basis, the resolution, the threshold, and the transformations. It also has the material and texture area. The base meta is effectively the parent of (or perhaps a better word to use is «the owner of») the other metas in the group (i.e. it is as if the other metas were «included» or joined into the base one).
Hint
When working with multiple scenes, take care naming your meta objects so the base is always in the same scene as other metas.
Failing to do this will give confusing behavior (invisible meta objects).
Examples
Meta ball base.
Fig. Meta ball base. shows the base meta labeled «B». The other two Meta objects are children. Children’s selection rings are always black, while the group’s mesh is orange. Because the metas are grouped, they form a unified mesh which can always be selected by selecting the mesh of any meta in the group. For example, in Fig. Meta ball base., only the lower sphere (the parent) has been selected, and you see that both the parent’s mesh and all of the children’s meshes are now highlighted.

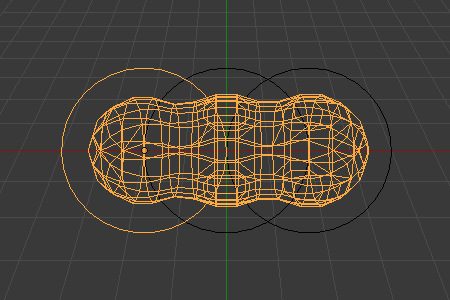
Scaling the «base».
The base meta object controls the polygonalization (mesh structure) for the group, and as such, also controls the polygonalization for the children (non-base) metas. If we transform the base meta, the children’s polygonalization changes. However, if we transform the children, the polygonalization remains unchanged.
Hint
This discussion of «polygonization» does not mean that the various meshes do not deform towards or away from each other (meta objects always influence one another in the usual way, whether or not they are members of the same family). Rather, it means that the underlying mesh structure changes only when the base object transforms. For example, if you scale the base, the children’s mesh structure changes. In Fig. Scaling the «base»., the base has been scaled down, which has the effect of scaling the mesh structure of each of the children. As you can see, the children’s mesh resolution has increased, while the base decreased. The children did not change size!