Introduction
A material defines the artistic qualities of the substance that an object is made of. In its simplest form, you can use materials to show the substance an object is made of, or to «paint» the object with different colors. Usually, the substance is represented by its surface qualities (color, shininess, reflectance, etc.) but it can also exhibit more complicated effects such as transparency, diffraction and subsurface scattering. Typical materials might be brass, skin, glass, or linen.
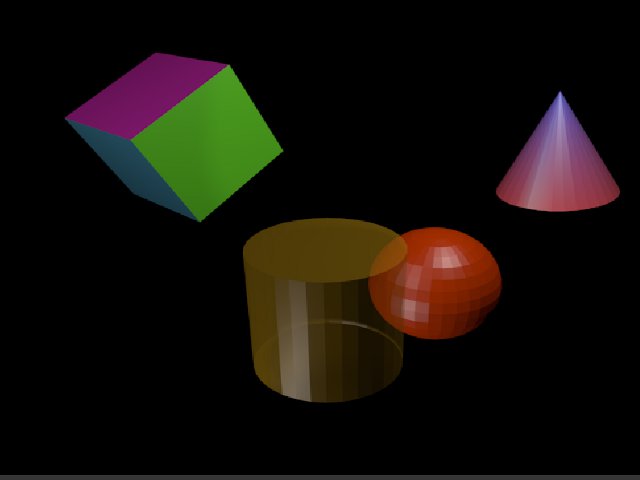
Various basic materials (single, multiple material, transparency, vertex paint).
The basic (un-textured) Blender material is uniform across each face of an object (although the various pixels of each face of the object may appear differently because of lighting effects). However, different faces of the object may use different materials (see Multiple Materials).
In Blender, materials can (optionally) have associated textures. Textures describe the substance: e.g. polished brass, dirty glass or embroidered linen. The Textures chapter describes how to add textures to materials.
How Materials Work
Before you can understand how to design effectively with materials, you must understand how simulated light and surfaces interact in Blender’s rendering engine and how material settings control those interactions. A deep understanding of the engine will help you to get the most from it.
The rendered image you create with Blender is a projection of the scene onto an imaginary surface called the viewing plane. The viewing plane is analogous to the film in a traditional camera, or the rods and cones in the human eye, except that it receives simulated light, not real light.
To render an image of a scene we must first determine what light from the scene is arriving at each point on the viewing plane. The best way to answer this question is to follow a straight line (the simulated light ray) backwards through that point on the viewing plane and the focal point (the location of the camera) until it hits a renderable surface in the scene, at which point we can determine what light would strike that point.
The surface properties and incident light angle tells how much of that light would be reflected back along the incident viewing angle (Rendering engine basic principle).

Rendering engine basic principle.
Two basic types of phenomena take place at any point on a surface when a light ray strikes it: diffusion and specular reflection. Diffusion and specular reflection are distinguished from each other mainly by the relationship between the incident light angle and the reflected light angle.
The shading (or coloring) of the object during render will then take into account the base color (as modified by the diffusion and specular reflection phenomenon) and the light intensity.
Using the internal ray tracer, other (more advanced) phenomena could occur. In ray-traced reflections, the point of a surface struck by a light ray will return the color of its surrounding environment, according to the rate of reflection of the material (mixing the base color and the surrounding environment’s) and the viewing angle.
On the other hand, in ray-traced refractions, the point of a surface struck by a light ray will return the color of its background environment, according to the rate of transparency (mixing the base color and the background environment’s along with its optional filtering value) of the material and the optional index of refraction of the material, which will distort the viewing angle.
Of course, shading of the object hit by a light ray will be about mixing all these phenomena at the same time during the rendering. The appearance of the object, when rendered, depends on many interrelated settings:
- World (Ambient color, Radiosity, Ambient Occlusion)
- Lights
- Material settings (including ambient, emission, and every other setting on every panel in that tab)
- Texture(s) and how they are mixed
- Material Nodes
- Camera
- Viewing angle
- Obstructions and transparent occlusions
- Shadows from other opaque/transparent objects
- Render settings
- Object dimensions (SS settings are relevant to dimensions)
- Object shape (refractions, Fresnel effects)
Using Materials
Tips
Check your Render
When designing materials (and textures and lighting), frequently check the rendered appearance of your scene, using your chosen render engine/shader settings. The appearance might be quite different from that shown in the texture display in the 3D panel.
As stated above, the material settings usually determine the surface properties of the object. There are several ways in which materials can be set up in Blender. Generally speaking, these are not compatible. You must choose which method you are going to use for each particular object in your scene:
- First, you can set the Properties in the various Material panels.
- Second, you can use Nodes; a graphical nodes editor is available.
- Last, you can directly set the color of object surfaces using various special effects. Strictly speaking, these are not materials at all, but they are included here because they affect the appearance of your objects. These include Vertex Painting, Wire Rendering, Volume Rendering, and Halo Rendering.
The exact effect of Material settings can be affected by a number of system settings. First and foremost is the renderer used: Cycles and the Blender Renderer (aka Blender Internal or BI) require quite different illumination levels to achieve similar results, and even then the appearance of objects can be quite different. Also, the material properties settings can be affected by the texture method used (single-texture, multi-texture or GLSL). So it is recommended to always select the appropriate system settings before starting the design of materials.