Introduction
Channels Region

The Channels region.
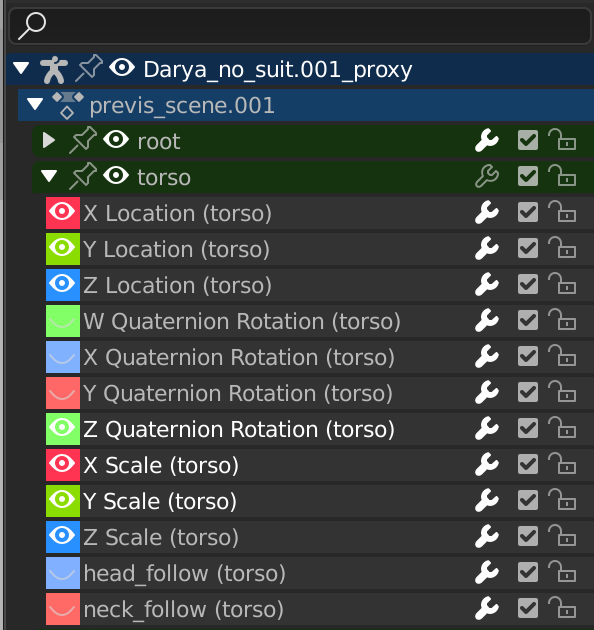
The channels region is used to select and manage the curves for all Animation Editors. This part shows the objects and their animation data hierarchy each as headers. Each level can be expanded/collapsed by the small arrow to the left of its header.
Scenes, Objects (dark blue)
Actions, Shape keys, etc. (light blue)
Channel Groups (green)
Channels (gray)
- Name Filter Ctrl-F
Only display channels that match the search text. Pressing the invert button displays all channels except the channels that match the search text.
Controls
On the headers, there are toggles to control channel’s setting:
- Pin (pin icon)
Make the channel always visible regardless of the current selection.
- Hide (eye icon)
Hides the channel(s)/curve (Graph editor only).
- Modifiers (wrench icon)
Deactivates the F-Curve modifiers of the selected curve or all curves in the channel.
- Mute (checkbox)
Deactivates the channel/curve.
- Lock Tab (padlock icon)
Toggle channel/curve from being editable. Selected channels can be locked by pressing Tab.
Obs
This also works in the Nonlinear Animation Editor, but note that it does not prevent edition of the underlying F-Curve, only the NLA strips of the NLA track.
Selection
Select header: LMB
Add/Remove from selection: Ctrl-LMB
Select Range: Shift-LMB
Select All: A
Deselect All: Alt-A or double A
Box Select: (LMB drag) or B (LMB drag)
Box Deselect: (Ctrl-LMB drag) or B (Shift-LMB drag)
Select all keyframes in the Channel: double LMB on a Channel Header.
Editing
Rename (Anything but a Channel): double LMB
Delete selected: X or Delete
Lock selected: Tab
Enable Channel Setting: Shift-Ctrl-W
Disable Channel Setting: Alt-W
Toggle Channel Setting: Shift-W
Sliders

The Action editor showing sliders.
On channel headers, you can have another column with number fields or sliders, allowing you to change the value on the current keyframes, or to add new keyframes. See View Menu for how to show these sliders.