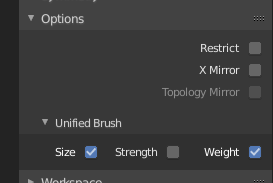
Opções

Paint options.
The weight paint options change the overall brush behavior.
- Normalizar automaticamente
Ensures that all deforming vertex groups add up to one while painting. When this option is turned off, then all weights of a vertex can have any value between 0 and 1. However, when vertex groups are used as deform groups for character animation then Blender always interprets the weight values relative to each other. That is, Blender always does a normalization over all deform bones. Hence in practice it is not necessary to maintain a strict normalization and further normalizing weights should not affect animation at all.
This option works most intuitively when used to maintain normalization while painting on top of weights that are already normalized with another tool.
- Lock-Relative
Displays bone-deforming groups as if all locked deform groups were deleted, and the remaining ones were re-normalized. This is intended for use when balancing weights within a group of bones while all other bones are locked. With this option you can also temporarily view non-normalized weights as if they were normalized, without actually changing the values.
- Pintura múltipla
Paint on all selected vertex groups simultaneously, in a way that preserves their relative influence. This can be useful when tweaking weights in an area that is affected by more than three bones at once, e.g. certain areas on a character’s face.
This option is only useful in the Armature tab, where you can select multiple vertex groups by selecting multiple pose bones. Once at least two vertex groups are selected, viewport colors and paint logic switch to Multi-Paint mode, using the sum of the selected groups” weights if Auto Normalize is enabled, and the average otherwise. Any paint operations aimed at this collective weight are applied to individual vertex group weights in such way that their ratio stays the same.
Since the ratio is undefined if all weights are zero, Multi-Paint cannot operate on vertices that do not have any weight assigned to the relevant vertex groups. For this reason it also does not allow reducing the weight all the way to zero. When used with X Mirror, it only guarantees completely a symmetrical result if weights are initially symmetrical.
Dica
While Multi-Paint cannot directly paint on zero-weight vertices, it is possible to use the Smooth Weight tool to copy a reasonable non-zero weight distribution from adjacent vertices without leaving Multi-Paint mode or changing bone selection.
Para fazer isto, habilite a seleção de vértices, selecione os vértices alvo, e aplique uma interação da ferramenta usando os grupos de vértices selecionados a partir dos Ossos de pose, com baixos fatores. Após isto, simplesmente pinte sobre a malha para definir os pesos de influência selecionados sobre a coletânea desejada.
- Restrict
This option limits the influence of painting to vertices (even with weight 0) belonging to the selected vertex group.
Veja também
See the Brush Display options.