Настройка периферийных устройств
Дисплеи
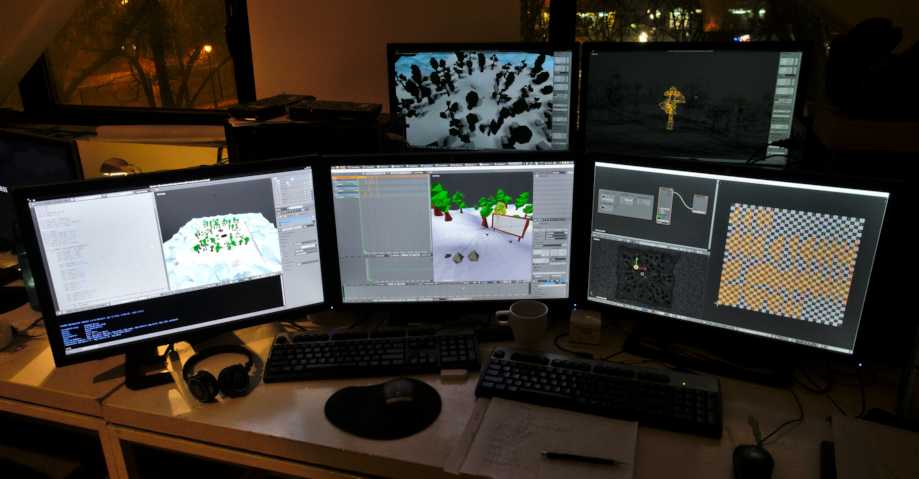
A full HD display or higher is recommended. Multi-monitor setups are supported, and workspaces can be configured to span multiple monitors.

Example of Blender’s multi-monitor support.
Устройства ввода
Blender поддерживает различные типы устройств ввода:
Клавиатуры (рекомендуется использовать клавиатуры с дополнительной цифровой панелью и английской раскладкой).
Mouse (recommended: three button mouse with scroll wheel)
NDOF Device (also known as 3D Mouse)
Graphic Tablet
Примечание
If you are missing an input device such as a mouse or numpad Blender can change its keymap to emulate these devices. Settings to enable this can be found in the Input Preferences.
Mouse
Эмуляция кнопок мыши
If you do not have a 3 button mouse, you will need to emulate it by checking the option in the Preferences.
Следующая таблица показывает используемые при эмуляции комбинации:
Трёхкнопочная мышь |
ЛКМ |
СКМ |
ПКМ |
|---|---|---|---|
Двухкнопочная мышь |
ЛКМ |
Alt-ЛКМ |
ПКМ |
Keyboard
Эмуляция цифровой клавиатуры
Если у вашей клавиатуры нет дополнительной цифровой панели, вы можете включить её эмуляцию (однако использование числовых кнопок в верхнем ряду лишит вас быстрого доступа к переключению видимости слоёв).
См.также
Read more about Numpad Emulation in the Preferences.
Клавиатуры с отсутствующей англоязычной раскладкой
Если вы используете клавиатуру с отсутствующей англоязычной раскладкой, вы всё ещё можете переключить раскладку вашей клавиатуры на раскладку Великобритании или США, во время работы с Blender’ом.
Примечание
You can also change the default keymap and default hotkeys from the Preferences, however, this manual assumes you are using the default keymap.
Graphic Tablet
Graphics tablets can be used to provide a more traditional method of controlling the mouse cursor using a pen. This can help provide a more familiar experience for artists who are used to painting and drawing with similar tools, as well as provide additional controls such as pressure sensitivity.
Примечание
Если вы используете графический планшет вместо мыши, а чувствительность к давлению не работает должным образом, попробуйте разместить указатель мыши над окном Blender’а и отключите, а затем снова подключите планшет. Это может помочь.
NDOF (3D Mouse)
3D mice or NDOF devices are hardware that you can use to navigate a scene in Blender. Currently only devices made by 3Dconnexion are supported. These devices allow you to explore a scene, as well as making Fly/Walk Navigation easier. Settings to control how the NDOF device interacts with the 3D Viewport can be configured in the User Preference. These settings can also be accessed using the NDOF-Menu button on the NDOF device to open a popup menu to adjust the settings directly from the 3D Viewport.
См.также
See Input Preference for more information on configuring peripherals.
Head-Mounted Displays (Virtual Reality)
HMDs make it possible to place users in an interactive, virtual environment. Attached to the head, they track head movements to project a seemingly surrounding world onto small screens in front of the user’s eyes. If the system works well, they experience the virtual environment as if they were really inside of it.
Supported Platforms
Virtual reality support in Blender is implemented through the multi-platform OpenXR standard. This standard is new and therefore support for it is still limited.
Platform |
Operating System |
Notes |
|---|---|---|
Windows |
Requires the Windows 10 May 2019 Update (1903) |
|
Windows |
||
GNU/Linux |
Not recommended for general use yet |
Getting Started
The following subsections describe how an HMD can be set up for usage with the supported platforms. If this is not done, Blender will report an error when trying to start a virtual reality session.
Windows Mixed Reality
To check if a PC meets the requirements to run Windows Mixed Reality, Microsoft offers the Windows Mixed Reality PC Check application.
Make sure the Windows 10 May 2019 Update (1903) is installed.
If the system meets all requirements, the Mixed Reality Portal should already be installed. It is also available in the Microsoft Store. On first use it will guide through some setup steps.
Launch the Mixed Reality Portal. Click the menu button
...in the lower left corner. In the menu it opens, select the Set up OpenXR. Windows Mixed Reality is now ready to be used with OpenXR.
For more information, refer to Windows“ Getting Started Guide for Windows Mixed Reality and OpenXR.
Oculus Rift
Oculus only provides prototype OpenXR support. To use it, Blender has to be started in a special way, as described below.
Download and install the Oculus Rift software.
Start Blender by double clicking the
blender_oculusscript inside the installation directory. It will open a command-line window with further information.
Monado
Monado is a free and open source XR platform for Linux. It is not yet ready for production usage and should only be used for testing purposes.
There are packages available for Debian based distributions. For others it has to be compiled from source, which in this case is not recommended for people with little experience in compiling software. Follow the Getting Started Guides from Monado to do so nevertheless.
Completing the Setup
Inside Blender, the VR Scene Inspection add-on needs to be enabled to access virtual reality features.