Stroke Menu
This page covers many of the tools in the Strokes menu. These are tools that work primarily on strokes, however, some also work with point selections.
Subdivide
Справка
- Mode:
Режим редактирования
- Меню:
Stroke ‣ Subdivide
Subdivides the strokes by inserting points between the selected points.
- Number of Cuts
The number of subdivisions to perform.
- Smooth
The amount of the smoothness on subdivided points.
- Repeat (повторение)
Number of times to repeat the procedure.
- Selected Points
When enabled, limits the effect to only the selected points within the stroke.
- Position (положение)
When enabled, the operator affect the points location.
- Толщина
When enabled, the operator affect the points thickness.
- Strength (сила)
When enabled, the operator affect the points strength (alpha).
- UVs
When enabled, the operator affect the UV rotation on the points.
Simplify
Справка
- Mode:
Режим редактирования
- Меню:
Stroke ‣ Simplify
Reduce the amount of points in the strokes.
Fixed (фиксировано)
Deletes alternated points in the strokes, except the start and end points.
- Steps
The number of times to repeat the procedure.
Адаптивно
Uses the RDP algorithm (Ramer-Douglas-Peucker algorithm) for points deletion. The algorithm tries to obtain a similar line shape with fewer points.
- Factor
Controls the amount of recursively simplifications applied by the algorithm.
Sample
Recreates the stroke geometry with a predefined length between points.
- Length
The distance between points on the recreated stroke. Smaller values will require more points to recreate the stroke, while larger values will result in fewer points needed to recreate the curve.
- Sharp Threshold
The maximum angle between points on the recreated stroke. Smaller values will require more points to recreate the stroke, while larger values will result in fewer points needed to recreate the curve.
Trim
Справка
- Mode:
Режим редактирования
- Меню:
Stroke ‣ Trim
Trims selected stroke to first loop or intersection.

Original stroke. |

Result of trim operation. |
Outline
Справка
- Mode:
Режим редактирования
- Меню:
Stroke ‣ Outline
Converts a stroke to an outline.
- View
The projection method to generate the outline
- View:
Use the viewport’s view as a projection.
- Спереди:
Use the X-Z axes view as a projection.
- Side:
use the Y-Z axis view as a projection
- Top (сверху):
Use the X-Y axes view as a projection
- Камера:
Use the view from the active camera as a projection.
- Material Mode
How materials are assigned to the outline.
- Active Material:
The stroke outline will be assigned the active material.
- Keep Material:
The stoke outline will have the same material as before.
- New Material:
A new material will be created and assigned to the outline.
- Толщина
Thickness of the stroke perimeter.
- Keep Shape
Try to keep global shape when the stroke thickness change.
- Subdivisions (подразделения)
Number of subdivisions for the start and end caps.
- Sample Length
The length each resulting segment of the outline. Smaller values create outlines closer to the original shape.

Original stroke. |
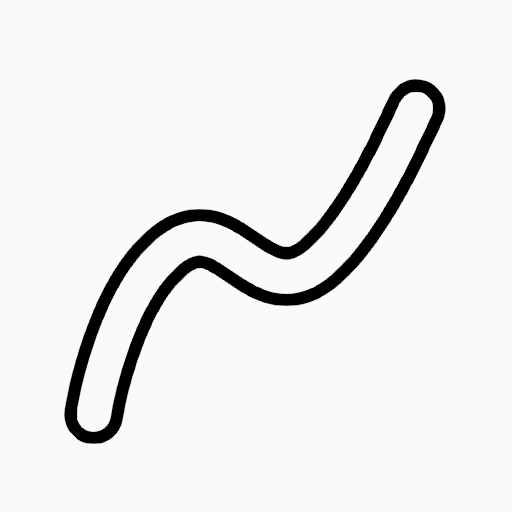
Generated stroke after outline operation. |
Join
Справка
- Mode:
Режим редактирования
- Меню:
Stroke ‣ Join ‣ Join, Join and Copy
- Горячая клавиша:
Ctrl-J, Shift-Ctrl-J
Join two or more strokes into a single one.
- Type
- Join Ctrl-J
Join selected strokes by connecting points.
- Join and Copy Shift-Ctrl-J
Join selected strokes by connecting points in a new stroke.
- Leave Gaps
When enabled, do not use geometry to connect the strokes.
Move to Layer
Справка
- Mode:
Режим редактирования
- Меню:
Stroke ‣ Move to Layer
- Горячая клавиша:
M
A pop-up menu to move the stroke to a different layer. You can choose the layer to move the selected strokes to from a list of layers of the current Grease Pencil object. You can also add a new layer to move the selected stroke to. When creating a new layer, there is another pop-up to type in the name of the new layer.
Assign Material
Справка
- Mode:
Режим редактирования
- Меню:
Stroke ‣ Assign Material
Changes the material linked to the selected stroke. You can choose the name of the material to be used by the selected stroke from a list of materials of the current Grease Pencil object.
Set as Active Material
Справка
- Mode:
Режим редактирования
- Меню:
Stroke ‣ Set as Active Material
Sets the active object material based on the selected stroke material.
Arrange
Справка
- Mode:
Режим редактирования
- Меню:
Stroke ‣ Arrange
Change the drawing order of the strokes in the 2D layer.
- Bring to Front
Moves to the top the selected points/strokes.
- Bring Forward
Moves the selected points/strokes upper the next one in the drawing order.
- Send Backward
Moves the selected points/strokes below the previous one in the drawing order.
- Send to Back
Moves to the bottom the selected points/strokes.
Close
Справка
- Mode:
Режим редактирования
- Меню:
Stroke ‣ Close
- Горячая клавиша:
F
Close or open strokes by connecting the last and first point.
- Type
- Close All
Close all open selected strokes.
- Open All
Open all closed selected strokes.
- Toggle
Close or Open selected strokes as required.
- Create Geometry
When enabled, points are added for closing the strokes. If disabled, the operator act the same as Toggle Cyclic.
Toggle Cyclic
Справка
- Mode:
Режим редактирования
- Меню:
Stroke ‣ Toggle Cyclic
Toggles between an open stroke and closed stroke (cyclic).
- Type
- Close All
Close all open selected strokes.
- Open All
Open all closed selected strokes.
- Toggle
Close or Open selected strokes as required.
- Create Geometry
When enabled, points are added for closing the strokes like when using the Close tool. If disabled, the stroke is close without any actual geometry.
Toggle Caps
Справка
- Mode:
Режим редактирования
- Меню:
Stroke ‣ Toggle Caps
Toggle ending cap styles of the stroke.
- Default (по умолчанию)
Sets stroke start and end points to rounded (default).
- Both
Toggle stroke start and end points caps to flat or rounded.
- Start (начало)
Toggle stroke start point cap to flat or rounded.
- End
Toggle stroke end point cap to flat or rounded.

Stroke ending with rounded caps. |

Stroke ending with flat caps. |

Stroke ending with combined caps. |
Switch Direction
Справка
- Mode:
Режим редактирования
- Меню:
Stroke ‣ Switch Direction
Reverse the direction of the points in the selected strokes (i.e. the start point will become the end one, and vice versa).
Set Start Point
Справка
- Mode:
Режим редактирования
- Меню:
Stroke ‣ Set Start Point
Set the start point for cyclic strokes.
Normalize Thickness
Справка
- Mode:
Режим редактирования
- Меню:
Stroke ‣ Normalize Thickness
Makes the thickness equal for the entire stroke.
- Mode
Stroke Property to normalize.
- Value
Thickness value to use on all points of the stroke.
Normalize Opacity
Справка
- Mode:
Режим редактирования
- Меню:
Stroke ‣ Normalize Opacity
Makes the opacity equal for the entire stroke.
- Mode
Stroke Property to normalize.
- Value
Opacity value to use on all points of the stroke.
Scale Thickness
Справка
- Mode:
Режим редактирования
- Меню:
Stroke ‣ Scale Thickness
When enabled, scales the stroke thickness during scale transformations.
Reset Fill Transform
Справка
- Mode:
Режим редактирования
- Меню:
Stroke ‣ Reset Fill Transform
Reset all fill translation, scaling and rotations in the selected strokes.