面
参考
- 模式
物体模式
- 面板
实例化面 是在父物体的每个面上复制物体的功能。 解释这一点的最佳方法之一是通过示例说明。
- 缩放
根据对应面的尺寸缩放每个实例。
- 继承缩放
缩放实例化面物体。
生成实例化面 工具将关联的物体(共享网格数据)转换成实例化面。此工具在物体所在处用面生成父级物体(实例器),然后用 实例化面 在每个创建的面位置安置实例。
You can go back from Instancing Faces to multiple linked objects using Make Instances Real.
基础用法
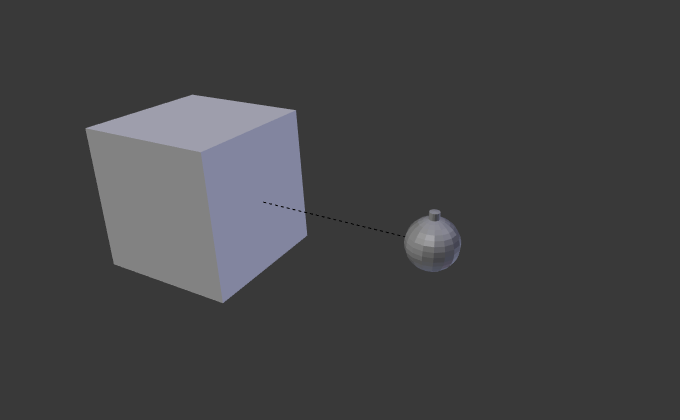
In this example we will use a UV sphere with an extruded "north pole" as our base object and a cube as our parent mesh. To parent the sphere to the cube, in Object Mode, first LMB select the sphere, then Shift-LMB select the cube (order is very important here), and finally Ctrl-P to parent.

一个立方体和一个球体。¶ |

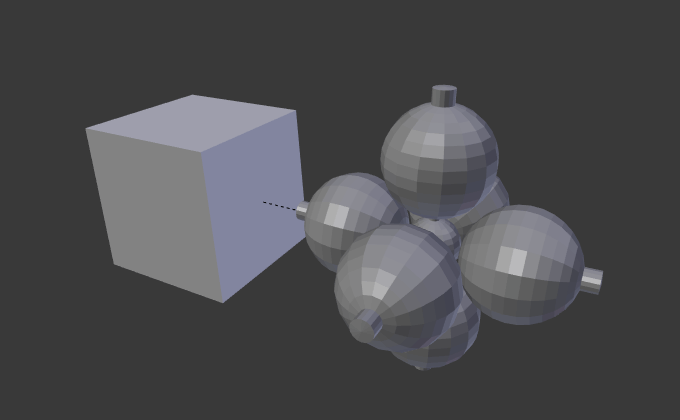
实例化面被应用到立方体。¶ |
Next, in the , select Faces. The sphere is instanced, one for each face of the cube.
Note
继承属性
实例化子物体的位置、方向、缩放与父物体的面相匹配,如果多个物体设置父级为立方体,他们全都将在立方体的每个表面实例化一次。但如果立方体细分了,每个子级物体将会在每个表面实例化。
Both the parent object and original are displayed as editable "templates" in 3D Viewport, but neither is rendered.
局限/注意事项
实例化几何体相对于面的定位取决于子物体相对于实例器原点的位置。 这可能会导致3D视图中出现一些视觉瑕疵,因为原始物体的几何图形与实例几何图形重叠或相交。 一种解决方法是将实例器网格的原点移出面所在的平面。
如果子级物体的几何体不对称则面的方向(由它自身的顶点顺序决定)会有影响。2.70版本的blender没有调整面的顶点顺序的工具。
当然,也提供了一个控制此情况的流程。创建一个单独的四边面并开启 实例化面 从而你能在3D视口看到实例化集合体。如果方向不合你意,旋转该面直到你满意。通常你会愿意在编辑模式旋转,而不是物体模式,不过二者均可。
如果方向正确,请复制面并将副本移动到所需位置。 重复此过程,直到有足够的面。 由于这些面相互贴合很常见,因此几何体将具有许多重复的顶点。 使用 。
示例视频
演示此流程的短片:

