Skinning
Relevant to Blender v2.31
Now we must make it so that a deformation in the armature causes a matching deformation in the body. We do this with Skinning, which assigns vertices to bones so that the former are subject to the latter's movements.
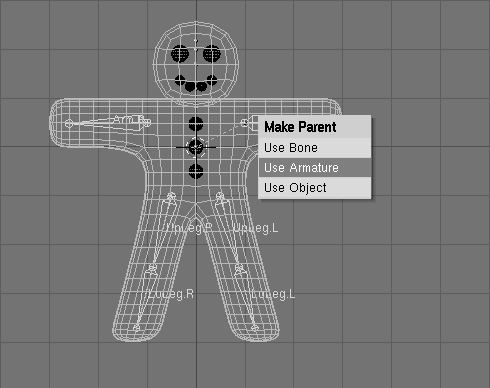
1. Select Gus's body, then SHIFT select the armature so that the body is magenta and the armature is light pink.
2. Press CTRL-P to parent the body to the armature. A pop up dialog will appear (Figure 53). Select the Use Armature entry.
3. A new menu appears, asking if you want Blender to do nothing, create empty vertex groups, or create and populate vertex groups (Figure 54).
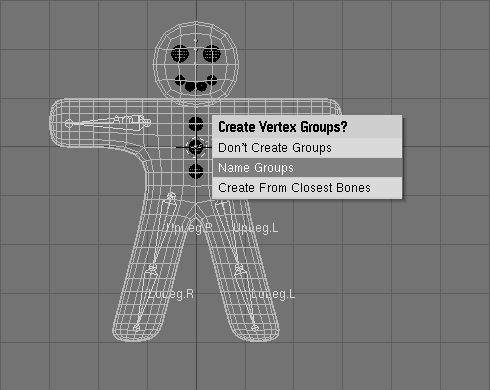
4. We'll use the automatic skinning option. Go ahead and select Create From Closest Bones.
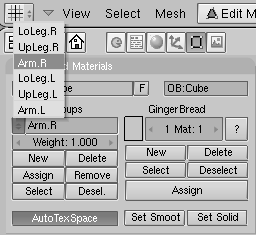
Now select only Gus's body and go to EditMode (TAB). You will notice in the Edit Buttons (F9) Window and Mesh Tools 1 Panel, the presence of a Vertex Group menu and buttons (Figure 55).

By pressing the Menu Button a menu with all available vertex group pops up (six in our case, but a truly complex character, with hands and feet completely rigged, can have tens of them! Figure 56). The buttons Select and Deselect show you which vertices belong to which group.
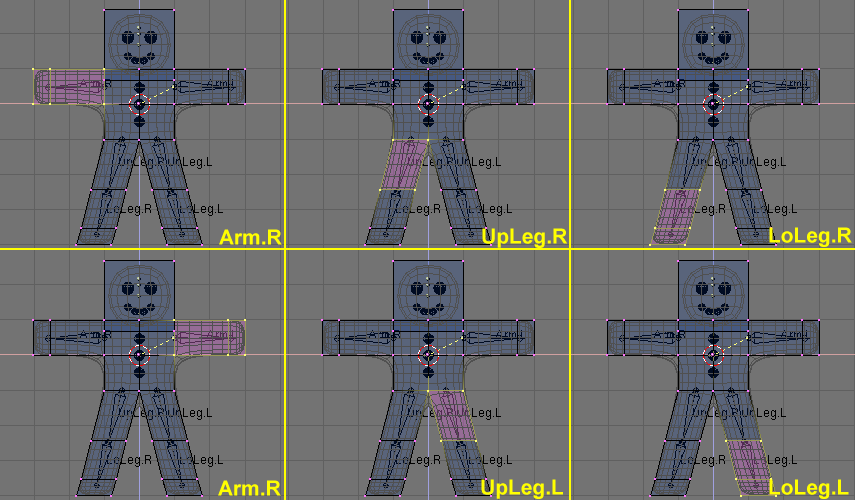
Select the Right arm (Arm.R) group and, with all vertices de-selected (AKEY, if needed) press Select. You should see something like Figure 57.
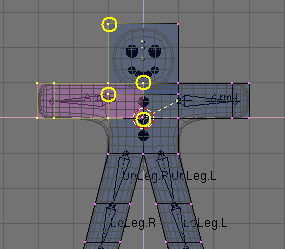
The vertices marked with yellow circles in Figure 57 belong to the deformation group, but they should not. The autoskinning process found that they were very close to the bone so it added them to the deformation group. We don't want them in this group because, since some are in the head and some are in the chest, adding them to the deformation group would deform those body parts. To remove them from the group, deselect all the other vertices, those which should remain in the group using Box selection (BKEY), but use MMB, not LMB, to define the box, so that all vertices within the box become deselected.
Once only the 'undesired' vertices are selected, press the Remove button (Figure 55) to eliminate them from group Arm.R.
Deselect all (AKEY) then check another group. Check them all and be sure that they look like those in Figure 58.
 | Vertex groups |
|---|---|
Be very careful when assigning or removing vertices from vertex groups. If later on you see unexpected deformations, you might have forgotten some vertices, or placed too many in the group. You can modify your vertex groups at any time. |
| Other details |
|---|---|
Our deformations will affect only Gus's body, not his eyes, mouth, or buttons, which are separate objects. While this is not an issue to consider in this simple animation, it's one that must be taken into account for more complex projects, for example by parenting or otherwise joining the various parts to the body to make a single mesh. (We'll describe all of these options in detail in later Chapters). |