Lattice Animation
Relevant to Blender v2.31
Parenting a mesh to a lattice is a nice way to apply deformations to the former while modelling, but it is also a way to make deformations in time!
You can use Lattices in animations in two ways:
Animate the vertices with vertex keys (or relative vertex keys);
Move the lattice or the child object of the lattice.
The first technique is basically nothing new than what contained in the previous two sections but applied to a lattice which has an object parented to it.
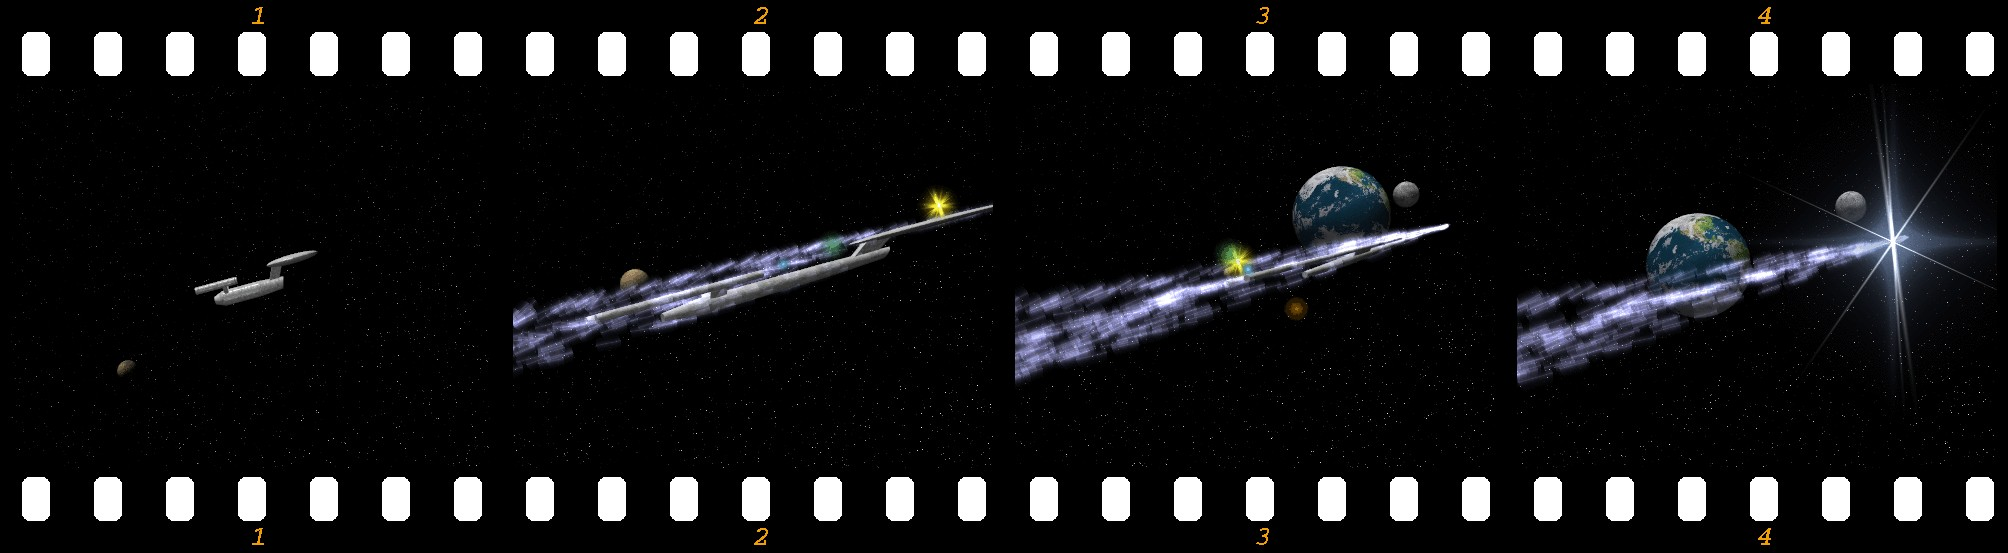
With the second kind you can create animations that squish things between rollers, or achieve the effect of a well-known space ship accelerating to warp-speed.
Make a space ship and add a lattice around the ship. make the lattice with the parameters in Figure 14.

Select the ship, extend the selection to the lattice (holding SHIFT while selecting), and press CTRL-P to make the lattice the parent of the ship. You should not see any deformation of the ship because the lattice is still regular.
For the next few steps it is important to do them in EditMode. So now select the lattice, enter EditMode, select all vertices (AKEY), and scale the lattice along its x-axis (press MMB while initiating the scale) to get the stretch you want. The ship's mesh shows immediately the deformation caused by the lattice (Figure 15).

Now edit the lattice in EditMode so that the right vertices have an increasing distance from each other. This will increase the stretch as the ship goes into the lattice. The right ends vertices I have scaled down so that they are nearly at one point; this will cause the vanishing of the ship at the end (Figure 16).
Select the ship again and move it through the lattice to get a preview of the animation. Now you can do a normal keyframe animation to let the ship fly through the lattice.

 | Camera tracking |
|---|---|
With this lattice animation, you can't use the pivot point of the object for tracking or parenting. It will move outside the object. You will need to vertex-parent an Empty to the mesh for that. To do so, select the Empty, then the mesh, enter EditMode and select one vertex, then press CTRL-P. |