The 3DWindow
3D Toolbar
Menus
The triangular button expand/collapses menus. Menus provide a self-explicative way to access to all Blender functions which can be performed in the 3D Window. They are context sensitive and will change depending on the selected Object and current Mode.
Widows with menus, as the 3D Viewport, does not have the standard "Full Window" and "Home" header buttons, actions which have moved to the View Menu.
Menu items are in general self-explanatory and the relative functionality has been explained in the the chapter called HotKeys In-depth Reference exceptfor the View Menu, which is described here.
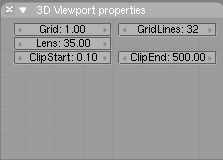
View Properties. Opens a floating panel allowing to set the properties (Grid Spacing, ClipStart and Clip End) of the 3D Viewport.
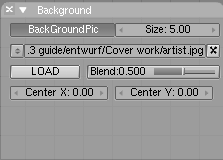
Background Pic. Opens a floating panel allowing to load a picture to be used as a background in the 3D window. The image can be resized and its opacity determined in the panel
View. Next entry group, taking most of the menu and self explanatory, sets the Viewport viewing point, duplicating The Numeric Keypad functions and the CKEY and HOME Keys.
Those deserving an explanation are:
Camera View, hotkey NUM0
Top View, hotkey NUM7
Front View, hotkey NUM1
Right View, hotkey NUM3
All these views can be 'seen' from the other direction by using SHIFT modifier. Views can be Orthographic, Perspective. Blender offers this method from every view, not just from the X, Y or Z axes. Perspective is a more realistic view of the 3D scene, but the Ortographic one is more handy for editing (toggle with NUM5).
Local View/Global View allows the user to continue working with complex Scenes. The currently selected Objects are taken separately, centered and displayed completely. The use of 3DWindow layers is temporarily disabled. Reactivating this option restores the display of the 3DWindow in its original form. If a picture is rendered from a LocalView, only the Objects present are rendered plus the visible lamps, according to the layers that have been set. Activating a new Camera in LocalView does not change the Camera used by the Scene. THese are toggled with the hotkey NUM/.
Orthographic, Perspective and Camera view. Blender offers this method from every view, not just from the X, Y or Z axes. Perspective is a more realistic view of the 3D scene, but the Orthographic one is more handy for editing (toggle with NUM5). Camera view is the view as will be rendered (NUM0).
Viewport Navigation submenu contains menu entries for rotating and zooming the view.
Play back animation. Plays back animation (ALT-A).
Mode
Allows to switch Mode among the allowed ones for active Object:
Object Mode Mode (all) TAB toggles.
Object Edit Mode (all) TAB toggles.
UV Face select (Mesh) FKEY toggles.
Vertex Paint (Mesh) VKEY toggles.
Texture Paint (Mesh).
Pose Mode (Armature) CTRL-TAB.
Draw Mode
This menu sets the drawing method. Respectively:
BoundBox. The quickest method, for animation previews, for example.
WireFrame.
Solid. Zbuffered with the standard OpenGL lighting. ZKEY toggles between WireFrame and Solid.
Shaded. This is as good an approach as is possible to the manner in which Blender renders - with Gouraud shading. It displays the situation from a single frame of the Camera. SHIFT-Z toggles, use CTRL-Z to force a recalculation.
Textured.
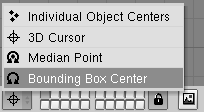
Pivot Point
This menu determine the manner in which the Objects (or vertices) are rotated or scaled or mirrored.
Bounding Box Center
The midpoint of the boundbox is the center of rotation or scaling. Hotkey: COMMA.
Individual Objects Center
All Objects rotate or scale around their own midpoints. In EditMode: all vertices rotate or scale around the Object midpoint.
Layers buttons
These 20 buttons show the available layers. In fact, a layer is nothing more than a visibility flag. This is an extremely efficient method for testing Object visibility. This allows the user to divide the work functionally.
For example: Cameras in layer 1, temporary Objects in layer 20, lamps in layers 1, 2, 3, 4 and 5, etc. All hotkey commands and tools in Blender take the layers into account. Objects in 'hidden' layers are treated as unselected.
Use LMB for selecting, SHIFT-LMB for adding/removing to/from the group of selected layers.
Hotkeys: 1KEY , 2KEY , etc. 0KEY for layers 1,2,3,4, etc. Use ALT-1, ALT-2 , ... ALT-0 ) for layers 11, 12, ... 20. Here, as well, use SHIFT + Hotkey adding/removing to/from the group of selected layers.
Lock
Every 3DWindow has it's own layer setting and active Camera. This is also true for a Scene: here it determines what layers - and what camera - are used to render a picture. The lock option links the layers and Camera of the 3DWindow to the Scene and vice versa: the layers and Camera of the Scene are linked to the 3DWindow. This method passes a layer change directly to the Scene and to all other 3DWindows with the "Lock" option ON. Turn the "Lock" OFF to set a layer or Camera exclusively for the current 3DWindow. All settings are immediately restored by turning the button back ON.
3DWindow
The standard 3DWindow has:
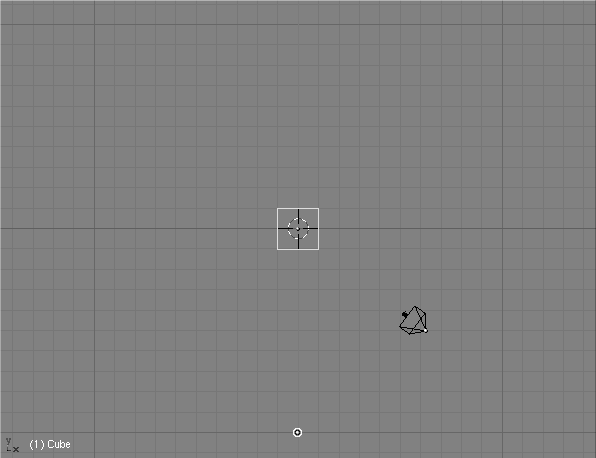
A grid. The dimensions (distance between the gridlines) and resolution (number of lines) can be set with the 3D Viewport floating Panel (View Menu. This grid is drawn as infinite in the presets of ortho ViewMode (Top, Front, Right view). In the other views, there is an finite 'floor'. Many Blender commands are adjusted to the dimension of the grid, to function as a standard unit. Blender works best if the total 'world' in which the user operates continually falls more or less within the total grid floor (whether it is a space war or a logo animation).
Axes in colour codes. The reddish line is the X axis, the green line is the Y axis, the blue line is the Z axis. In the Blender universe, the 'floor' is normally formed by the X and Y axes. The height and 'depth' run along the Z axis.
A 3D cursor. This is drawn as a black cross with a red/white striped circle. A LeftMouse click moves the 3DCursor. Use the SnapMenu (SHIFT-S) to give the 3Dcursor a specific location. New Objects are placed at the 3D cursor location.
Layers (visible in the header buttons). Objects in 'hidden' layers are not displayed. All hotkey commands and tools in Blender take the layers into account: Objects in the 'hidden' layers are treated as not selected. See the following paragraph as well.
ViewButtons. Separate variables can be set for each 3Dwindow, e.g for the grid or the lens. Use the View Menu entries.
The Mouse
The mouse provides the most direct access to the 3DWindow. Below is a complete overview:
Press LMB and drag
These are the Gestures. Blender's gesture recognition works in three ways:
Draw a straight line: start translation mode (Grabber)
Draw a curved line: start rotation mode.
Draw a V-shaped line: start scaling mode.
MMB
Rotate the direction of view of the 3DWindow. This can be done in two ways (can be set in the UserMenu):
the trackball method. In this case, where in the window you start the mouse movement is important. The rotation can be compared to rotating a ball, as if the mouse grasps and moves a tiny miniscule point on a ball and moves it. If the movement starts in the middle of the window, the view rotates along the horizontal and vertical window axes. If the movement begins at the edge of the window, the view rotates along the axis perpendicular to the window.
the turntable method. A horizontal mouse movement always results in a rotation around the global Z axis. Vertical mouse movements are corrected for the view direction, and result in a combination of (global) X and Y axis rotations.
RMB
Select Objects or (in EditMode) vertices. The last one selected is also the active one. This method guarantees that a maximum of 1 Object and 1 vertex are always selected. This selection is based on graphics (the wireframe).
SHIFT-RMB
Adds/removes from selection Objects or (in EditMode) vertices. The last one selected is also the active one. Multiple Objects or vertices may also be selected. This selection is based on graphics too (the wireframe).
CTRL-RMB
Select Objects on the Object-centers. Here the wireframe drawing is not taken into account. Use this method to select a number of identical Objects in succession, or to make them active.
NumPad
The numeric keypad on the keyboard is reserved for view related hotkeys. Below is a description of all the keys with a brief explanation.
NUM/
LocalView. The Objects selected when this command is invoked are taken separately and displayed completely, centered in the window. See the description of 3DHeader>>LocalView.
NUM*
Copy the rotation of the active Object to the current 3DWindow. Works as if this Object is the camera, without including the translation.
NUM.
Center and zoom in on the selected Objects. The view is changed in a way that can be compared to the LocalView option.
CTRL-NUM0
Make the active Object the camera. Any Object can be used as the camera. Generally, a Camera Object is used. It can also be handy to let a spotlight function temporarily as a camera when directing and adjusting it. ALT-NUM0 Revert to the previous camera. Only Camera Objects are candidates for 'previous camera'.
Hotkeys
The 3D Viewport hotkeys are hundreds and varyes if Blender is In Object or Edit Modes and on the basys of which object is active. The previous the chapter called HotKeys In-depth Reference Contains them all, hence they are not repeated here.
Fly Mode
Fly Mode is invoked by SHIFT-F. Works only in Camera ViewMode. The mouse cursor jumps to the middle of the window. It works as follows:
Mouse cursor movement indicates the view direction.
LMB (repeated): Fly faster.
MMB (repeated): Fly slower.
LMB and MMB toghether: Set speed to zero.
CTRL: translation downwards (negative Z).
ALT: translation upwards (positive Z).
ESC: Camera back to its starting position, terminate Fly Mode.
SPACE: Leave the Camera in current position, terminate Fly Mode.


