Zubehör aufbauen
Displays
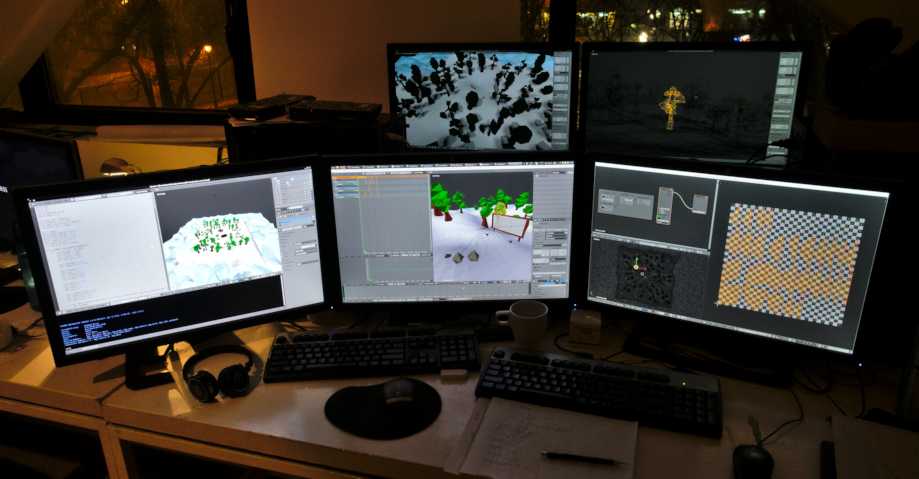
Es wird ein FullHD-Display oder höher empfohlen. Multi-Monitor-Setups werden unterstützt und Workspaces (Arbeitsbereiche) können über mehrere Monitore hinweg eingerichtet werden.

Ein Beispiel von Blenders Multi-Monitor-Unterstützung.
Eingabegeräte
Blender unterstützt verschiedene Arten von Eingabegeräten:
Tastatur (empfohlen: Tastatur mit Ziffernblock, das englische Layout funktioniert am besten)
Maus (empfohlen: Drei-Tasten-Maus mit Scrollrad)
NDOF-Gerät (auch bekannt als 3D-Maus)
Grafiktablet
Bemerkung
If you are missing an input device such as a mouse or numpad you can change Blender’s keymap to emulate these devices. Settings to enable this can be found in the Input Preferences.
Maus
Tastatur
Emulieren des Ziffernblocks
Falls Sie keinen numerischen Ziffernblock am Rand ihrer Tastatur haben, möchten Sie vielleicht einen emulieren (dazu werden stattdessen die Zahlen am oberen Rand der Tastatur benutzt, dies entfernt allerdings den Schnellzugriff auf die Ebenensichtbarkeit).
Siehe auch
Lesen Sie mehr über das Emulieren des Ziffernblocks in den Eingabe-Einstellungen.
Nicht-englische Tastaturen
Falls Sie ein eine Tastatur mit nicht-englischem Tastaturlayout nutzen, können Sie dennoch von einem Wechsel ihres Computers zum UK- oder US-Layout profitieren, solange Sie mit Blender arbeiten.
Bemerkung
Sie können außerdem die Standard-Tastenbelegung und Standard-Tastenkürzel in den Eingabe-Einstellungen ändern. Dieses Nutzerhandbuch geht jedoch davon aus, dass Sie die Standard-Tastenbelegung nutzen.
Grafiktablet
Grafiktablets können genutzt werden, um eine eher traditionelle Art der Kontrolle über den Mauszeiger mithilfe eines Stiftes auszuüben. Dies kann dabei helfen Künstlern, die an das Malen und Zeichnen mit ähnlichen Werkzeugen gewöhnt sind, eine gewohntere Umgebung zu bieten.
Bemerkung
Falls Sie ein Grafiktablet statt einer Maus benutzen und die Druckempfindlichkeit nicht richtig funktioniert, können Sie versuchen, den Mauszeiger im Blenderfenster zu platzieren und dann ihr Grafiktablet aus- und einzustecken. Dies kann unter Umständen helfen.
NDOF (3D-Maus)
3D mice or NDOF devices are hardware that you can use to navigate a scene in Blender. Currently only devices made by 3Dconnexion are supported. These devices allow you to explore a scene, as well as making Fly/Walk Navigation easier to control. The NDOF device can be configured in the Preference. These settings can also be accessed using the NDOFMenu button on the NDOF device to open a pop-up menu to adjust the settings directly from the viewport.
Siehe auch
Mehr Informationen über den Hardwareaufbau finden Sie unter Eingabe-Einstellungen.
Head-Mounted Displays (Virtual Reality)
HMDs ermöglichen es, die Benutzer in eine interaktive und virtuelle Umgebung zu versetzen. Am Kopf befestigt, verfolgen sie Kopfbewegungen, um eine scheinbar umgebende Welt auf kleine Bildschirme vor den Augen des Benutzers vorzuführen. Wenn das System gut funktioniert, erleben sie die virtuelle Umgebung so, als befänden sie sich tatsächlich mittendrin.
Unterstützte Plattformen
Die Unterstützung der Virtual Reality in Blender wird durch den Multiplattform-Standard OpenXR implementiert. Dieser Standard ist neu und daher noch begrenzt unterstützt.
Plattform |
Betriebssystem |
Hinweise |
|---|---|---|
Windows |
||
GNU/Linux |
Not recommended for general use yet. |
|
Oculus (Rift and Quest) |
Windows |
Requires Oculus v31 Software Update. Oculus Link required for Quest. |
Windows, GNU/Linux |
Requires SteamVR 1.16 or greater. |
|
Windows |
– |
|
Windows |
Requires Windows 10 May 2019 Update (1903). |
Loslegen
Die folgenden Unterabschnitte beschreiben, wie ein HMD für die Verwendung mit den unterstützten Plattformen (supported platforms) eingerichtet werden kann. Wenn dies nicht geschieht, meldet Blender beim Versuch, eine Virtual-Reality-Sitzung zu starten, einen Fehler.
HTC Vive Cosmos
The dedicated platform for the HTC Vive Cosmos is currently targeted at developers and may lack features found in other platforms.
Follow the steps from the Vive Developer Forums.
Enable the VR Scene Inspection add-on in Blender.
Monado
Monado is a free and open source XR platform for Linux. It is not yet ready for production usage and should only be used for testing purposes.
Packages are available for the following distributions:
Ubuntu (Eoan, Focal)
For other systems, it has to be compiled from source, which in this case is not recommended for people with little experience in compiling software. Follow the Getting Started Guides from Monado to do so nevertheless.
Enable the VR Scene Inspection add-on in Blender.
Oculus
Oculus provides full support for OpenXR as of the Oculus v31 Software Update.
Download and install the Oculus Rift/Oculus Link software.
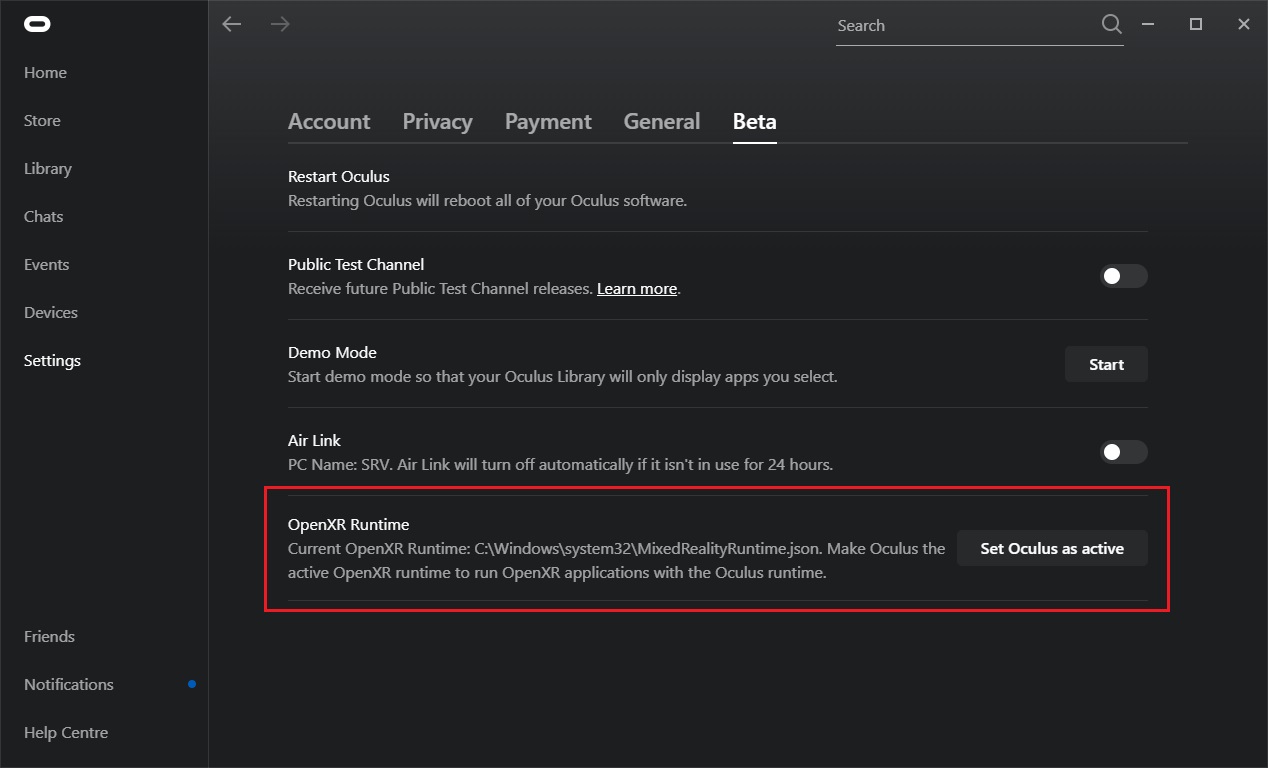
Set Oculus as the active OpenXR runtime via the Beta tab in the Oculus App Settings.

Enable the VR Scene Inspection add-on in Blender.
SteamVR
SteamVR provides full support for OpenXR as of SteamVR 1.16.
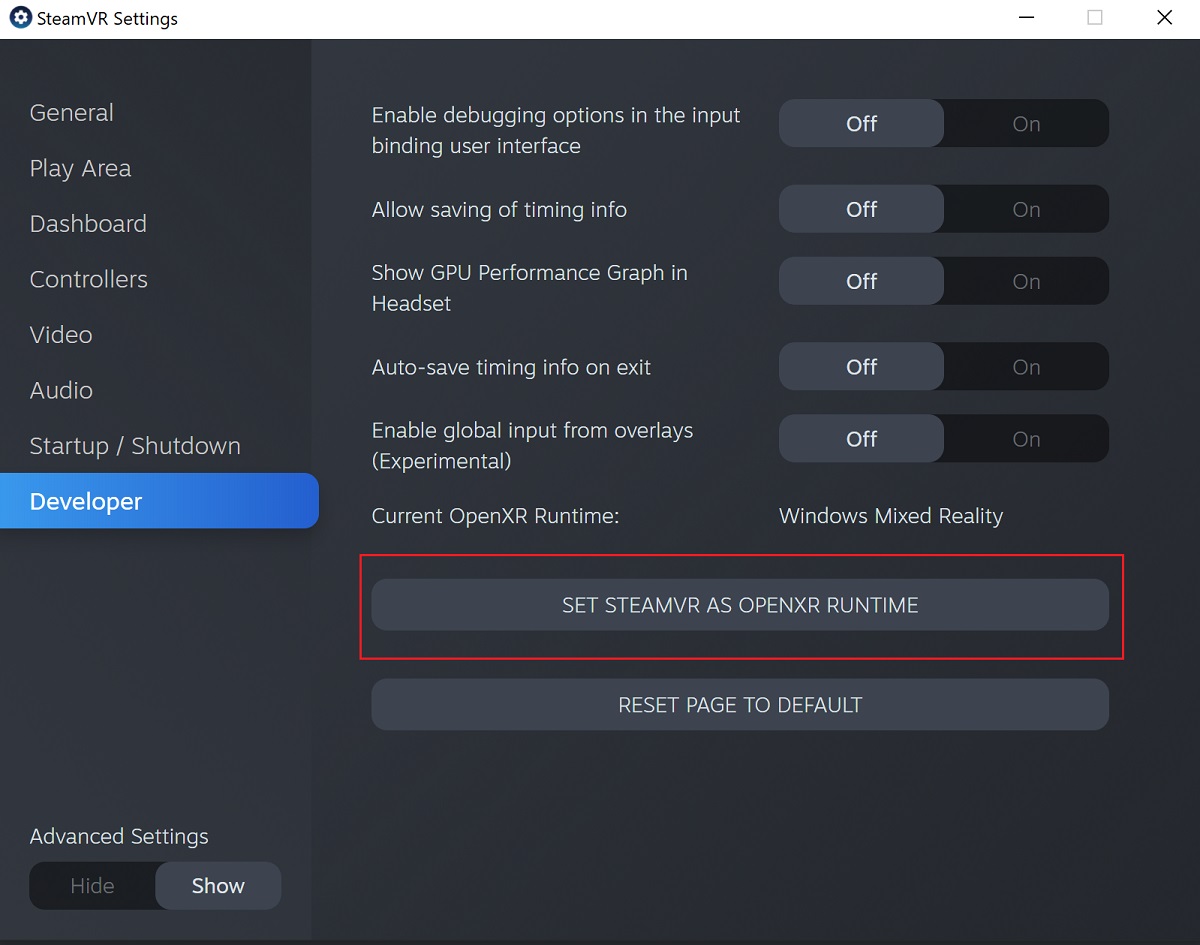
Set SteamVR as the active OpenXR runtime via the Developer tab in the SteamVR Settings.

Enable the VR Scene Inspection add-on in Blender.
Bemerkung
The SteamVR runtime can also be used for HTC Vive Cosmos, Oculus, and Windows Mixed Reality HMDs.
Varjo
Varjo includes full OpenXR support with its required Varjo Base software.
Enable the VR Scene Inspection add-on in Blender.
Windows Mixed Reality
Windows Mixed Reality provides full support for OpenXR. To check if a PC meets the requirements to run the software, Microsoft offers the Windows Mixed Reality PC Check application.
Vergewissere dich, dass Windows 10 May 2019 Update (1903) (das Windows Update vom 10 Mai 2019 (1903)) installiert ist.
If the system meets all requirements, the Mixed Reality Portal should already be installed. It is also available in the Microsoft Store.
Launch the Mixed Reality Portal. Click the menu button
...in the lower left corner. In the menu it opens, select the Set up OpenXR.Enable the VR Scene Inspection add-on in Blender.
Bemerkung
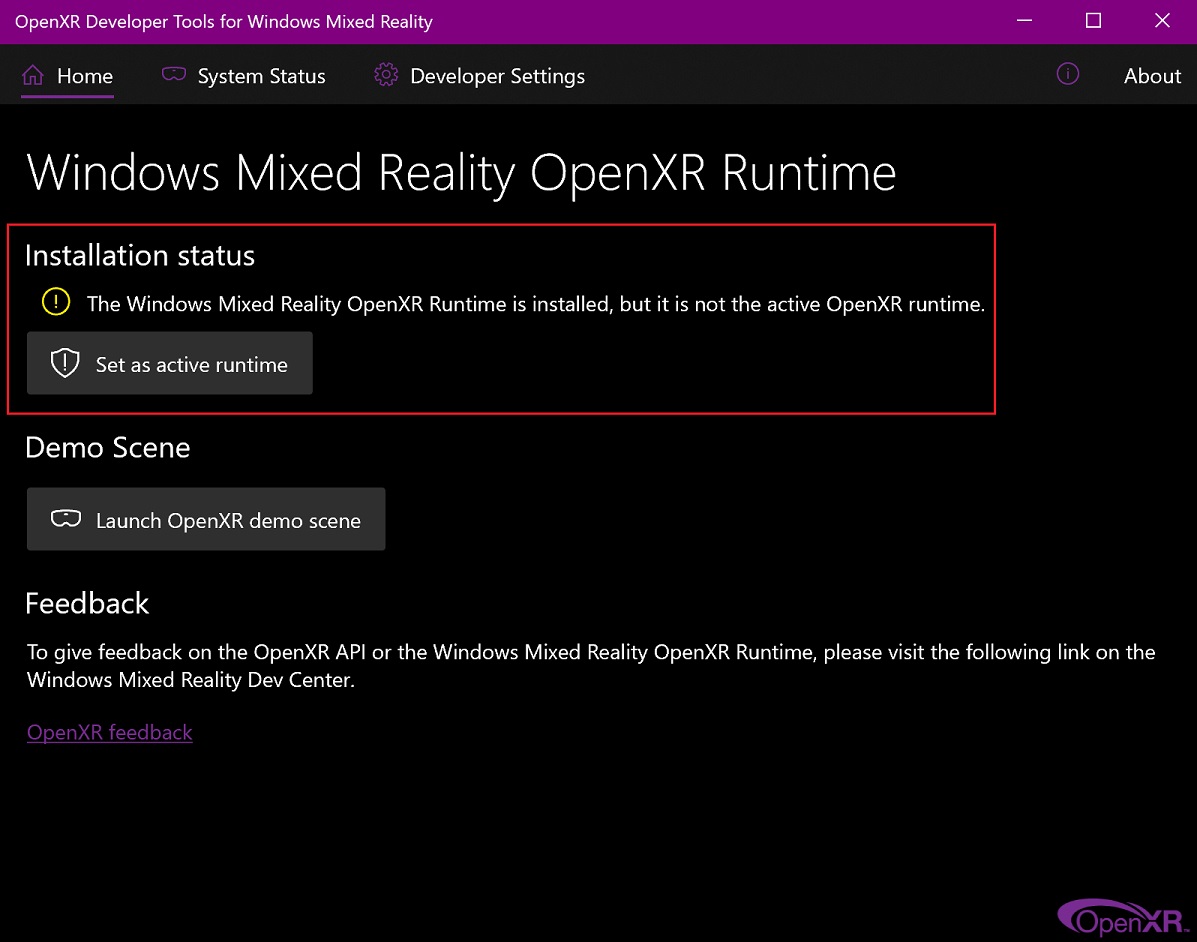
To switch to Windows Mixed Reality from another OpenXR runtime (e.g. SteamVR), download the OpenXR Developer Tools from the Microsoft Store and set Windows Mixed Reality as the active runtime.
