Areas
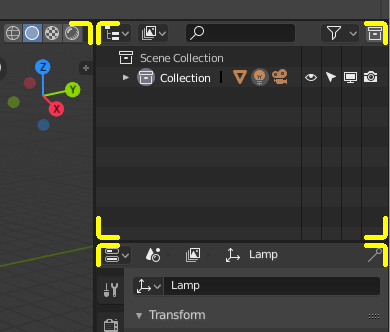
Area boundaries are indicated by rounded corners (yellow highlights).
The Blender window is divided up into a number of rectangles called Areas. Areas reserve screen space for Editors, such as the 3D Viewport, or the Outliner. In general an Editor provides a way to view and modify your work through a specific part of Blender. All hotkeys you press will affect the contents of the Editor in the Area the mouse pointer is located. Area boundaries are indicated by rounded (beveled) corners.
Areas can be customized to match specific tasks called Workspaces, which can then be named and saved for later use.
Resizing
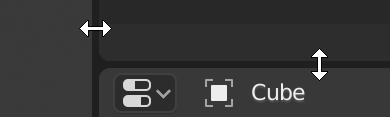
You can resize areas by dragging their borders with LMB. Move your mouse cursor over the border between two areas, so that the cursor changes to a double-headed arrow, and then click and drag.
Splitting
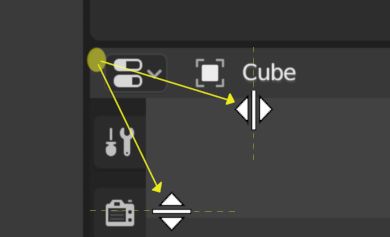
Splitting an area will create a new area. Placing the mouse cursor in an area corner will change the cursor to a cross (+) to indicate that pressing down LMB will activate splitting or joining operator. Dragging from area corner inward will split the area. You define the split direction by dragging either horizontally or vertically.
Joining
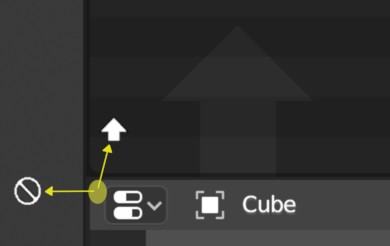
The Properties Editor is being joined to the Outliner.
Dragging from an area corner outward will join two areas. The area that will be closed gets a dark overlaid arrow. You can select which area will be closed by moving the mouse over areas. Release the LMB to complete the join. If you press Esc or RMB before releasing the mouse, the operation will be aborted.
Note
Areas to be joined must be the same size (width or height) in the direction you wish to join, otherwise nothing will happen. This is so that the combined area remains a rectangle.
Area Options
RMB on the border opens the Area Options.
- Split Area
- Shows an indicator line that lets you select the area and position where to split. Tab switches between vertical/horizontal.
- Join Areas
- Shows the join direction overlay.
Swapping Contents
You can swap the contents between two areas with Ctrl-LMB on one of the corners of the initial area, dragging towards the target area, and releasing the mouse there. The two areas do not need to be side-by-side, though they must be inside the same window.
Duplicate Area into new Window
Reference
| Menu: |
|---|
A new floating window containing an area can be created from .
The new window is a fully functional window, which is part of the same instance of Blender. This can be useful, e.g. if you have multiple monitors.
You can also create a new window from an existing area by Shift-LMB on the area corner, then drag outward slightly.
The window can be closed with the OS Close Window button.
Toggle Maximize Area
Reference
| Menu: | |
|---|---|
| Hotkey: | Ctrl-Spacebar |
The maximized area fill the whole application window. You can maximize an area with menu entry or keyboard shortcut Ctrl-Spacebar. To return to normal size use keyboard shortcut or the Back to Previous button on the Topbar.
Note
The area your mouse is currently hovering over is the one that will be maximized using the keyboard shortcuts.
Toggle Fullscreen Area
Reference
| Menu: | |
|---|---|
| Hotkey: | Ctrl-Alt-Spacebar |
The fullscreen area contains only the main region. To exit the fullscreen move the mouse to the top right corner of the area to reveal the return icon.