Light Objects
Reference
- Panel
and
Common Settings
- Type
Defines the type of light.
- Color
Color tint of the emitted light.
Renderer Settings
Point Light
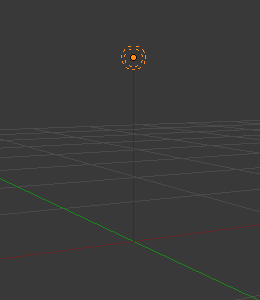
Point light.
The point light is an omni-directional point of light, that is, a point radiating the same amount of light in all directions. It’s visualized by a plain, circled dot. Being a point light source, the direction of the light hitting an object’s surface is determined by the line joining the light and the point on the surface of the object itself. It can be used as simple model of e.g. a light bulb.
Light intensity/energy decays based on (among other variables) distance from the point light to the object. In other words, surfaces that are further away will be rendered darker.
- Power
Power of the light in Watts. Higher values increase the intensity of the light. Negative values can be set, but should be avoided for predictable and physically based result.
- Radius
When larger than zero, light will be emitted from a spherical surfaces with the specified radius. Lights with larger size have softer shadows and specular highlights, and they will also appear dimmer because their power is distributed over a larger area.
Spot Light
A spot light emits a cone-shaped beam of light from the tip of the cone, in a given direction.
- Power
Power of the light in Watts. Higher values increase the intensity of the light. Negative values can be set, but should be avoided for predictable and physically based result.
- Radius
When larger than zero, light will be emitted from a spherical surfaces with the specified radius. Lights with larger size have softer shadows and specular highlights.
Beam Shape
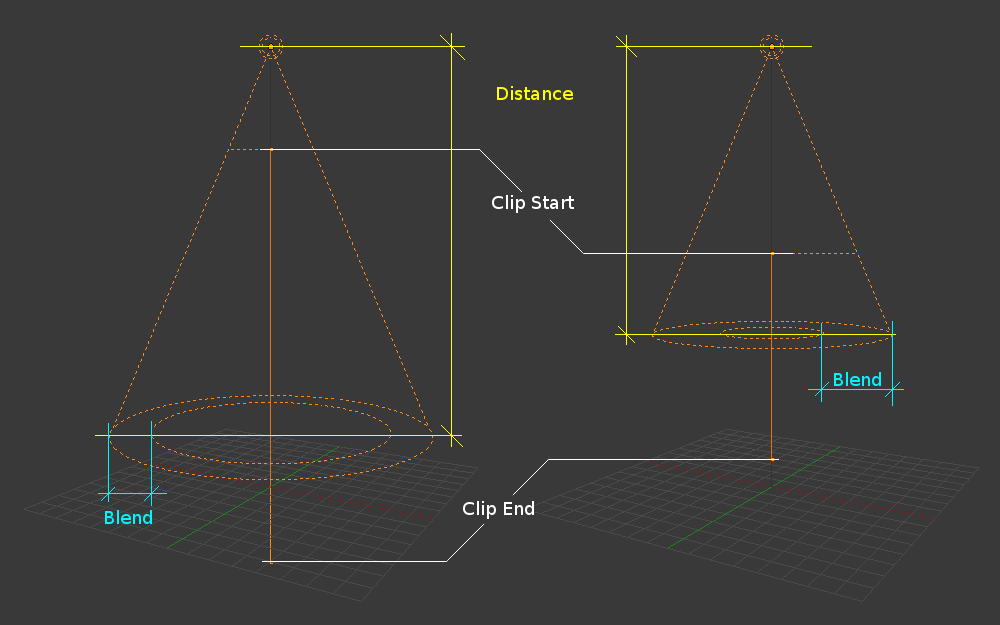
Changing the spot options also changes the appearance of the spotlight as displayed in the 3D Viewport.
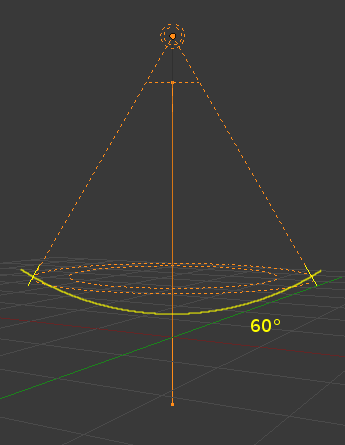
- Size
The size of the outer cone of a spot, which largely controls the circular area a spot light covers. This slider in fact controls the angle at the top of the lighting cone, and can be between (1.0 to 180.0).
Changing the spot Size option.¶ 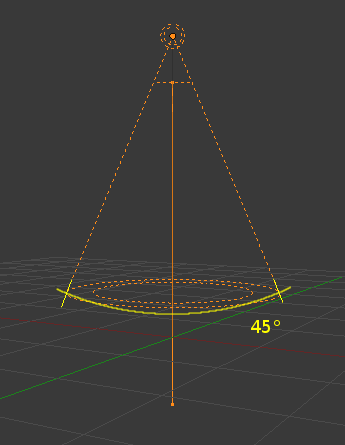
- Blend
The Blend slider controls the inner cone of the spot. The Blend value can be between (0.0 to 1.0). The value is proportional and represents that amount of space that the inner cone should occupy inside the outer cone Size.
The inner cone boundary line indicates the point at which light from the spot will start to blur/soften; before this point its light will mostly be full strength. The larger the value of Blend the more blurred/soft the edges of the spotlight will be, and the smaller the inner cone’s circular area will be (as it starts to blur/soften earlier).
To make the spot have a sharper falloff rate and therefore less blurred/soft edges, decrease the value of Blend. Setting Blend to 0.0 results in very sharp spotlight edges, without any transition between light and shadow.
The falloff rate of the spot light is a ratio between the Blend and Size values; the larger the circular gap between the two, the more gradual the light fades between Blend and Size.
Blend and Size only control the spot light cone’s aperture and softness (“radial” falloff); they do not control the shadow’s softness as shown below.

Render showing the soft edge spotlighted area and the sharp/hard object shadow.
Notice in the picture above that the object’s shadow is sharp as a result of the ray tracing, whereas the spotlight edges are soft. If you want other items to cast soft shadows within the spot area, you will need to alter other shadow settings.
- Show Cone
Displays a transparent cone in 3D Viewport to visualize which objects are contained in it.
Area Light
The area light simulates light originating from a surface (or surface-like) emitter. For example, a TV screen, office neon lights, a window, or a cloudy sky are just a few types of area light. The area light produces shadows with soft borders by sampling a light along a grid the size of which is defined by the user. This is in direct contrast to point-like artificial lights which produce sharp borders.
- Power
Power of the light in Watts. Higher values increase the intensity of the light. Negative values can be set, but should be avoided for predictable and physically based result.
- Shape
Shape of the light.
- Rectangle
The shape of the light can be represented as a rectangle and changed with the “X” and “Y” values.
- Square
The shape of the light can be represented as a square and changed with the Size property.
- Disk
The shape of the light can be represented as a disk and changed with the Size property.
- Ellipse
The shape of the light can be represented as an ellipse and changed with the X and Y values.
Tip
Choosing the appropriate shape for your area light will enhance the believability of your scene. For example, you may have an indoor scene and would like to simulate light entering through a window. You could place a Rectangular area light in a window (vertical) or from neons (horizontal) with proper ratio for Size X and Size Y. For the simulation of the light emitted by a TV screen, a vertical Square area light would be better in most cases.
- Size / Size X / Size Y
Dimensions for the Square or Rectangle.
Beam Shape
- Spread Cycles Only
How wide the emitted light fans out controlling how diffused the light is. Larger values create soft shadows while smaller values create sharper light simulating a gridded softbox.
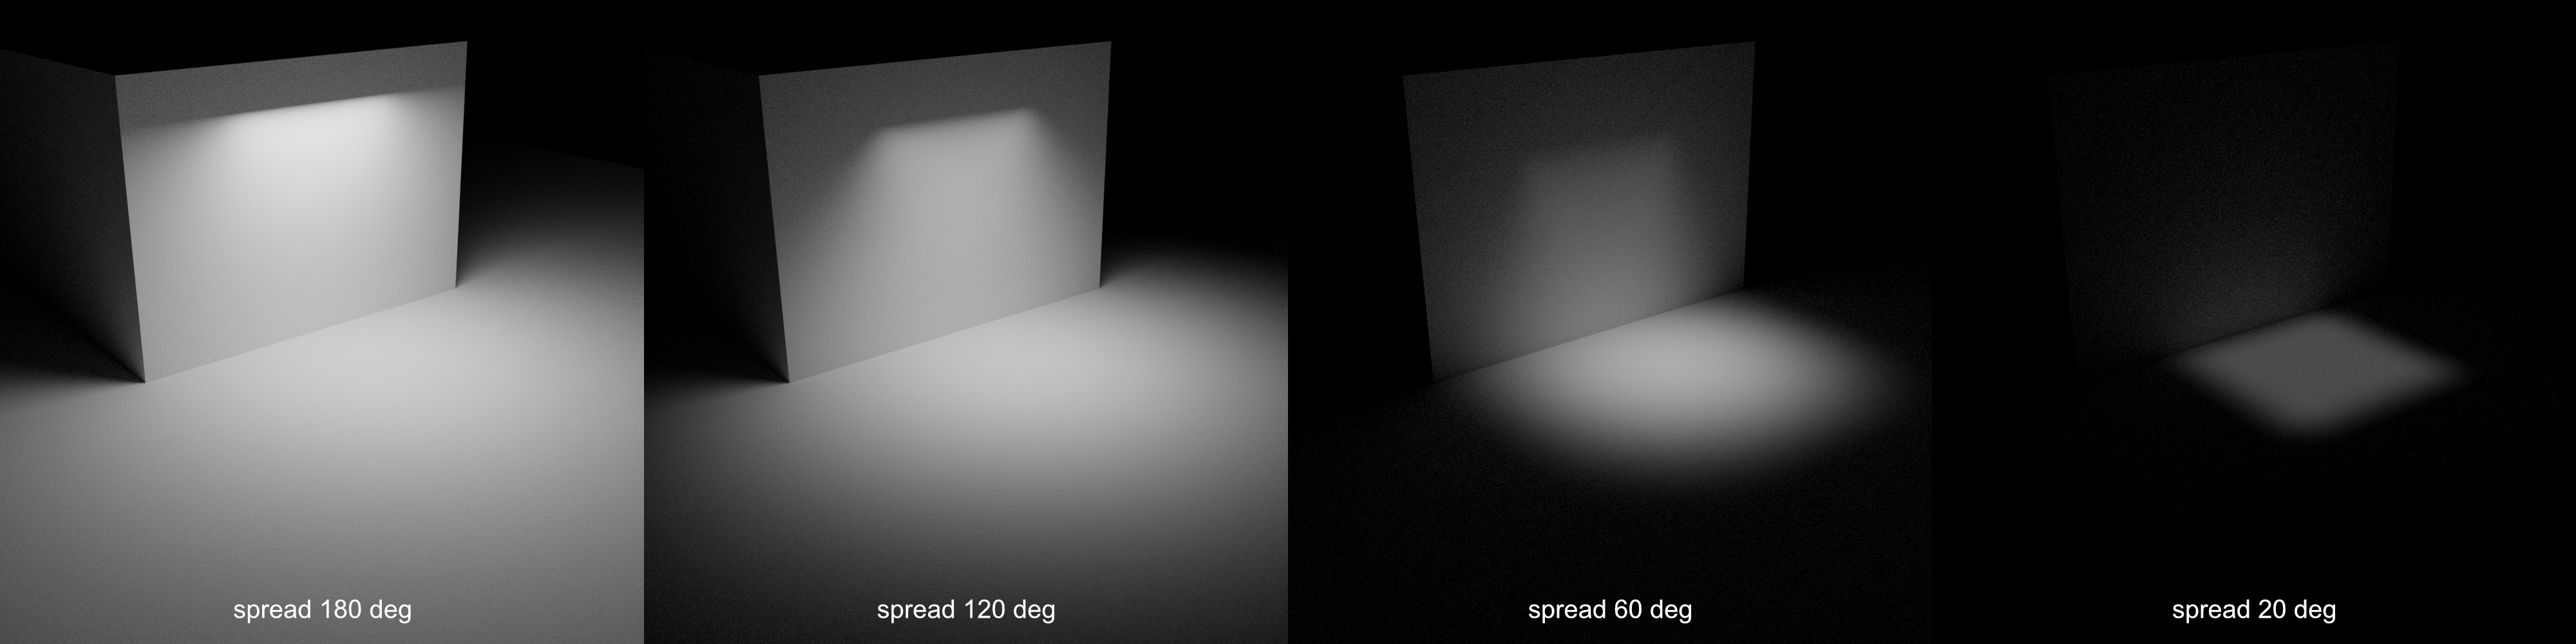
Example of Spread at different angles.
Sun Light
A sun light provides light of constant intensity emitted in a single direction from infinitely far away. It can be very handy for a uniform clear daylight open-space illumination. In the 3D Viewport, the sun light is represented by an encircled black dot with rays emitting from it, plus a dashed line indicating the direction of the light.
Note
This direction can be changed by rotating the sun light, like any other object, but because the light is emitted from a location considered infinitely far away, the location of a sun light does not affect the rendered result.
- Strength
Strength of the lights in Watts per square meter. Typical values are around 250 for an overcast day and 1000 or more for direct sunlight. See more details at Power of Lights.
- Angle
The size of the sun light according to its angular diameter as seen from earth.
Power of Lights
The power of sun lights is specified in Watts per square meter. The power of point lights, spot lights, and area lights is specified in Watts. But this is not the electrical Watts that consumer light bulbs are rated at. It is Radiant Flux or Radiant Power which is also measured in Watts. It is the energy radiated from the light in the form of visible light.
If you want to set the power to real world values, you have to convert the wattage of consumer bulbs or LED lights to radiant flux, but it is not a straightforward process. The wattage of bulbs means the electrical power required to power them. LED lights have a “Watt equivalent” which is neither the electrical power they require nor the amount of light they put out. Some consumer lights specify lumens or luminous flux which is the radiant flux weighted with the wavelengths perceived by the human eye.
To save you from doing the conversion, here is a table of typical power values for point, spot, and area lights:
Real world light |
Power |
Suggested Light Type |
|---|---|---|
Candle |
0.05 W |
Point |
800 lm LED bulb |
2.1 W |
Point |
1000 lm light bulb |
2.9 W |
Point |
1500 lm PAR38 floodlight |
4 W |
Area, Disk |
2500 lm fluorescent tube |
4.5 W |
Area, Rectangle |
5000 lm car headlight |
22 W |
Spot, size 125 degrees |
And a table of typical Strength values for sun lights:
Sun type |
Strength |
|---|---|
Clear sky |
1000 W/m2 |
Cloudy sky |
500 W/m2 |
Overcast sky |
200 W/m2 |
Moonlight |
0.001 W/m2 |
These values will likely produce much brighter or dimmer lights than you would expect, because our eyes adapt while a render engine does not. So to compensate, adjust the Exposure in .
To get realistic results, remember to also set the light size and color to realistic values. The color of your lights will also influence how bright they appear to the human visual system. If you leave the power unchanged, a green light will seem the brightest, red darker and blue the darkest. Thus you might want to manually compensate for these perceived differences.