Structure
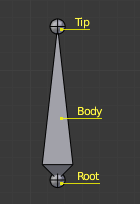
The elements of a bone.
They have three elements:
The “start joint” named root or head.
The “body” itself.
And the “end joint” named tip or tail.
With the default armature in Edit Mode, you can select the root and the tip, and move them as you do with mesh vertices.
Both root and tip (the “joints”) define the bone by their respective position.
They also have a radius property, only useful for the envelope deformation method (see below).
Roll
Activating the Axes checkbox will show local axes for each bone’s tip. The Y axis is always aligned along the bone, oriented from root to tip, this is the “roll” axis of the bones.
Bones Influence
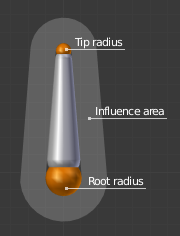
A bone in Envelope visualization, in Edit Mode.
Basically, a bone controls a geometry when vertices “follow” the bone. This is like how the muscles and skin of your finger follow your finger-bone when you move a finger.
To do this, you have to define the strength of influences a bone has on a certain vertex.
The simplest way is to have each bone affecting those parts of the geometry that are within a given range from it. This is called the envelope technique, because each bone can control only the geometry “enveloped” by its own influence area.
If a bone is visualized as Envelope, in Edit Mode and in Pose Mode you can see the area of influence, which depends on:
The distance property and
the root’s radius and the tip’s radius.
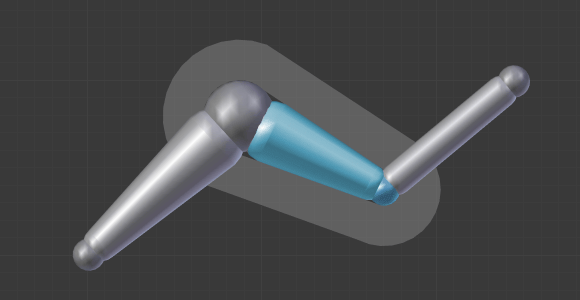
Our armature in Envelope visualization, in Pose Mode.
All these influence parameters are further detailed in the skinning pages.