Stroke Menu
This page covers many of the tools in the Strokes menu. These are tools that work primarily on strokes, however, some also work with point selections.
Subdivide
Reference
- Mode:
Edit Mode
- Menu:
Stroke ‣ Subdivide
Subdivides the strokes by inserting points between the selected points.
- Number of Cuts
The number of subdivisions to perform.
- Selected Points
When enabled, limits the effect to only the selected points within the stroke.
Subdivide and Smooth
Reference
- Mode:
Edit Mode
- Menu:
Stroke ‣ Subdivide and Smooth
Subdivides and smooths the strokes by inserting points between the selected points.
- Number of Cuts
The number of subdivisions to perform.
- Selected Points
When enabled, limits the effect to only the selected points within the stroke.
- Iterations
Number of times to repeat the procedure.
- Factor
The amount of the smoothness on subdivided points.
- Smooth Endpoints
Smooths the stroke’s endpoints.
- Keep Shape
Preserves the strokes shape.
- Position
When enabled, the operator affect the points location.
- Radius
When enabled, the operator affect the points thickness.
- Opacity
When enabled, the operator affect the points strength (alpha).
Simplify
Reference
- Mode:
Edit Mode
- Menu:
Stroke ‣ Simplify
Uses the RDP algorithm (Ramer-Douglas-Peucker algorithm) for points deletion. The algorithm tries to obtain a similar line shape with fewer points.
- Factor
Controls the amount of recursively simplifications applied by the algorithm.
Trim
Reference
- Mode:
Edit Mode
- Menu:
Stroke ‣ Trim
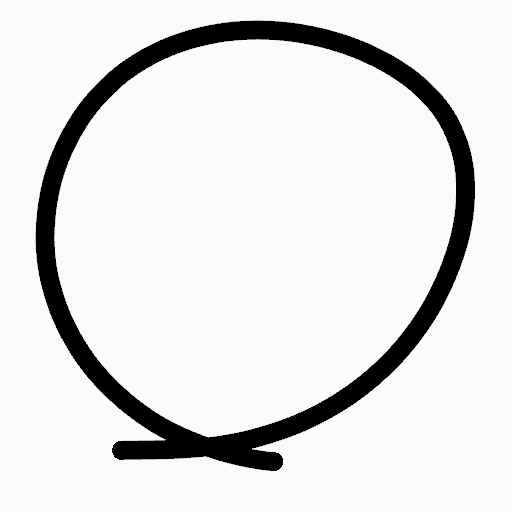
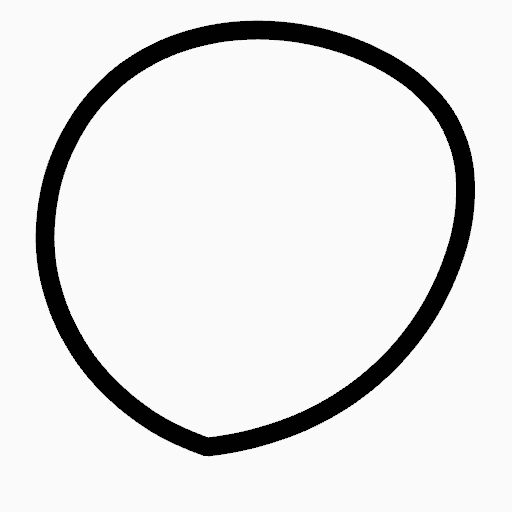
Trims selected stroke to first loop or intersection.
Join
Join
Reference
- Mode:
Edit Mode
- Menu:
Stroke ‣ Join ‣ Join,
Join two or more strokes into a single one.
- Type
- Join:
Ctrl-J Join selected strokes by connecting points.
- Join and Copy:
Join selected strokes by connecting points in a new stroke.
- Leave Gaps
When enabled, do not use geometry to connect the strokes.
Join and Copy
Reference
- Mode:
Edit Mode
- Menu:
Stroke ‣ Join ‣ Join and Copy
- Shortcut:
Shift-Ctrl-J
Same as Join but Type defaults to Join and Copy.
Move to Layer
Reference
- Mode:
Edit Mode
- Menu:
Stroke ‣ Move to Layer
- Shortcut:
M
A pop-up menu to move the stroke to a different layer. You can choose the layer to move the selected strokes to from a list of layers of the current Grease Pencil object. You can also add a new layer to move the selected stroke to. When creating a new layer, there is another pop-up to type in the name of the new layer.
Assign Material
Reference
- Mode:
Edit Mode
- Menu:
Stroke ‣ Assign Material
Changes the material linked to the selected stroke. You can choose the name of the material to be used by the selected stroke from a list of materials of the current Grease Pencil object.
Set as Active Material
Reference
- Mode:
Edit Mode
- Menu:
Stroke ‣ Set as Active Material
Sets the active object material based on the selected stroke material.
Arrange
Reference
- Mode:
Edit Mode
- Menu:
Stroke ‣ Arrange
Change the drawing order of the strokes in the 2D layer.
- Bring to Front
Moves to the top the selected points/strokes.
- Bring Forward
Moves the selected points/strokes upper the next one in the drawing order.
- Send Backward
Moves the selected points/strokes below the previous one in the drawing order.
- Send to Back
Moves to the bottom the selected points/strokes.
Close
Reference
- Mode:
Edit Mode
- Menu:
Stroke ‣ Close
- Shortcut:
F
Close or open strokes by connecting the last and first point.
- Type
- Close All:
Close all open selected strokes.
- Open All:
Open all closed selected strokes.
- Toggle:
Close or Open selected strokes as required.
Toggle Cyclic
Reference
- Mode:
Edit Mode
- Menu:
Stroke ‣ Toggle Cyclic
Toggles between an open stroke and closed stroke (cyclic).
- Type
- Close All:
Close all open selected strokes.
- Open All:
Open all closed selected strokes.
- Toggle:
Close or Open selected strokes as required.
Set Caps
Reference
- Mode:
Edit Mode
- Menu:
Stroke ‣ Set Caps
Toggle ending cap styles of the stroke.
- Rounded
Sets stroke start and end points to rounded (default).
- Flat
Toggle stroke start and end points caps to flat or rounded.
- Toggle Start
Toggle stroke start point cap to flat or rounded.
- Toggle End
Toggle stroke end point cap to flat or rounded.
Switch Direction
Reference
- Mode:
Edit Mode
- Menu:
Stroke ‣ Switch Direction
Reverse the direction of the points in the selected strokes (i.e. the start point will become the end one, and vice versa).
Set Uniform Thickness
Reference
- Mode:
Edit Mode
- Menu:
Stroke ‣ Set Uniform Thickness
Makes the thickness equal for the entire stroke.
- Thickness
Thickness value to use on all points of the stroke.
Set Uniform Opacity
Reference
- Mode:
Edit Mode
- Menu:
Stroke ‣ Set Uniform Opacity
Makes the opacity equal for the entire stroke.
- Opacity
Opacity value to use on all points of the stroke.
Scale Thickness
Reference
- Mode:
Edit Mode
- Menu:
Stroke ‣ Scale Thickness
When enabled, scales the stroke thickness during scale transformations.
Set Curve Type
Reference
- Mode:
Edit Mode
- Menu:
Stroke ‣ Set Curve Type
Sets the spline type for the splines in the stroke component that are in the selection.
- Type
The type to convert the splines in the selection to. Read the Spline Types page for more details on the different spline types.
- Bézier:
Convert to a Bézier spline. A spline converted from a poly spline gets vector handles, while one converted from NURBS or Catmull Rom spline gets auto handles.
Note
When converting from a NURBS spline to a Bézier spline, at least six points are needed. When the number of points is not a multiple of three a full conversion is not possible and the spline has to be truncated.
- NURBS:
Convert to a NURBS spline.
- Poly:
Convert to a poly spline.
- Catmull Rom:
Convert to a Catmull Rom spline.
- Handles
Take handle information into account in the conversion
Set Curve Resolution
Reference
- Mode:
Edit Mode
- Menu:
Stroke ‣ Set Curve Resolution
Sets the number of points generated along each curve segment (between two handles).
Reset UVs
Reference
- Mode:
Edit Mode
- Menu:
Stroke ‣ Set Curve Resolution
Reset UV transformation to default values.
