Modificador Onda
The Wave modifier adds a ripple-like motion to an object’s geometry.
Este modificador se encuentra disponible para objetos de tipo malla, jaula, curva, superficie y texto.
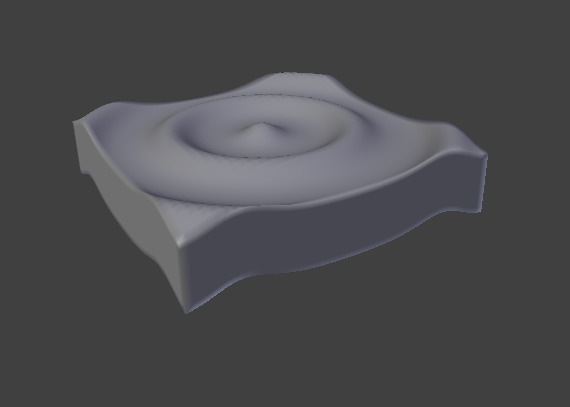
Circular wave front. |
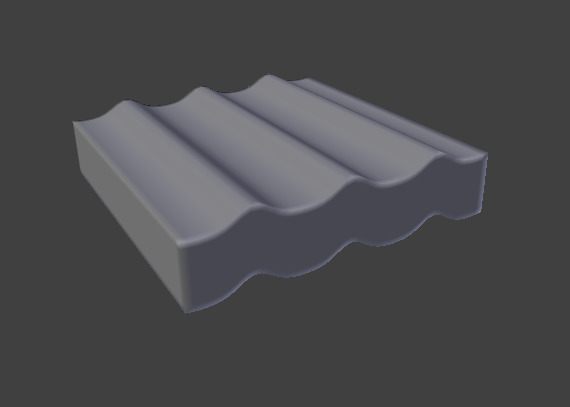
Linear wave front. |
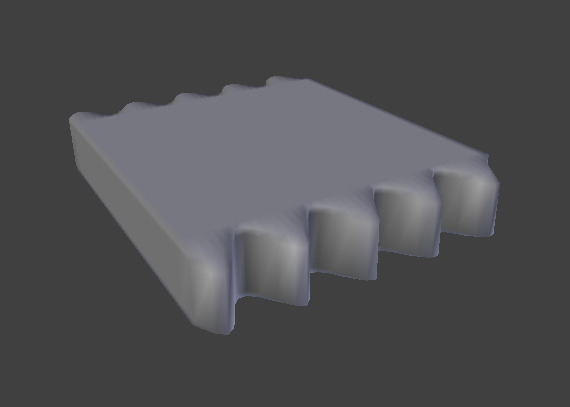
Motion enabled for X, Normals enabled for Y. |
Opciones
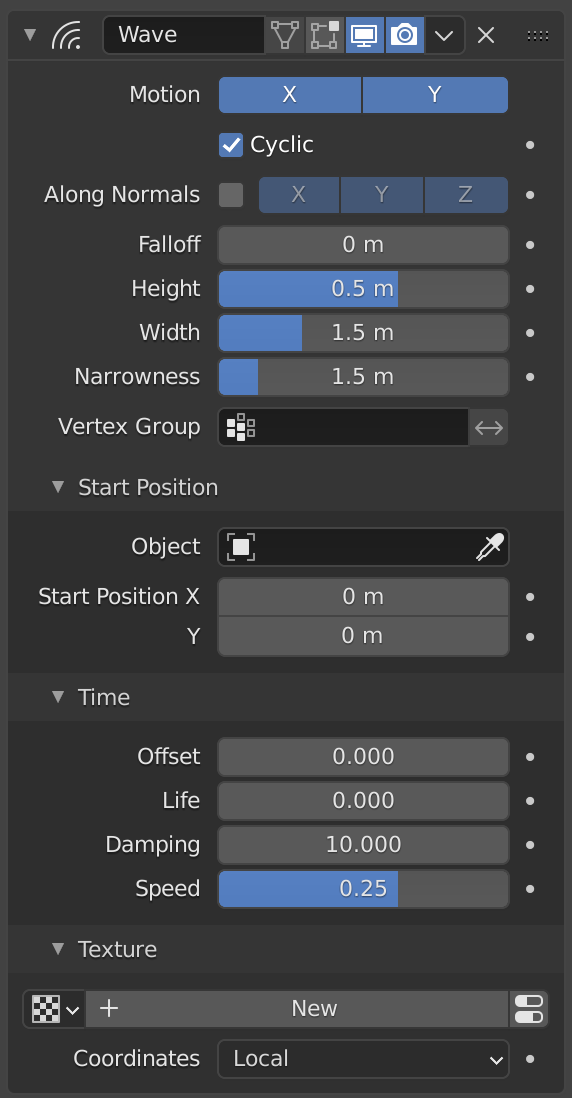
El modificador Onda.
- Movimiento
The wave effect deforms vertices/control points in the Z direction, originating from the given starting point and propagating along the object with circular wave fronts (if both X and Y are enabled), or with rectilinear wave fronts (if only one axis is enabled), then parallel to the axis corresponding to the X or Y button activated.
- Cíclica
Repeats the waves cyclically, rather than a single pulse.
- Alinear a normales
For meshes only. Displaces the mesh along the surface normals (instead of the object’s Z axis).
- X/Y/Z
Restrict displacement along normals to the selected local axes.
- Decaimiento
Controls how fast the waves fade out as they travel away from the coordinates above (or those of the Start Position Object).
- Altura
The height or amplitude of the ripple.
- Ancho
Half of the width between the tops of two subsequent ripples (if Cyclic is enabled). This has an indirect effect on the ripple amplitude. If the pulses are too near to each other, the wave may not reach the zero Z position, so in this case Blender actually lowers the whole wave so that the minimum is zero and, consequently, the maximum is lower than the expected amplitude. See Technical Details and Hints for more information.
- Estrechez
The actual width of each pulse: the higher the value the narrower the pulse. The actual width of the area in which the single pulse is apparent is given by
4 / Narrowness. That is, if Narrowness is 1 the pulse is 4 units wide, and if Narrowness is 4 the pulse is 1 unit wide.- Grupo de vértices
El nombre de un grupo de vértices que será usado para controlar el área de acción del modificador. Cuando se encontrara vacío, el modificador afectará de igual manera a todos los vértices.
- Invertir
<-> Invierte la influencia del grupo de vértices seleccionado, lo que significa que el grupo ahora representa vértices que no serán deformados por el modificador.
Esta opción invertirá los valores de las influencias del grupo.
- Invertir
Importante
All the values described above are in local object space, i.e. they must be multiplied with the corresponding Scale values of the object to get the real dimensions.
Posición inicial
- Objeto
Use another object as the reference for the starting position of the wave. Note that you then can animate this object’s position, to change the wave’s origin across time.
- Posición inicial X/Y
Coordinates of the center of the waves, in the object’s local space.
Tiempo
Ajustes para controlar la animación.
- Desplazamiento
Time offset in frames. The frame at which the wave begins (if Speed is positive), or ends (if Speed is negative). Use a negative frame number to prime and pre-start the waves.
- Vida
Duration of animation in frames. When set to zero, loops the animation forever.
- Amortiguación
An additional number of frames in which the wave slowly damps from the Height value to zero after Life is reached. The dampening occurs for all the ripples and begins in the first frame after the Life is over. Ripples disappear over Damping frames.
- Velocidad
The speed per frame, of the ripple.
Textura
You can finely control which vertices are affected by the wave, and to what extent, using a texture.
Ver opciones comunes de enmascaramiento para una completa referencia.
Detalles técnicos y consejos
The relationship of the above values is described here:
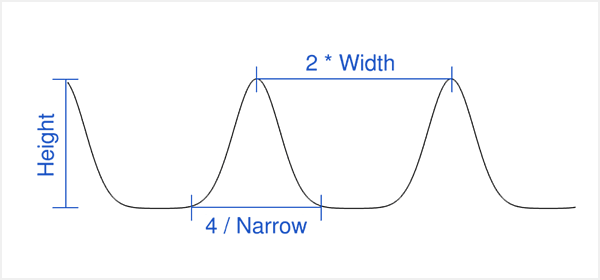
Wave front characteristics.
To obtain a nice wave effect similar to sea waves and close to a sinusoidal wave,
make the distance between following ripples and the ripple width equal. That is,
the Narrowness value must be equal to 2 / Width.
E.g. for Width to be 1, set Narrow to 2.