Courbe
Cette page couvre les bases de l’édition des courbes.
Transform
Référence
- Mode
Mode Édition
- Menu
A Bézier curve can be edited by transforming the locations of both control points and handles. NURBS curve on the other hand have only control points.
- Move, Rotate, Scale
Like other elements in Blender, curve control points and handles can be moved, rotated, or scaled as described in Basic Transformations.
- To Sphere, Shear, Warp, Bend, Push/Pull, Warp, Randomize
The transform tools are described in the Transformations sections.
- Move/Scale Texture Space
Like other objects, curves have textures spaces which can be edited.
Radius
Référence
- Mode
Mode Édition
- Tool
- Menu
- Hotkey
Alt-S
The Radius allows you to directly control the width of the extrusion along the « spinal » curve. The radius will be interpolated from point to point (you can check it with the normals). The Radius of the points is set using the Radius transform tool. Or in the Sidebar Transform panel.
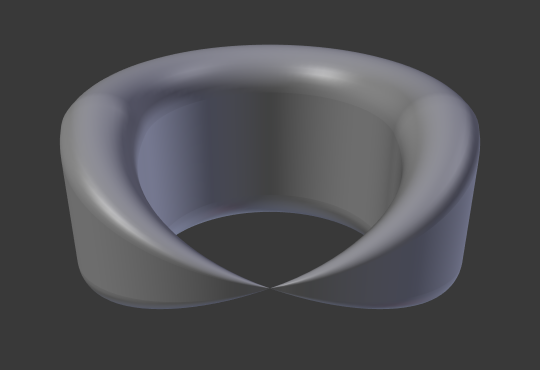
One control point radius set to zero.
Mirror
Référence
- Mode
Mode Édition
- Menu
- Hotkey
Ctrl-M
The Mirror tool is also available, behaving exactly as with mesh vertices.
Snap
Référence
- Mode
Mode Édition
- Menu
- Hotkey
Shift-S
Mesh snapping also works with curve components. Both control points and their handles will be affected by snapping, except for within itself (other components of the active curve). Snapping works with 2D curves but points will be constrained to the local XY axes.
Spin
Référence
- Mode
Mode Édition
- Menu
The Spin operator only works for one dimensional surface objects. Its use for curves is currently not possible, the full feature is documented in Surface editing.
Add Duplicate
Référence
- Mode
Mode Édition
- Menu
- Hotkey
Shift-D
This tool duplicates the selected control points, along with the curve segments implicitly selected (if any). If only a handle is selected, the full point will be duplicated too. The copy is selected and placed in select mode, so you can move it to another place.
Split
Référence
- Mode
Mode Édition
- Menu
- Hotkey
Y
The Split operator splits a selected segment of a curve from the rest of the curve. This curve can then be moved or altered without affecting the other curve. If a single control point is selected the Split operator will create a new singular loose control point; leaving the previously selected control point attached to the rest of the curve.
Separate
Référence
- Mode
Mode Édition
- Menu
- Hotkey
P
Curve objects that are made of multiple distinct curves can be separated into their own objects by selecting the desired segments and pressing P. Note, if there is only one curve in a Curve object, Separate will create a new Curve object with no control points.
Toggle Cyclic
Référence
- Mode
Mode Édition
- Menu
- Hotkey
Alt-C
This toggles between an open curve and closed curve (Cyclic). Only curves with at least one selected control point will be closed/open. The shape of the closing segment is based on the start and end handles for Bézier curves, and as usual on adjacent control points for NURBS. The only time a handle is adjusted after closing is if the handle is an Auto one. Fig. Open and Closed curves. is the same Bézier curve open and closed.
This action only works on the original starting control point or the last control point added. Deleting a segment(s) does not change how the action applies; it still operates only on the starting and last control points. This means that Alt-C may actually join two curves instead of closing a single curve! Remember that when a 2D curve is closed, it creates a renderable flat face.
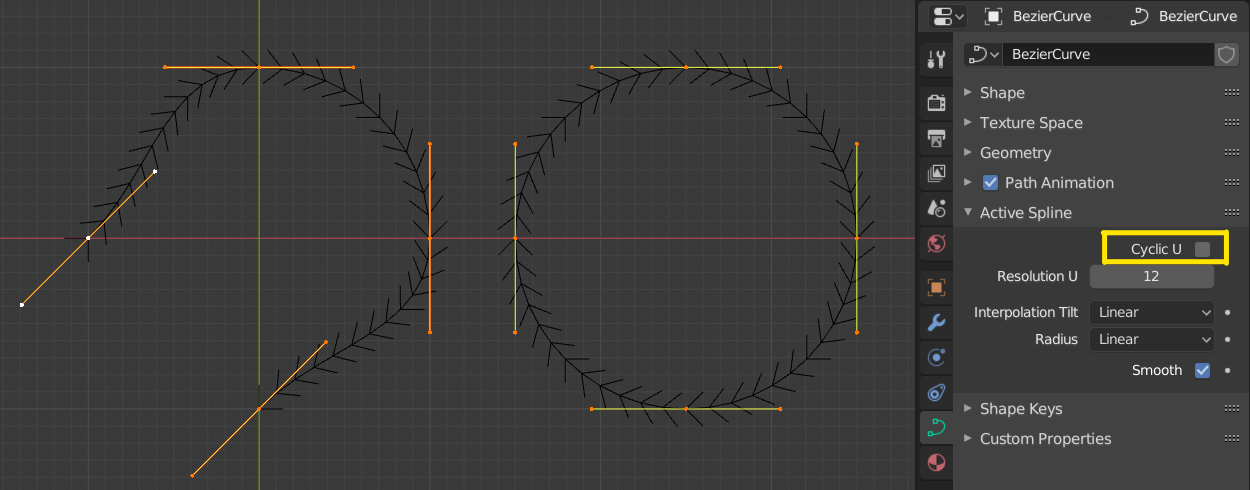
Open and Closed curves.
Set Spline Type
Référence
- Mode
Mode Édition
- Menu
Set Spline Type converts splines in a curve object between Bézier, NURBS, and Poly curves. Note, this is not a « smart » conversion, i.e. Blender does not try to keep the same shape, nor the same number of control points. For example, when converting a NURBS to a Bézier, each group of three NURBS control points become a unique Bézier one (center point and two handles).
Voir aussi
Convert To/from Mesh.
Show/Hide
Référence
- Mode
Mode Édition
- Menu
- Hotkey
Alt-H, H, Shift-H
When in Edit Mode, you can hide and reveal elements from the display. You can only show or hide control points, as segments are always shown, unless all control points of the connected curve are hidden, in which case the curve is fully hidden.
See Show/Hide in Object Mode. See also the Curve Display panel.
Cleanup
Decimate Curve
Référence
- Mode
Mode Édition
- Menu
The Decimate Curve operator reduces the number of control points while trying to maintain the curves original shape. This operator works similar to its mesh counterpart.
- Ratio
The percentage of control points to remove.
Note
This tool can only decimate Bézier curves.
Delete
Référence
- Mode
Mode Édition
- Menu
- Hotkey
X, Delete; Ctrl-X
Options for the Delete pop-up menu:
- Vertices
Les points de contrôle sélectionnés seront supprimés, sans rupture de la courbe (c’est-à-dire que les points adjacents seront directement reliés, joints, une fois que les points intermédiaires seront supprimés). N’oubliez pas que l’ordre NURBS ne peut pas être supérieur à son nombre de points de contrôle, il peut donc diminuer lorsque vous supprimez un point de contrôle. Bien entendu, lorsqu’il ne reste qu’un seul point, il n’y a plus de courbe visible, et lorsque tous les points sont supprimés, la courbe elle-même est supprimée.
- Segment
Supprime le segment qui relie les points de contrôle sélectionnés et les déconnecte.
- Dissolve Vertices Ctrl-X
Supprime les points de contrôle sélectionnés, tandis que le segment restant est ajusté à la courbe supprimée en ajustant ses poignées.

Avant la suppression.¶ |
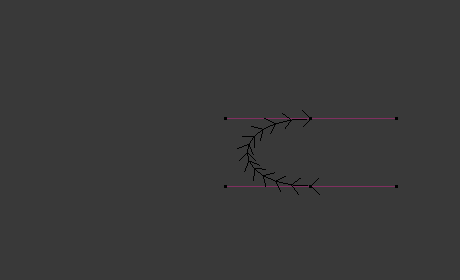
Suppression des sommets.¶ |
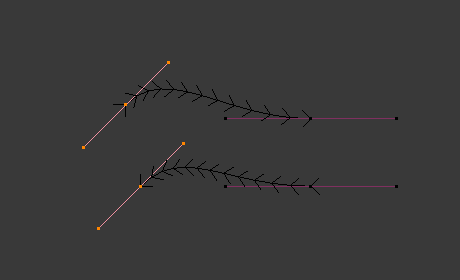
Suppression du segment.¶ |
Dissolution des osmmets.¶ |