Introduction
Constraints are a way to control an object’s properties (e.g. its location, rotation, scale), using either plain static values (like the «limit» ones), or another object, called «target» (like e.g. the «copy» ones).
Even though constraints are useful in static projects, their main usage is obviously in animation.
You can control an object’s animation through the targets used by its constraints (this is a form of indirect animation). Indeed, these targets can then control the constraint’s owner’s properties, and hence, animating the targets will indirectly animate the owner.
You can animate constraints” settings. e.g. the Influence or when using an armature’s bone as target, animate where along this bone (between root and tip) lays the real target point.
They can make the eyes of a tennis player track a tennis ball bouncing across the court, allow the wheels on a bus to all rotate together, help a dinosaur’s legs bend at the knee automatically, and make it easy for a hand to grip the hilt of a sword and the sword to swing with the hand.
Constraints, in Blender, work with Objects and Bones. Read about using constraints in rigging in the Armature chapter.

Object¶ |

Bone¶ |

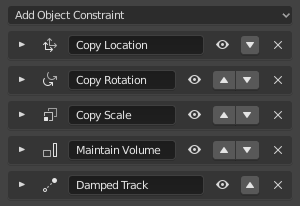
The Constraint Stack is evaluated from top to bottom.¶ |
Constraints work in combination with each other to form a Constraint Stack.
Tips
Constraints are a fantastic way to add sophistication and complexity to a rig.
But be careful not to rush in too quickly, piling up constraint upon constraint until you lose all sense of how they interact with each other.
Start simply. Get to know a single constraint inside and out. Copy Location Constraint is a good first constraint to explore it also has an animation example. Take the time to understand every fundamental concept behind it, and the other constraints will make far more sense.