はじめに
Image Editor では、画像やテクスチャなどの 2D アセットの表示/編集ができます。

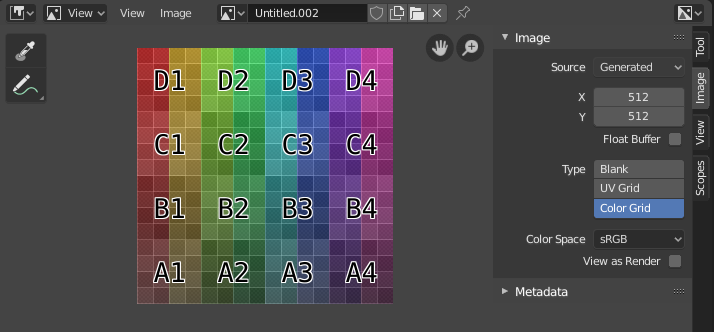
テスト用グリッドテクスチャが Image Editor に表示されています。
ツールバー
- Sample ツール
Blender 内の任意の場所から、ピクセルの色を採取するために使用します。
- Sample Size
ピクセルを採取する際の正方形のサイズです。1 より大きい場合、サンプル結果は、取得もとの全ピクセルの平均になります。
- Annotate
詳細については 注釈ツール を参照してください。
ヘッダー
- Mode
- View
画像を表示します。
- Paint
- Mask
Masking 。
- View
コンテンツをエディタ内でどのように表示するかを制御するツールです。ナビゲート を参照してください。
- Image
Tools for opening and manipulating images. See Editing.
- Image
画像を選択は データブロックメニュー で行います。Image Editor で画像の読み込みまたは作成が行われると、サイドバー領域 に Image パネルが表示されます。イメージの設定 を参照してください。
Render Result
Viewer Node
- Image Pin
Todo.
- Slot
You can save successive renders into the render buffer by selecting a new slot before rendering. If an image has been rendered to a slot, it can be viewed by selecting that slot. Empty slots appear as blank grids in the Image editor. Use the J and Alt-J to cycle forwards and backwards through saved renders. Alternatively you can use the number keys 1, 2, 3, etc, to select the slot with the corresponding number. A slot can be renamed by double clicking its name in the Image panel in the Sidebar.
- View Layer
View Layers を使用している場合、このメニューを使用して、表示させるレイヤーを選択できます。
- Render Pass
Render Passes を使用している場合、このメニューを使用して、表示させるパスを選択できます。
- Display Channels
Select what color channels are displayed.
- Color and Alpha
透明なピクセルをチェッカーボードの背景に置き換えることで、アルファチャンネルを示します。
- Color
アルファチャンネルなしの、色付き画像を表示します。
- Alpha
アルファチャンネルをグレースケール画像で表示します。白い領域は不透明で、黒の領域はアルファ値が 0 です。
- Z-Buffer
カメラセッティング での指定に従い、Clip Start から Clip End までのカメラの奥行きを表示します。
- Red, Green, Blue
単一のカラーチャンネルをグレースケール画像として視覚化します。
メインビュー
When LMB / RMB dragging mouse the color under the cursor is shown in the footer as well the cursor position and the color values in the RGBA, HSV and Luminance Color Space.