はじめに
The Image Editor lets you create, view, and edit images, as well as see render results and intermediate Compositor output.

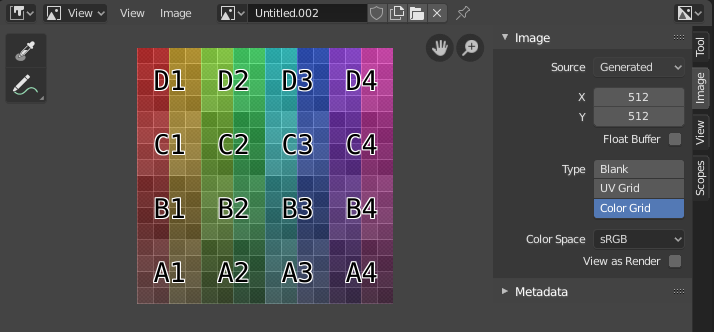
テスト用グリッドテクスチャが Image Editor(画像エディター) に表示されています。
Toolbar(ツールバー)
- Sample(サンプル)
Used to sample the color of one or more pixels in the image. As long as you hold LMB, the footer will show the following:
X and Y coordinates of the mouse cursor.
Color in RGBA.
Color in RGB after Color Management.
Color in HSV.
Luminance.
- Sample Size(サンプルサイズ)
The dimensions of the square used to sample underlying pixels. If larger than 1, the resulting sample is an average of all underlying pixels.
- Annotate(アノテート)
詳細については Annotations(アノテーション) を参照してください。
ヘッダー
- Mode(モード)
- View(ビュー):
Displays images.
- Paint(ペイント):
- Mask(マスク):
Masking 。
- View(ビュー)
コンテンツをエディタ内でどのように表示するかを制御するツールです。ナビゲート を参照してください。
- Image(画像)
Tools for opening and manipulating images. Shows an asterisk if the image has unsaved changes. See Editing(編集).
- Image(画像)
A data-block menu used for selecting images. Once an image is selected, the Image tab appears in the Sidebar region.
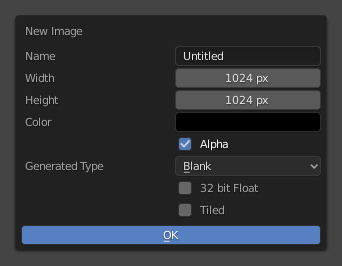
Apart from loading existing images, you can also create new ones:

The pop-over that's displayed when clicking "New Image" in the header.
The Tiled option creates an image with support for UDIM. For the other options, see Generated Images.
In addition to images, the data-block selector includes the following items:
Render Result: displays renders. When this item is selected, the Slot, View Layer, and Render Pass selectors become available (see below).
Viewer Node: displays the image that's fed into the Viewer(ビューアー)ノード in the Compositor.
- Image Pin(画像を固定)
Prevents the Image Editor from automatically switching to the texture of the selected object. (This switching only happens if the 3D Viewport is in Texture Paint mode).
- Slot(スロット)
The render slot to view (and render to). You can create new renders without losing previous ones by selecting an empty slot before rendering. Afterwards, you compare them by pressing J and Alt-J to cycle forwards and backwards. Alternatively, you can use the number keys 1, 2, 3 etc. to select the slot with the corresponding number.
Slots can be renamed by double clicking their name in the Image panel in the Sidebar.
- View Layer(ビューレイヤー)
The View Layer to display.
- Render Pass(レンダーパス)
The Render Pass to display.
- Viewport Gizmos(ビューポートギズモ)
Lets you show/hide all gizmos using the toggle button, or specific gizmos using the drop-down arrow.
- Display Channels(表示チャンネル)
Select which color channels are displayed.
- Color & Alpha:
Enables transparency and shows a checkerboard behind the image.
- Color(カラー):
Disables transparency.
- Alpha(アルファ):
Displays the alpha channel as a grayscale image. White areas are opaque, black areas are transparent.
- Z-Buffer(Zバッファー):
Displays the depth from the camera, from Clip Start to Clip End, as specified in the Camera settings.
- Red(赤)、Green(緑)、Blue(青):
Single color channel visualized as a grayscale image.
メインビュー
Holding RMB will sample the image just like the Sample tool, except it will always sample only one pixel.