작업공간(workspace)
작업공간 은 미리 정해놓은 화면 구조(layout)에요. 블렌더에서는 영역(area) 을 자유자재로 움직일 수 있어서 자기가 원하는 대로 작업공간을 만들어낼 수 있어요. 모델링, 애니메이션, 스크립트 등 필요한 작업에 따라 하나의 파일 안에서 여러 개의 작업공간을 쓸 수 있죠.

Workspaces are located at the Topbar.
조작
- 탭
Click on the tabs titles to switch between the workspaces. To cycle between workspaces use Ctrl-PageUp and Ctrl-PageDown. Double click to rename the workspace.
+추가 버튼더하기 버튼을 누르면 새 작업공간을 만들 수 있답니다.
- RMB 우클릭 메뉴
우클릭 메뉴로 복제, 삭제, 순서 바꾸기도 할 수 있어요.
블렌더의 기본 작업공간들
Blender’s default startup shows the 《Layout》 workspace in the main area. This workspace is a general workspace to preview your scene and objects and contains the following 편집기(editor):
3D Viewport on top left.
Outliner on top right.
Properties on bottom right.
Timeline on bottom left.
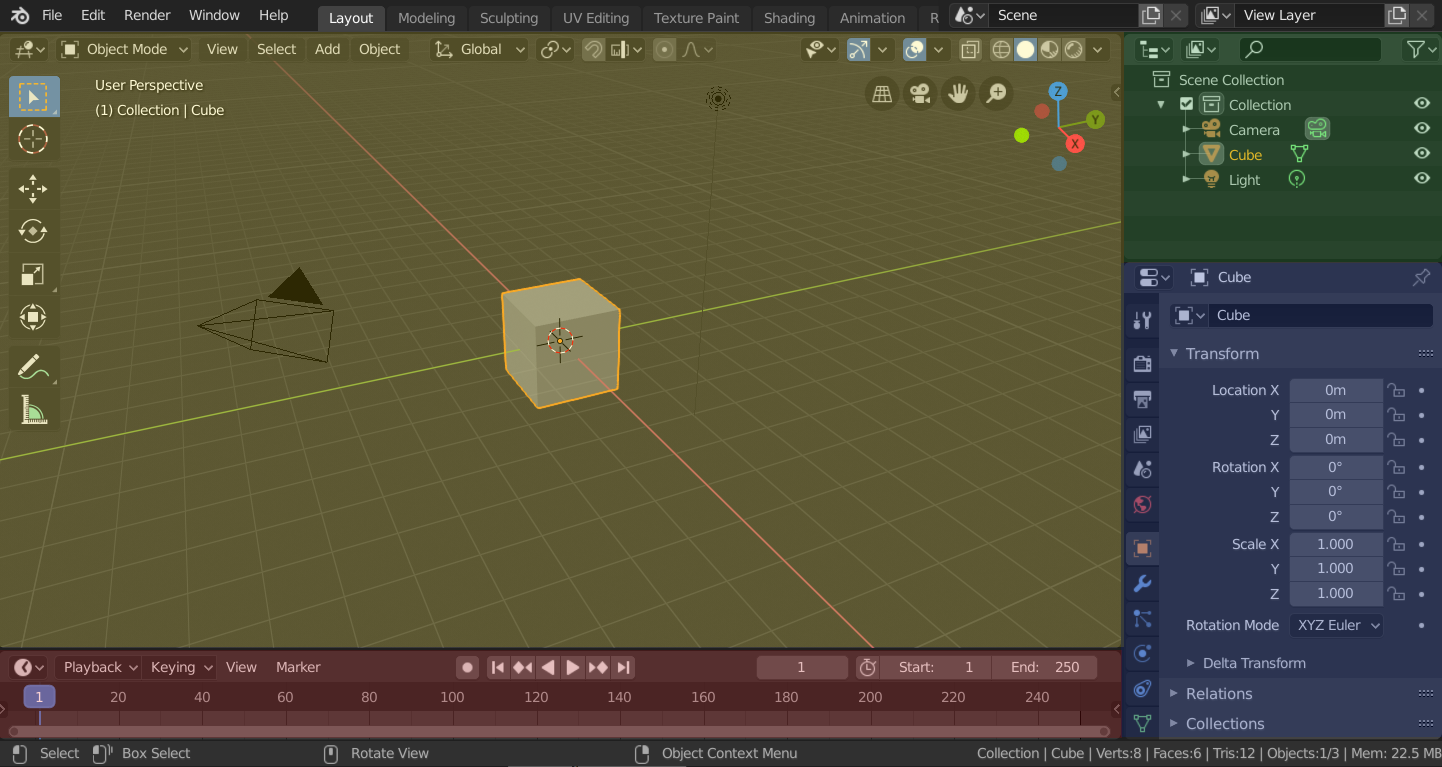
Blender’s 〈Layout〉 Workspace with four editors.
3D Viewport (yellow), Outliner (green), Properties (blue) and Timeline (red).
Blender also has several other workspaces added by default:
- Modeling
모델링(modeling) 도구로 입체도형을 수정하는 곳
- Sculpting
조각(sculpting) 도구로 모형을 빚는 곳
- UV Editing
2D 이미지를 3D 입체도형 위에 씌우는(mapping) 곳
- Texture Paint
Tools for coloring image textures in the 3D Viewport.
- Shading
렌더하기 위해서 재질을 다루는 곳
- Animation
시간의 흐름에 따라 오브젝트가 움직이게 하는 곳
- Rendering
렌더 결과를 보면서 분석하는 곳
- Compositing
렌더 출력을 이미지로 합성하는 곳
- Scripting
스크립트(script)로 프로그래밍(programming)하는 곳
Additional Workspaces
Blender has a couple additional Workspaces to choose from when adding a new Workspace:
2D Animation
- 2D Animation
General workspace to work with Grease Pencil.
- 2D Full Canvas
Similar to 《2D Animation》 but contains a larger canvas.
VFX
- Masking
Tools to create 2D masks for compositing.
- Motion Tracking
Tools to motion track and stabilize footage.
Video Editing
- Video Editing
Sequence together media into one video.