Введение
Shape keys are used to deform objects into new shapes for animation. In other terminology, shape keys may be called «morph targets» or «blend shapes».
The most popular use cases for shape keys are in character facial animation and in tweaking and refining a skeletal rig. They are particularly useful for modeling organic soft parts and muscles where there is a need for more control over the resulting shape than what can be achieved with combination of rotation and scale.
Shape keys can be applied on object types with vertices like mesh, curve, surface and lattice.

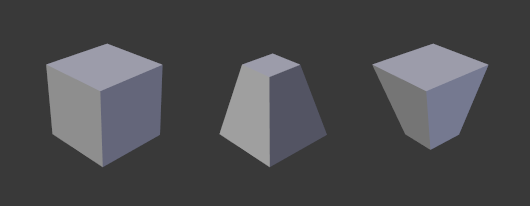
Example of a mesh with different shape keys applied.
Рабочий процесс
Shape keys are authored in the Shape Keys panel which is accessed in the Object Data tab of the Properties (e.g. the Mesh tab for mesh objects).
A shape key is modified by first selecting a shape key in the panel, and then moving the object’s vertices to a new position in the 3D Viewport.
The panel has controls for affecting the current Value (influence, weight) of a shape. It is possible to see a shape in isolation or how it combines with others.
Adding and Removing Vertices
It is not possible to add or remove vertices in a shape key. The number of vertices and how they connect is specified by the mesh, curve, surface or lattice. A shape key merely records a position for each vertex and therefore shapes always contain all the object’s vertices.
When adding a vertex, all shape keys will record it with the position in which it is created. Workflow-wise, adding and deleting vertices after creating shape keys is possible, but it is best to leave the creation of shape keys for when the mesh is finished or its topology is stable.
Adding Shape Keys
When adding a new shape key with the + button next to the list,
the new shape will be a copy of the Basis shape,
independently of the current result visible in the 3D Viewport.
When adding a new shape key from , the shape will start of with the vertex configuration that is visible at that moment.
When doing facial animation with relative shape keys, it can be useful to first create a shape key with a complex extreme pose (e.g. anger or surprise), and then break this complex shape into components by applying a temporary vertex group to the complex shape and creating a copy with New Shape from Mix. This technique helps reducing conflicts between different shape keys that would otherwise produce a double effect.
Relative or Absolute Shape Keys
A mesh (curve, surface or lattice) has a stack of shape keys. The stack may be of Relative or Absolute type.
- Relative
Mainly used for muscles, limb joints, and facial animation.
Each shape is defined relative to the Basis or to another specified shape key.
The resulting effect visible in the 3D Viewport, also called Mix, is the cumulative effect of each shape with its current value. Starting with the Basis shape, the result is obtained by adding each shape’s weighted relative offset to its reference key.
- Value
Represents the weight of the blend between a shape key and its reference key.
A value of 0.0 denotes 100% influence of the reference key and 1.0 of the shape key. Blender can extrapolate the blend between the two shapes above 1.0 and below 0.0.
- Basis
Basis is the name given to the first (top-most) key in the stack.
The Basis shape represents the state of the object’s vertices in their original position. It has no weight value and it is not keyable. This is the default Reference Key when creating other shapes.
- Absolute
Mainly used to deform the objects into different shapes over time.
Each shape defines how the object’s shape will be at Evaluation Time specified in its Value.
The resulting shape, or Mix, is the interpolation of the previous and next shape given the current Evaluation Time.
- Value
Represents the Evaluation Time at which that shape key will be active.
- Basis
Basis is the name given to the first (topmost) key in the stack.
The Basis shape represents the state of the object’s vertices in their original position.