Uvod

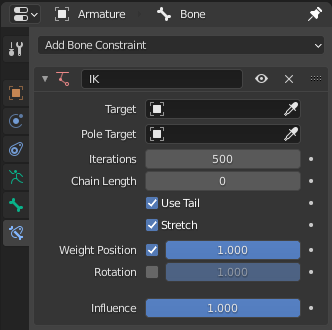
The Bone Constraints Properties in Pose Mode, with an Inverse Kinematics constraint added to the active bone.
As bones behave like objects in Pose Mode, they can also be constrained. This is why the Constraints tab is shown in both Object Mode and Edit Mode. This panel contains the constraints of the active bone (its name is displayed at the top of the panel, in the To Bone:… static text field).
Constraining bones can be used to control their degree of freedom in their pose transformations, using e.g. the Limit constraints. You can also use constraints to make a bone track another object/bone (inside the same object, or in another armature), etc. And the inverse kinematics feature is also mainly available through the IK Solver constraint, which is specific to bones.
For example, a human elbow cannot rotate backward (unless the character has broken their arm), nor to the sides, and its forward and roll rotations are limited in a given range. (E.g. depending on the rest position of your elbow, it may be from (0 to 160) or from (-45 to 135).)
So you should apply a Limit Rotation constraint to the forearm bone (as the elbow movement is the result of rotating the forearm bone around its root).
Using bones in constraints, either as owners or as targets, is discussed in detail in the constraints pages.