Proportional Editing Tool
Relevant to Blender v2.31
When working with dense meshes, it can become difficult to make subtle adjustments to the vertices without causing nasty lumps and creases in the model's surface. When you face situations like these, use the proportional editing tool. It acts like a magnet to smoothly deform the surface of the model, without creating lumps and creases.
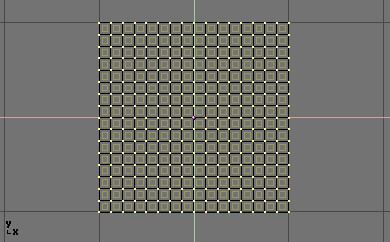
In a top-down view, add a plane mesh to the scene with SPACE>>Add>>Mesh>>Plane. Subdivide it a few times with WKEY>>Subdivide (or by clicking on the Subdivide button in the Editing Context Mesh Tools Panel) to get a relatively dense mesh (Figure 20). Or, add a grid directly via SPACE>>Add>>Mesh>>Grid, specifying the number of vertices in each direction. When you are finished, deselect all vertices with AKEY.
 | Vertex limit |
|---|---|
In Blender, up to 2.31, a single mesh can have no more than 65,000 vertices. From 2.32 onwards meshes can have 2 billion vertices. |
Select a single vertex in the mesh by clicking it with RMB (Figure 21).

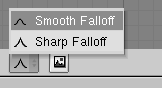
While still in EditMode, activate the proportional editing tool by pressing OKEY or by using the Mesh>>Proportional Editing Menu entry (Figure 22 top).
Switch to a front view (NUM 1) and activate the grab tool with GKEY. As you drag the point upwards, notice how nearby vertices are dragged along with it (Figure 23).
Change the curve profile used by either using the Mesh>>Proportional Faloff submenu or by pressing SHIFT-O to toggle between the two options Sharp and Smooth. Note that you cannot do this while you are in the middle of a proportional editing operation; you will have to press ESC to cancel the editing operation before you can change the curve.
When you are satisfied with the placement of the vertex, press LMB to fix its position. If you are not satisfied, nullify the operation and revert your mesh to the way it looked before you started dragging the point with ESC key.
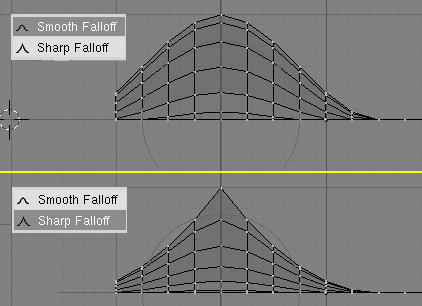
While you are editing you can increase or decrease the radius of influence (shown by the dotted circle in Figure 23) by pressing NUM+ and NUM- respectively. As you change the radius, the points surrounding your selection will adjust their positions accordingly. You can also use MW to enlarge and shrink the circle.
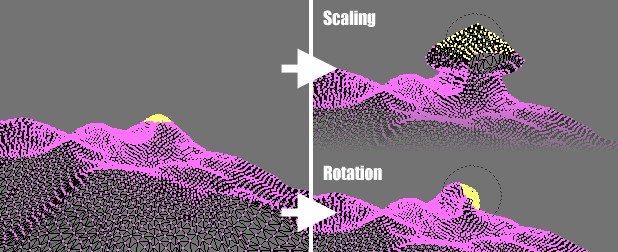
You can use the proportional editing tool to produce great effects with the scaling (SKEY) and rotation (RKEY) tools, as Figure 24 shows.
Combine these techniques with vertex painting to create fantastic landscapes.
Figure 25 shows the results of proportional editing after the application of textures and lighting.