Environment Maps
Relevant to Blender v2.31
The shiny surfaces that Blender generates show specular highlights. The ironic thing about these specular shaders, though, is that they are sensitive only to lamps. Specifically, specular shaders surfaces show you a bright spot as a mirror-like reflection of a lamp.
This all makes sense except that if you turn the camera directly toward the lamp you won't see it! The camera sees this light only if it is being reflected by a specular shader, not directly. On the other hand, objects that appear very bright in your scene (that reflect a lot of light to the camera) but are not lamps don't show up in these highlights.
It is easy enough to make a lamp which is directly visible to the camera by placing some renderable object in the scene which looks like some appropriate sort of lamp fixture, flame, sun, and so on. However, there is no immediate fix for the fact that surrounding objects do not show up on specular highlights.
In a word, we lack reflections. This is the sort of problem we will address using the technique of environment mapping.
Just as we render the light that reaches the viewing plane using the camera to define a viewpoint, we can render the light that reaches the surface of an object (and hence, the light that might ultimately be reflected to the camera).
Blender's environment mapping renders a cubic image map of the scene in the six cardinal directions from any point. When the six tiles of the image are mapped onto an object using the Refl input coordinates, they create the visual complexity that the eye expects to see from shiny reflections.
 | It's useful to remember here that the true goal of this technique is believability, not accuracy. The eye doesn't need a physically accurate simulation of the light's travel; it just needs to be lulled into believing that the scene is real by seeing the complexity it expects. The most unbelievable thing about most rendered images is the sterility, not the inaccuracy. |
The first step to follow when creating an environment map is to define the viewpoint for the map. To begin, add an empty to the scene and place it in the specular position of the camera with respect to the reflecting surface. (This is possible, strictly speaking, only for planar reflecting surfaces.)
Ideally, the location of the empty would mirror the location of the camera across the plane of the polygon onto which it is being mapped. It would be ridiculously difficult to create a separate environment map for every polygon of a detailed mesh, so we take advantage of the fact that the human eye is very gullible.
In particular, for relatively small and complex objects, we can get away with simply placing the empty near the center. We name the empty env so that we can refer to it by name in the environment map settings.
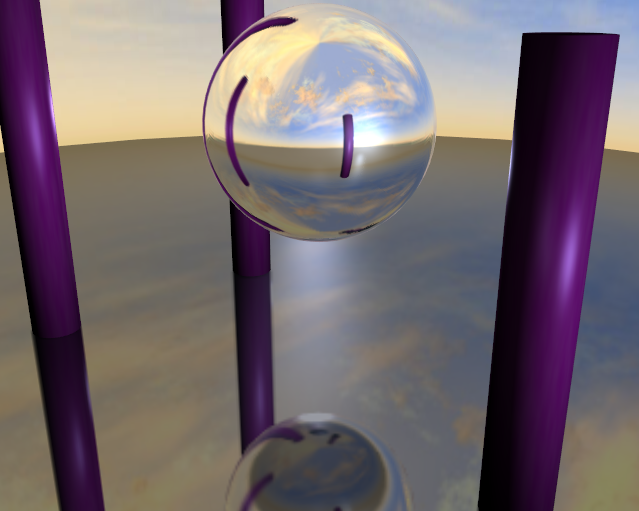
We will create a reflective sphere over a reflective plane, using the set up depicted in Figure 21.
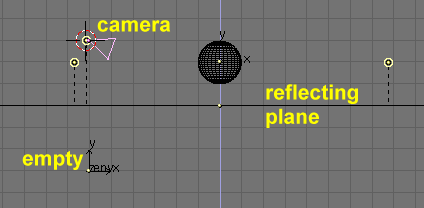
Note the 'env' Empty is placed exactly below the camera, at a distance from the reflecting plane equal to 3 blender units, which is equal to the height of the camera over the same plane.
Now, let's place some lights, leave the sphere without a given material, and move the plane to a different layer. For example, say that everything is on layer 1, except for the plane which is in layer 2.
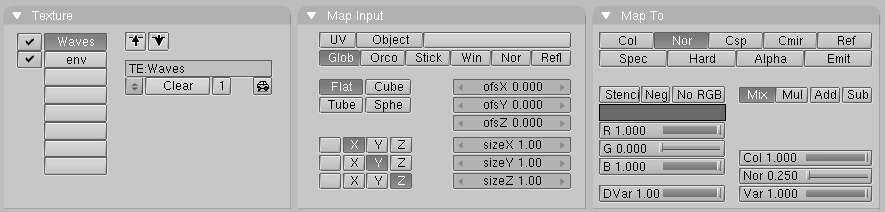
Give the plane a low Ref and Spec material and add a texture on channel two with the parameters in Figure 22.
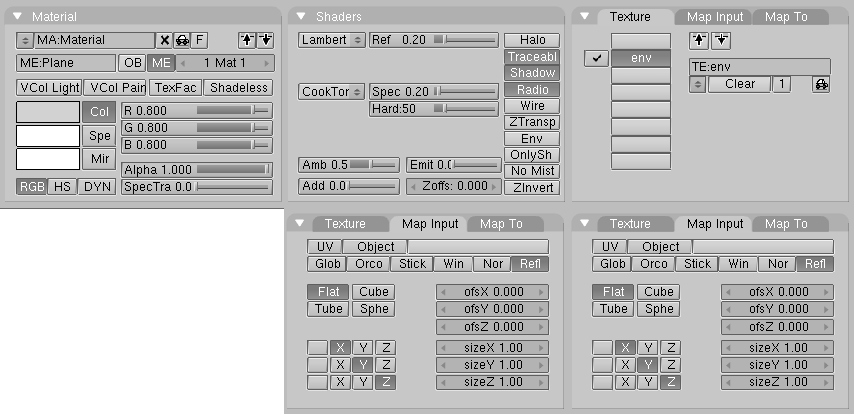
Note both the Refl mapping and the Cmir effect. We use channel 2 and not 1 because we will need channel 1 later on in this example.

Now define the newly assigned texture as an EnvMap in the Texture Buttons (F6) (Figure 23). In the Envmap Panel, note the Ob: field containing the name of the Empty with respect to which we compute the EnvMap. Note also the resolution of the cube on which the EnvMap will be computed and, most important, the Don't render layer: buttons.
Because the EnvMap is computed from the Empty location it must have an unobstructed view of the scene. Since the reflecting plane would completely hide the sphere, it must be on its own layer which must be marked as 'Not renderable' for the EnvMap calculation.
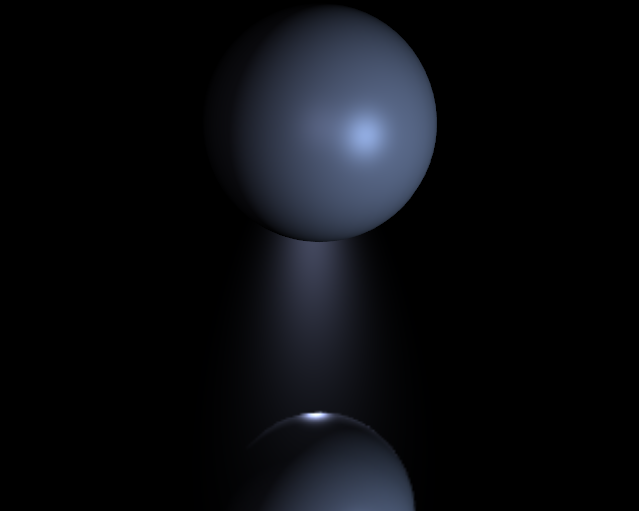
Pressing F12 starts the rendering process. First, six different square images comprising the EnvMap are computed, after which the final image is produced, of the sphere reflected over the plane.
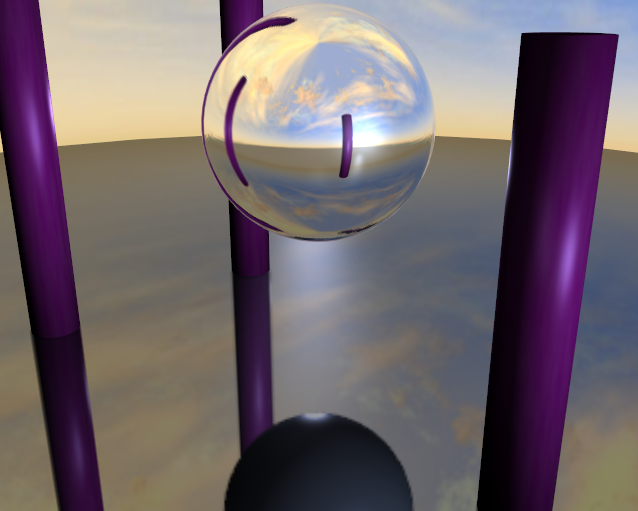
To add more visual appeal to the scene, add a big sphere encompassing the whole scene and map a sky image onto it to fake a real, cloudy world. Then add a new Empty in the center of the Sphere and move the Sphere to Layer 3. Next, give the sphere an EnvMap exactly as you did for the plane (but this time layer 3 must not be rendered!)
Now add some cylinders, to make the environment even more interesting, and, before pressing F12 return to the plane's texture and press the Free Data button. This will force Blender to recalculate the EnvMap for the new, different, environment.
This time in the rendering process twelve images, six for each EnvMap, will be computed. The result is in Figure 25. The sphere is shiner than the plane due to slightly different settings in the materials.
But wait, there is a problem! The Sphere reflects the Plane, but the Plane reflects a dull grey Sphere! This is because the Plane EnvMap is computed before the sphere EnvMap. As such, when it is computed the sphere is still dull grey, while when the Sphere EnvMap is computed the plane already has its Reflection.
To fix this locate the Depth Num Button in the Envmap panel of the Texture buttons and set it to 1 both for the plane and the sphere EnvMap texture. This force recursive computation of EnvMaps. Each EnvMap is computed, then they are recomputed as many times as 'Depth' is set to, always one after the other. The result is in to fix this Figure 26.
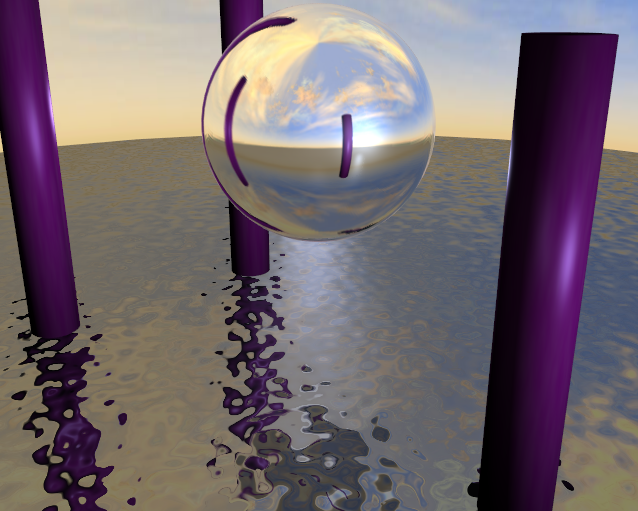
Now, if you are still wondering why the first texture channel of the Plane material was kept empty... Add a new texture to the first channel of the plane material. Make it Glob, affecting the Nor with a 0.25 intensity (Figure 27).
This new texture should be of Stucci type; tune the Noise Size down to 0.15 or so. If you now render the image the plane will look like rippled water (Figure 28).
You must have the BumpMap on a channel preceding the EnvMap because textures are applied in sequence. If you were to do this the other way around the reflection would appear to be broken by waves.
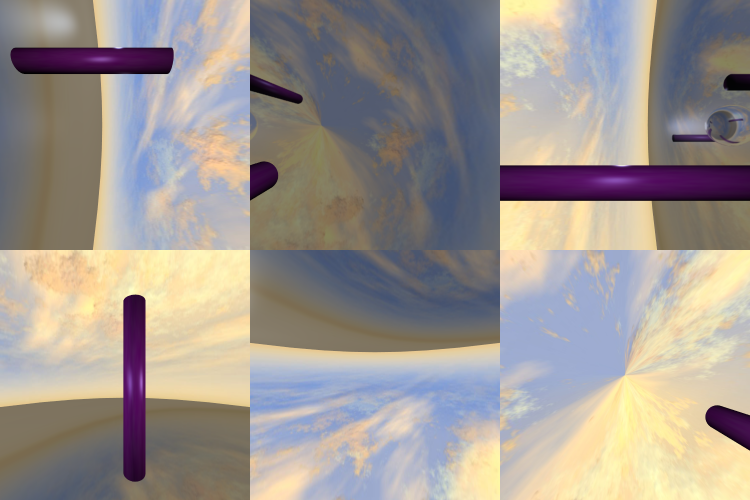
You can save EnvMaps for later use and load them with the pertinent buttons in the Texture Buttons. You can also build your own envmap. The standard is to place the six images mapped on the cube on two rows of three images each, as in Figure 29.
Blender allows three types of environment maps, as you can see in Figure 23:
Static - The map is only calculated once during an animation or after loading a file.
Anim - The map is calculated each time a rendering takes place. This means moving Objects are displayed correctly in mirroring surfaces.
Load - When saved as an image file, environment maps can be loaded from disk. This option allows the fastest rendering with environment maps.
| You can animate the water of the previous example by setting an IPO for the ofsX and ofsY values of the texture placement in the Material Buttons. Rendering the animation would then show moving ripples on the surface, with reflections changing accordingly! |
| The EnvMap of the Plane needs to be computed only once at the beginning if nothing else moves! Hence it can be static. The Envmap on the sphere is another matter, since it won't reflect the changes in the reflections in the water unless it is computed at each frame of the animation. Hence it should be of type Anim. |
If the camera is the only moving object and you have a reflecting plane, the Empty must move too and you must use Anim EnvMaps. If the object is small and the Empty is in its center, the EnvMap can be Static, even if the object itself rotates since the Empty does not move. If, on the other hand, the Object translates the Empty should follow it and the EnvMap be of Anim type.
Other settings are:
Filter: - With this value you can adjust the sharpness or blurriness of the reflection.
Clipsta, ClipEnd - These values define the clipping boundaries when rendering the environment map images.
| EnvMap calculation can be disabled at a global level by the EnvMap Tog Button in the Render Panel of the Rendering Buttons. |