Rendering Animations
Relevant to Blender v2.31
The rendering of an animation is controlled via the Anim Panel (Figure 16).
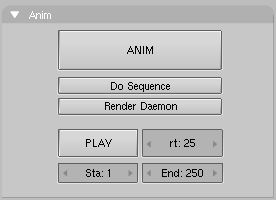
The ANIM button starts the rendering. The first and last frames of the animation are given by the two NumButtons at the bottom (Sta: and End:), and by default are 1 and 250.
By default the 3D scene animation is rendered, to make use of the sequence editor the Do Sequence Tog Button must be selected.
By default the animation is rendered in the directory specified in the Output Panel (Figure 17). If an AVI format has been selected, then the name will be ####_####.avi where the '####' indicates the start and end frame of the animation, as 4 digit integers padded with zeros as necessary.
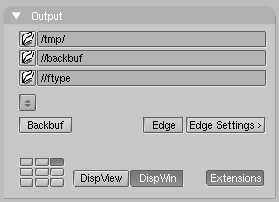
If an image format is chosen, on the other hand, a series of images named ####, ('####' being the pertinent frame number) is created in the directory. If the file name extension is needed, this is obtained by pressing the Extensions Tog Button (Figure 17).
 | Complex animations |
|---|---|
Unless your animation is really simple, and you expect it to render in half an hour or less, it is always a good idea to render the animation as separate Targa frames rather than as an AVI file from the beginning. This allows you an easy recovery if the power fails and you have to re-start the rendering, since the frames you have already rendered will still be there. It is also a good idea since, if an error is present in a few frames, you can make corrections and re-render just the affected frames. You can then make the AVI out of the separate frames with Blender's sequence editor or with an external program. |