Modifiers
Reference
- Panel

Modifiers are used to make adjustments on the image, like contrast, brightness, saturation, color balance and applying masks.
You can add these modifiers directly to the selected strip, or you can use it within an "Adjustment Layer" effect strip, which allows you to apply these modifiers onto several strips the same time.
- Use Linear Modifiers
Calculate modifiers in linear space instead of sequencer space.
- Copy to Selected Strips
Allows you to copy the modifiers to selected strips. This works two ways, you can either replace the old modifiers or append/add to the previous modifiers.
Common Options
Each modifier has several buttons at its top:
- Mute (eye icon)
Disables the modifier. Very useful to compare the image, with / without modifications.
- Move (up/down arrow icon)
The next two buttons are used to change the modifier's position in the stack.
- Remove
X The cross is to delete the modifier from the stack.
Input Mask Type
- Strip
Use this to apply the modification on the whole image, or to use another strip's image (with alpha channel) for masking the modifier (and only this modifier), by choosing it in the "Mask" select menu.
- Mask
This allows you to choose a Mask created in the Mask editor which will limit the modification to the masked image's zones.
Types
Currently, the following modifiers are supported:
Bright/Contrast Modifier
Adjusts the brightness and contrast of the modifier input.
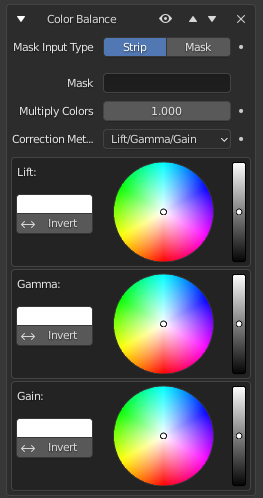
Color Balance Modifier
Color balance adjustments, either by the Lift, Gamma, and Gain or the Slope, Offset and Power method.
This modifier works similar to the Color Balance Node.

Depending on the selected method, the following operations can be applied to the color values in the sequencer color space:
- Lift/Gamma/Gain
- Lift
Increases the value of dark colors.
- Gamma
Adjusts midtones.
- Gain
Adjusts highlights.
- Offset/Power/Slope (ASC-CDL)
The following formula is applied to each RGB color value separately: \(c_{out} = (c_{in}*s + o)^p\)
- Slope
The multiplier \(s\) influences all color values except black. Its effect is stronger the brighter the source color is.
- Offset
Shifts color values after applying Slope by adding the Offset \(o\) to them. Note that the selected value shown in the UI will be subtracted by 1, so the default value of 1 means effectively no offset is applied.
- Power
Over-all exponent \(p\), which mainly adjusts the midtones.
Curves Modifier
Color and RGB curves.
This modifier works the same as the Curves Node.
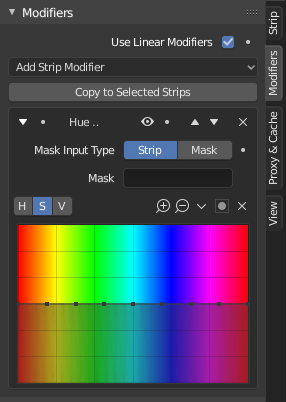
Hue Correct Modifier
HSV multi points curves.
This modifier works the same as the Curves Node.
Mask Modifier
Use it for masking the other modifiers in the stack which are below.
For example, to correct the brightness only on a certain zone of the image, you can filter the Bright/Contrast modifier by placing a Mask modifier, just before it in the stack. You can choose to use a Mask created in the Mask editor, or to use another strip as a mask (the image of this strip must have an alpha channel). This mask will be applied on all the others modifiers below it in the stack.
Tone Map Modifier
Used to map one set of colors to another in order to approximate the appearance of high dynamic range images in a medium that has a more limited dynamic range.
This modifier works the same as the Tone Map Node.
White Balance Modifier
Use it to adjust the white balance by choosing the color that should be white.