Normals
See also
The Normal Edit Modifier can be used to edit normals.
The Weighted Normal Modifier can be used to affect normals by various methods, including Face Strength (see below).
You can also copy normals from another mesh using Data Transfer (operator or modifier).
Shading
Reference
| Mode: | Object Mode |
|---|---|
| Menu: |
Reference
| Mode: | Edit Mode |
|---|---|
| Menu: | |
| Menu: |
Flat

|
|
As seen in the previous sections, polygons are central to Blender. Most objects are represented by polygons and truly curved objects are often approximated by polygon meshes. When rendering images, you may notice that these polygons appear as a series of small, flat faces. Sometimes this is a desirable effect, but usually we want our objects to look nice and smooth.
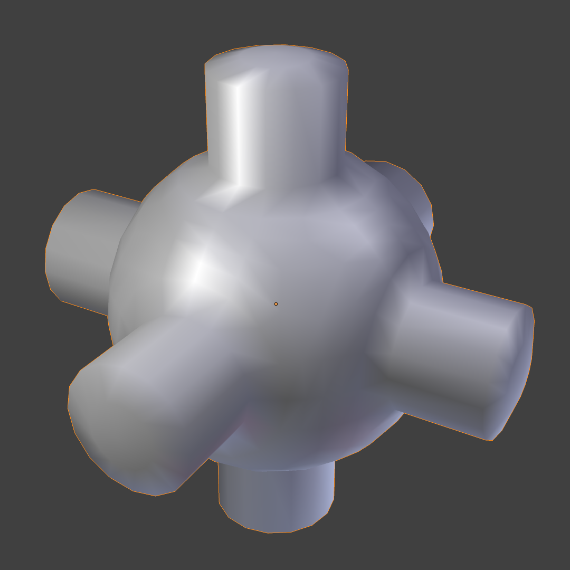
Smooth
The easiest way is to set an entire object as smooth or faceted by selecting a mesh object, and in Object Mode, select Shade Smooth in the Object menu. This forces the assignment of the “smoothing” attribute to each face in the mesh, including when you add or delete geometry.
Notice that the outline of the object is still strongly faceted. Activating the smoothing features does not actually modify the object’s geometry; it changes the way the shading is calculated across the surfaces (normals will be interpolated), giving the illusion of a smooth surface.
Select the Shade Flat item in the Object menu to revert the shading back (normals will be constant) to that shown in the first image above.
Smoothing Parts of a Mesh
Alternatively, you can choose which faces to smooth by entering Edit Mode, then selecting some faces and picking Shade Smooth from the Face Menu.
When the mesh is in Edit Mode, only the selected faces will receive the “smoothing” attribute. You can set faces as flat (removing the “smoothing” attribute) in the same way by selecting edges and picking the Shade Flat from the Face Menu.
See also
The Auto Smooth option is a quick and easy way to combine smooth and faceted faces in the same object.
Face Strength
Another way to affect normals is to set a Face Strength on the faces of the model. The Face Strength can be either Weak, Medium, or Strong. The idea is that the Weighted Normal Modifier can be set to pay attention to the Face Strength as follows: when combining the normals that meet at a vertex, only the faces with the strongest Face Strength will contribute to the final value.
For example, if three faces meet at a vertex and have the face weights weak, medium, and strong, then only the normal associated with the strong face will be used to set the final result.
Tools
Flip Direction
Reference
| Mode: | Edit Mode |
|---|---|
| Menu: |
This will reverse the normals direction of all selected faces. Note that this allows you to precisely control the direction (not the orientation, which is always perpendicular to the face) of your normals, as only selected ones are flipped.
Recalculate Normals
Reference
| Mode: | Edit Mode |
|---|---|
| Menu: | and |
| Hotkey: | Ctrl-N and Shift-Ctrl-N |
These tools will recalculate the normals of selected faces so that they point outside (respectively inside) the volume that the face belongs to. The volume does not need to be closed; inside and outside are determined by the angles with adjacent faces. This means that the face of interest must be adjacent to at least one non-coplanar other face. For example, with a Grid primitive, recalculating normals does not have a meaningful result.
Set From Faces
Reference
| Mode: | Edit Mode |
|---|---|
| Menu: |
Set the custom normals at corners to be the same as the face normal that the corner is part of.
Rotate
Reference
| Mode: | Edit Mode |
|---|---|
| Menu: | |
| Hotkey: | R N |
This is an interactive tool. As you move the mouse around, the selected normals are rotated. You can also invoke the Rotate Normals tool by typing the Rotate transform key, R followed by N.
Point to Target
Reference
| Mode: | Edit Mode |
|---|---|
| Menu: | |
| Hotkey: | Alt-L |
All selected normals are set to point from their vertex to the target after confirmed by Return or LMB.
A target is set by the keys:
- The mouse cursor M
- The pivot L
- The object origin O
- The cursor (set at this click) Ctrl-LMB
- A mesh item selection (set by this click) Ctrl-RMB.
- Mode
The tool operation can be modified; if one of the following keys has been previously pressed:
- Align A
- Then all normals will point in the same direction: from the center of selected points to the target.
- Spherize S
- Then each normal will be an interpolation between its original value and the direction to the target.
- Invert I
- Then the normal directions are reversed from what was specified above.
- Reset R
- Will reset the custom normals back to what they were when the operation started.
Merge
Reference
| Mode: | Edit Mode |
|---|---|
| Menu: |
Merge all of the normals at selected vertices, making one average normal for all of the faces.
Split
Reference
| Mode: | Edit Mode |
|---|---|
| Menu: |
Split the normals at all selected vertices so that there are separate normals for each face, pointing in the same direction as those faces.
Average
Reference
| Mode: | Edit Mode |
|---|---|
| Menu: |
Average all of the normals in each fan of faces between sharp edges at a vertex.
Copy Vectors
Reference
| Mode: | Edit Mode |
|---|---|
| Menu: |
If a single normal is selected, copy it to an internal vector buffer.
Paste Vectors
Reference
| Mode: | Edit Mode |
|---|---|
| Menu: |
Replace the selected normals with the one in the internal vector buffer.
Smoothen Vectors
Reference
| Mode: | Edit Mode |
|---|---|
| Menu: |
Adjust the normals to bring them closer to their adjacent vertex normals.
Reset Vectors
Reference
| Mode: | Edit Mode |
|---|---|
| Menu: |
Put normals back the to default calculation of the normals.
Select by Face Strength
Reference
| Mode: | Edit Mode |
|---|---|
| Menu: |
Use the submenu to pick one of Weak, Medium, or Strong. Then this tool selects those faces that have the chosen face strength.
Set Face Strength
Reference
| Mode: | Edit Mode |
|---|---|
| Menu: |
Use the submenu to pick one of Weak, Medium, or Strong. Then this tool changes the Face Strength of currently selected faces to the chosen face strength.