Viewport Shading
Reference
- Mode
All Modes
- Header
- Shortcut
Z Shift-Z
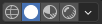
Blender offers different shading modes for helping with different tasks. For example, Solid shading is well-suited for modeling, while Rendered is useful for setting up lighting.
The radio buttons let you change the shading mode, while the dropdown button opens a popover with additional options described below.
Pressing Z opens a pie menu for changing the shading mode. Pressing Shift-Z switches between the current shading mode and Wireframe.
Wireframe
Only displays the edges (wireframes) of the objects in the scene.
- Color
- Single
All objects get shaded using the same single color.
- Object
Use the color from the object’s Viewport Display settings.
- Random
Each object gets displayed in a random color.
- Background
How the background is displayed in the 3D Viewport.
- Theme
Use the background of the theme. This can be configured in the Themes Preferences under .
- World
Use the color from the World’s Viewport Display options.
- Viewport
Select a custom color for the background of the 3D Viewport.
- Options
- X-Ray Alt-Z
Make objects transparent, allowing you to see and select items that would otherwise be occluded. The slider controls object opacity.
- Outline
Draw an outline around objects. The color of the outline can be adjusted.
Solid
This mode utilizes the Workbench engine to render the 3D Viewport. It shows solid geometry rather than just wireframes, but is still highly simplified as it doesn’t show materials or scene lighting.
- Lighting
See Workbench Lighting.
- Color
See Workbench Color.
- Background
How the background is displayed in the 3D Viewport.
- Theme
Use the background of the theme. This can be configured in the Themes Preferences under .
- World
Use the color from the World’s Viewport Display options.
- Viewport
Select a custom color for the background of the 3D Viewport.
- Options
See Workbench Options.
Material Preview
Render the 3D Viewport with Eevee and an HDRI environment. This mode is particularly suited for previewing materials and painting textures. You can select different lighting conditions to test your materials.
Note
The Material Preview shading mode is not available when the scene’s render engine is set to Workbench.
- Lighting
- Scene Lights
Use the lights in the scene. When disabled (or when the scene contains no lights), a virtual light is used instead.
- Scene World
Use the World of the scene. When disabled, a world will be constructed with the following options:
- HDRI Environment
The environment map used to light the scene.
- Rotation
The rotation of the environment on the Z axis.
- World Space Lighting
Makes the lighting rotation fixed and not follow the camera.
- Strength
Light intensity of the environment.
- World Opacity
Opacity of the HDRI as a background image in the viewport.
- Blur
Factor to unfocus the HDRI. Note that this does not change the diffusion of the lighting, only the appearance of the background.
- Render Pass
Instead of the combined render, show a specific render pass. Useful to analyze and debug geometry, materials and lighting.
Rendered
Render the 3D Viewport using the scene’s Render Engine, for interactive rendering. This gives you a preview of the final result, including scene lighting effects.
The options are the same as for Material Preview, except that the Render Pass selector will offer different passes if the scene uses the Cycles render engine.