Brush Settings
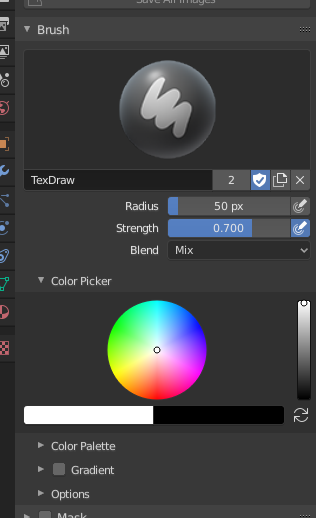
Brush settings.
- Blend
Set the way the paint is applied over the underlying color. See Color Blend Modes.
Add Alpha: makes the image more opaque where painted.
Erase Alpha: makes the image transparent where painted, allowing background colors and lower-level textures to show through. As you “paint”, the false checkerboard background will be revealed. Using a table pen’s eraser end will toggle on this mode.
Tip
In order to see the effects of the Erase and Add Alpha mix modes in the Image Editor, you must enable the alpha channel display by clicking the Display Alpha or the Alpha-Only button. Transparent (no alpha) areas will then show a checkered background.
- Radius
This option controls the radius of the brush, measured in pixels. F allows you to change the brush size interactively by dragging the mouse and then LMB (the texture of the brush should be visible inside the circle). Typing a number then enter while using F allows you to enter the size numerically.
- Size Pressure
Brush size can be affected by enabling the pressure sensitivity icon, if you are using a Graphics Tablet.
- Use Unified Radius
Use the same brush Radius across all brushes.
- Strength
How powerful the brush is when applied.
- Size Pressure
Brush Strength can be affected by enabling the pressure sensitivity icon, if you are using a Graphics Tablet.
- Use Unified Radius
Use the same brush Strength across all brushes.
Color Picker
Color
The color of the brush. See Color Picker.
Press S on any part of the image to sample that color and set it as the brush color. Hold Ctrl while painting to temporally paint with the secondary color.
- Swap Colors (cycle icon) X
Swaps the primary and secondary colors.
- Use Unified Color
Use the same brush color across all brushes.
Gradient
A gradient can be used as a color source.
- Gradient Colors
The Color Ramp Widget to define the gradient colors.
- Mode
- Pressure
Will choose a color from the color ramp according to the stylus pressure.
- Clamp
Will alter the color along the stroke and as specified by Gradient Spacing option. With Clamp it uses the last color of the color ramp after the specified gradient.
- Repeat
Similar to Clamp. After the last color it resets the color to the first color in the color ramp and repeats the pattern.
Color Palette
Color Palettes are a way of storing a brush’s color so that it can be used at a later time. This is useful when working with several colors at once.
- Palette
A Data-Block Menu to select a palette.
- New
+ Adds the current brush’s primary Color to the palette.
- Delete
- Removes the currently selected color from the palette.
- Move (up/down arrow icon)
Moves the selected color up/down one position.
- Sort
Sort Colors by Hue, Saturation, Value, Luminance.
- Color List
Each color that belongs to the palette is presented in a list. Clicking on a color will change the brush’s primary Color to that color.
Advanced
- Accumulate
This will allow a stroke to accumulate on itself, just like an airbrush would do.
- Affect Alpha
When this is disabled, it locks (prevents changes to) the alpha channel while painting (3D only).
- Anti-Aliasing 2D Painting Only
Toggles Anti-Aliasing around the brush, this is useful if you are working with pixel art or low resolution textures.
Texture
See the global brush settings for Texture settings.
Texture Mask
See the global brush settings for Texture Mask settings.
Stroke
See the global brush settings for Stroke settings.
Falloff
See the global brush settings for Falloff settings.
Cursor
See the global brush settings for Cursor settings.