Geometría
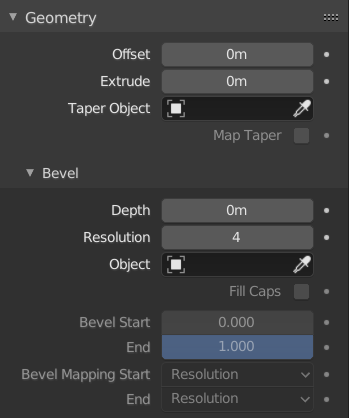
Panel de geometría.
- Desplazamiento
Moves the extrusion parallel to the curve normals.
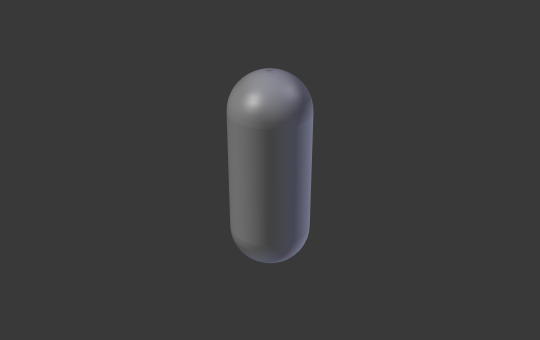
Bézier Circle -1 offset, 0.5 extrusion, 0.25 Bevel Depth, 10 Bevel resolution.
- Extruir
Will extrude the curve along both the positive and negative local Z axes. Turns a one-dimensional curve into a two-dimensional curve by giving it height. With a scale is the sum of both directions, perpendicular to the curve’s normals.
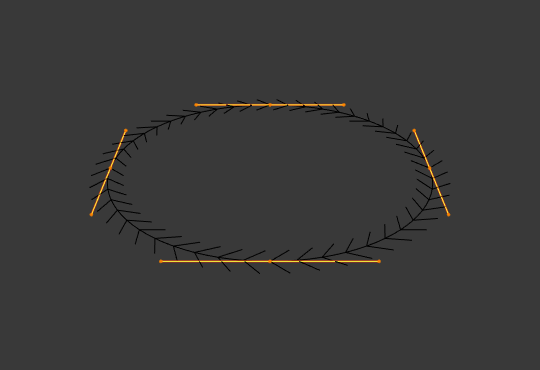
Bézier Circle 0.0 extrude (Edit Mode).
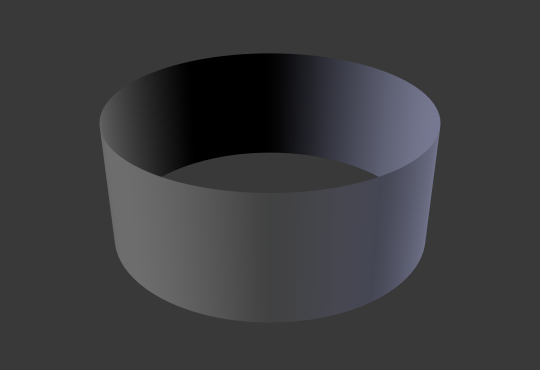
Extruded by 0.5 (Object Mode).
- Taper Object
Tapering a curve causes it to get thinner towards one end. You can also alter the proportions of the Taper throughout the tapered object by moving/scaling/rotating the control points of the Taper Object. The taper curve is evaluated along the local X axis, using the local Y axis for width control. In order for this to work the Taper Object can only be another open curve.
The details are:
The taper is applied independently to all curves of the extruded object.
Only the first curve in a Taper Object is evaluated, even if you have several separated segments.
The scaling starts at the first control point on the left and moves along the curve to the last control point on the right.
Negative scaling, (e.g. negative local Y on the taper curve) is possible as well. However, rendering artifacts may appear.
You may need to increase the curve resolution to see more detail of the taper.
The Taper Object is distributed by control points. Therefor unevenly spaced control points may likelier to stretch the shape of the taper. Subdividing segments causes those points to use a larger fraction of the overall taper shape.
With closed curves, the taper curve in Taper Object acts along the whole curve (perimeter of the object), not just the length of the object, and varies the extrusion depth. In these cases, you want the relative height of the Taper Object Taper curve at both ends to be the same, so that the cyclic point (the place where the endpoint of the curve connects to the beginning) is a smooth transition.
Consejo
Editing the handles and control points of the Taper Object will instantly change the shape of the original object.
- Taper Mode
For curves using a Taper Object, this option defines how the effective curve radius is computed from the Taper Object.
- Override
The curve radius is ignored and the effective radius is equal to the taper radius.
- Multiplicar
The effective radius is computed by multiplying the taper radius with the curve radius.
- Agregar
The effective radius is computed by adding the taper radius to the curve radius.
Examples of a curve with a radius of zero on one end and a radius of one on the other end. 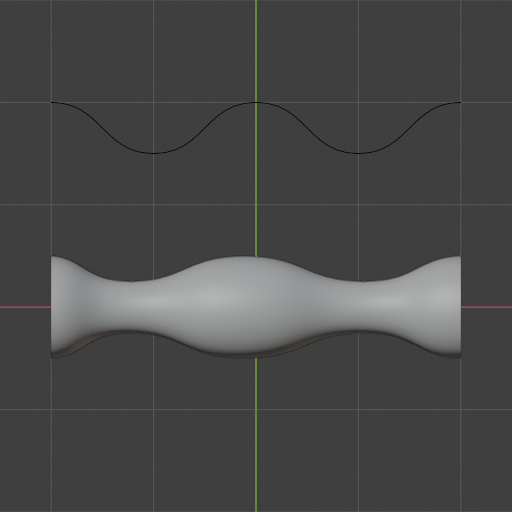
Anular modo.
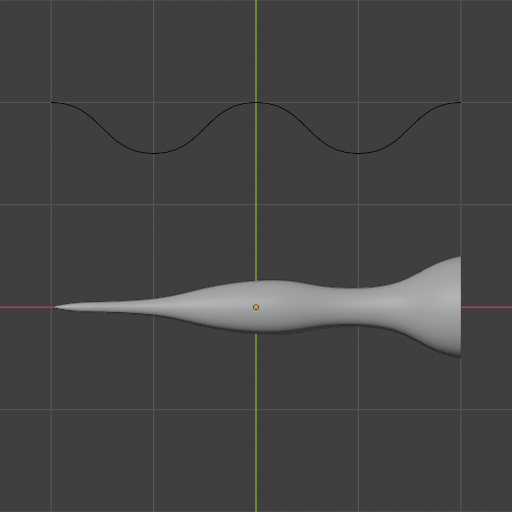
Multiply mode.
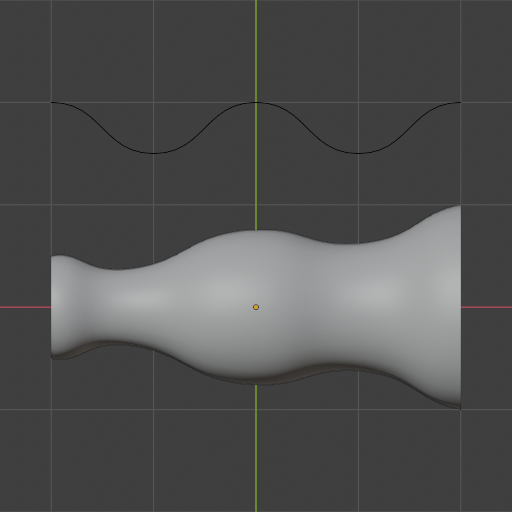
Add mode.
- Map Taper
For curves using a Taper Object and with modifications to the Start/End Bevel Factor the Map Taper option will apply the taper to the beveled part of the curve (not the whole curve).
Bisel
Redondo
- Profundidad
Changes the size of the bevel.
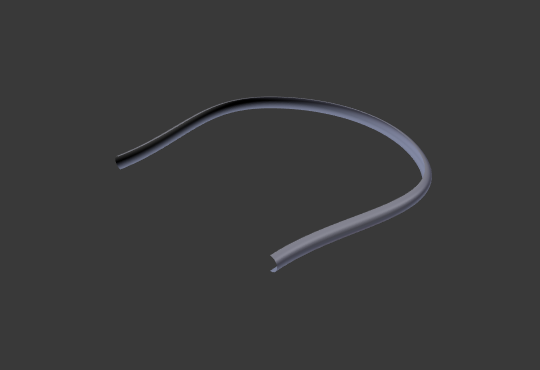
A curve with different Bevel depths applied (Depth of 0.05).
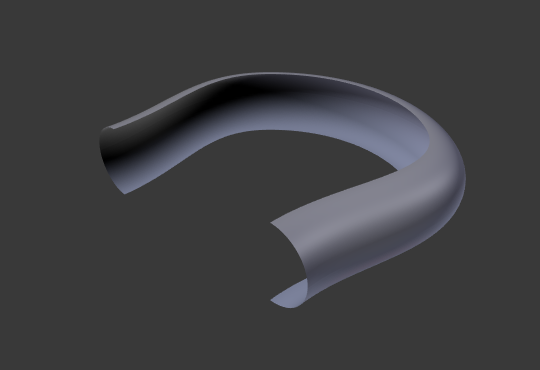
A curve with different Bevel depths applied (Depth of 0.25).
- Resolución
Alters the smoothness of the bevel.
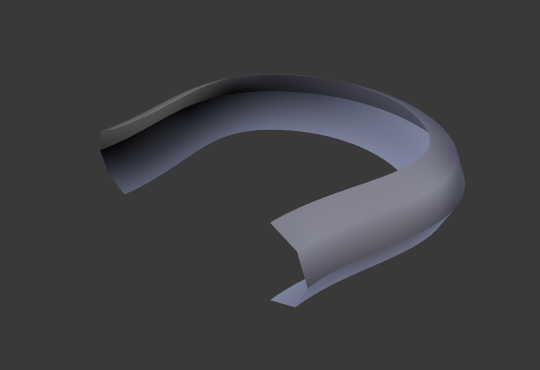
A curve with different resolutions applied (Resolution of 1).

A curve with different resolutions applied (Resolution of 12).
- Fill Caps
Seals the ends of a beveled curve.
Objeto
- Objeto
Here you can specify a curve object (opened or closed) which will be extruded along the curve. If your object’s shape is 3D, it will be projected to its local XY plane before the extrusion. You can check how the projected Object looks like by switching its shape to 2D.
Importante
Make sure the shape you want to extrude is in the Object’s local XY plane. If it is in the local XZ or YZ plane, it will be reduced to a line when it is projected to the local XY plane. Because of this, the extruded shape will be a flat plane.
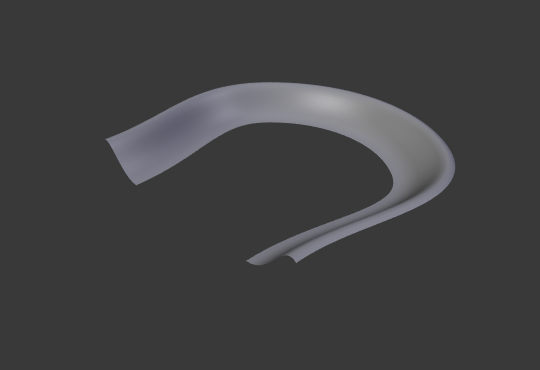
A curve with a Bézier curve as the Bevel Object.
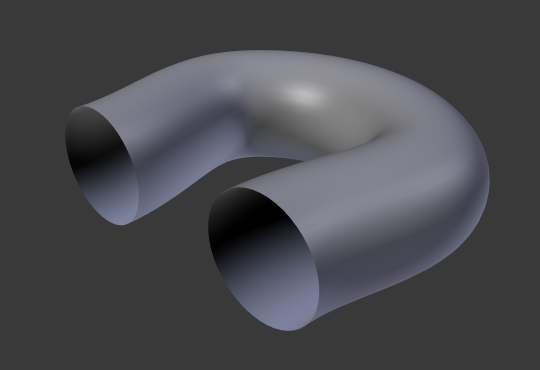
A curve with a Bézier circle as the Bevel Object.
Profile

El manipulador de perfil personalizado.
Este Complemento de Curva permite la creación de un perfil definido por el usuario con más complejidad que con el parámetro de perfil único. La herramienta modal permite alternar el perfil personalizado, pero la forma del perfil sólo se puede editar en el panel de opciones después de confirmar la operación.
El perfil comienza en la parte inferior derecha del manipulador y termina en la parte superior izquierda, como si estuviera entre dos aristas que se cruzan en ángulo recto. Los puntos de control se crean en el manipulador y luego la ruta se muestrea con la cantidad de segmentos del modificador Bisel.
Nota
El manipulador de curva Perfil permanece activo cuando los ingletes están habilitados porque todavía controla la forma de los perfiles de inglete.
- Preajustes
Los preajustes Bucles de Soporte e Intervalos se construyen dinámicamente según la cantidad de segmentos en el bisel. Si se cambia el número de segmentos, será necesario volver a aplicar el preajuste.
- Muestrear
Primero se agregarán muestras a cada punto de control, luego, si hay suficientes muestras, se dividirán uniformemente entre las aristas. La opción Muestrear Bordes Rectos alterna si las muestras se agregan a las aristas con puntos de control nítidos en cualquier lado. Si no hay suficientes muestras para dar a cada arista la misma cantidad de muestras, sólo se agregarán a las aristas más curvas. Por lo tanto, se recomienda utilizar al menos tantos segmentos como puntos de control haya.
Start & End Mapping
- Factor Start, End
These options determine where to start/end the geometry of the curve. This allows to make a curve which is not fully covered with geometry.
Increasing the start value to 0.5 will start the geometry at 50% of the distance from the start of the curve (in effect shortening the curve). Decreasing the end value by 0.25 will start the geometry at 25% of the distance from the end of the curve (again, shortening the curve).

A curve with no Factor Start, End.
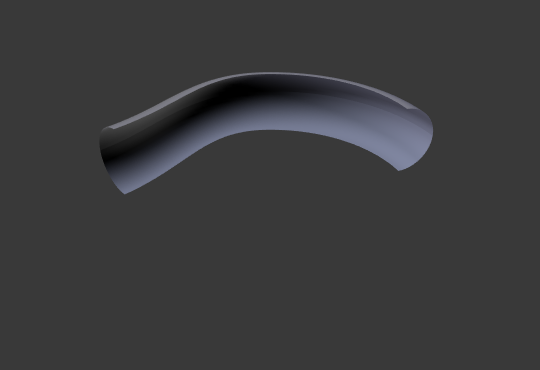
A curve with a 0.6 End factor.
- Mapping Start, End
Allows to control the relation between the Factor Start, End (number between 0 and 1) and the rendered start and end point of the spline’s geometry.
- Resolución
Maps the start and end factor to the number of subdivisions of a spline (U resolution).
- Segmentos
Maps the start and end factor to the length of its segments. Mapping to segments treats the subdivisions in each segment of a curve as if they would have all the same length.
- Curva
Maps the start and end factor to the length of a spline.
Ejemplos
Open 2D Curve
The extrusion will create a «wall» or «ribbon» following the curve shape. If using a Bevel Depth, the wall becomes a sort of slide or gutter. If your normals are facing the wrong way you can switch their direction as shown here.
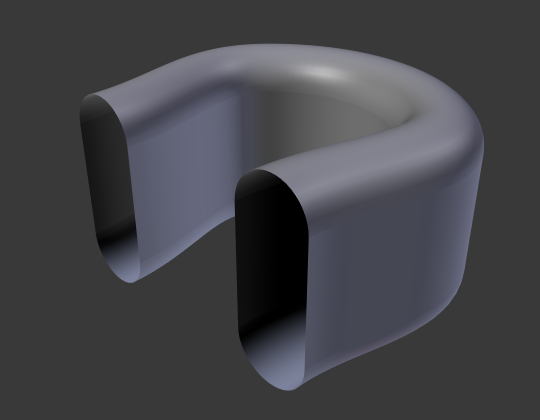
Open 2D Curve with Alt-C, fill set to none, zero offset, 0.5 extrusion, 0.25 Bevel Depth, 10 Bevel resolution.
Closed 2D Curve
This is probably the most useful situation, as it will quickly create a volume, with (by default) two flat and parallel surfaces filling the two sides of the extruded «wall». You can remove one or both of these faces by choosing the fill mode: both, front, back, or none.
The optional bevel depth will always create a 90 degree bevels here.
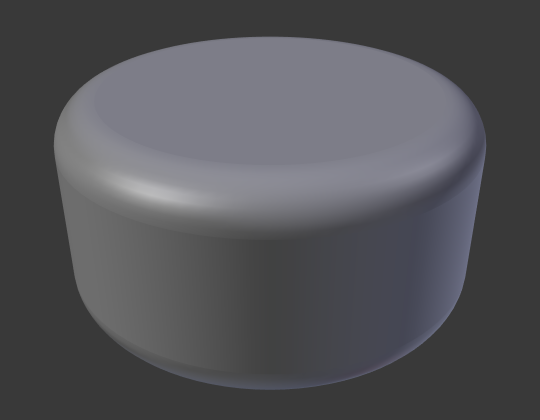
Closed 2D Curve, 0.5 extrude, 0.25 Bevel Depth, 10 Bevel resolution, Fill: Both.
Curva 3D
Here the fact that the curve is closed or not has no importance – you will never get a volume with an extruded 3D curve, only a wall or ribbon, like with open 2D curves.
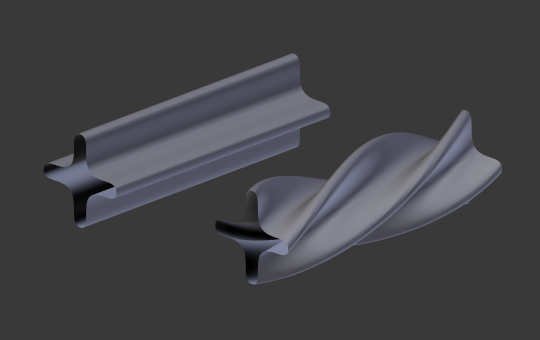
However, there is one more feature with 3D curves: the Tilt of the control points (see above). It will make the ribbon twist around the curve to create a Möbius strip, for example.
Taper
Let us taper a simple curve circle extruded object using a taper curve. Add a curve, then exit Edit Mode. Add another one (a closed one, like a circle); call it «BevelCurve», and enter its name in the Bevel Object field of the first curve (Curve tab). We now have a pipe. Add a third curve while in Object Mode and call it «TaperCurve». Adjust the left control point by raising it up about 5 units.
Now return to the Object tab, and edit the first curve’s Taper Object field in the Geometry panel to reference the new taper curve which we called «TaperCurve». When you hit enter the taper curve is applied immediately, with the results shown in Fig. Circle curve set as Bevel Object..

Circle curve set as Bevel Object. |
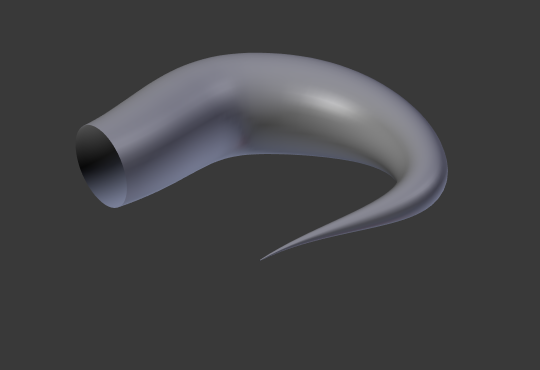
Taper extruded curve. |
You can see the taper curve being applied to the extruded object. Notice how the pipe’s volume shrinks to nothing as the taper curve goes from left to right. If the taper curve went below the local Y axis the pipe’s inside would become the outside, which would lead to rendering artifacts. Of course as an artist that may be what you are looking for!
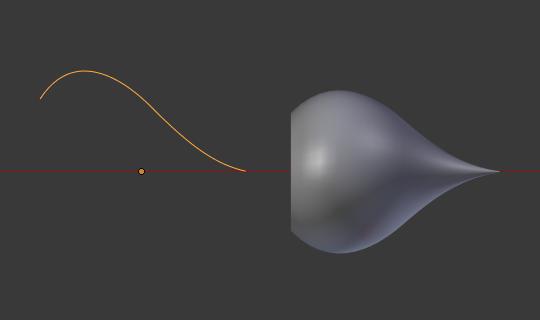
Taper example 1.
In Fig. Taper example 1. you can clearly see the effect the left taper curve has on the right curve object. Here the left taper curve is closer to the object origin and that results in a smaller curve object to the right.
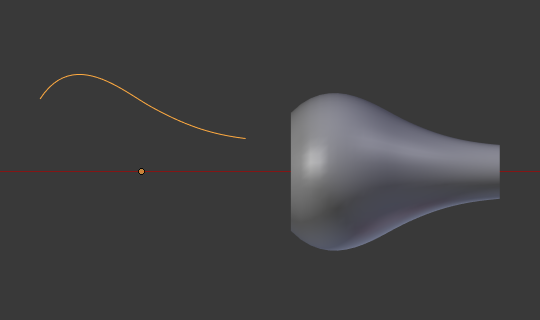
Taper example 2.
In Fig. Taper example 2. a control point in the taper curve to the left is moved away from the origin and that gives a wider result to the curve object on the right.
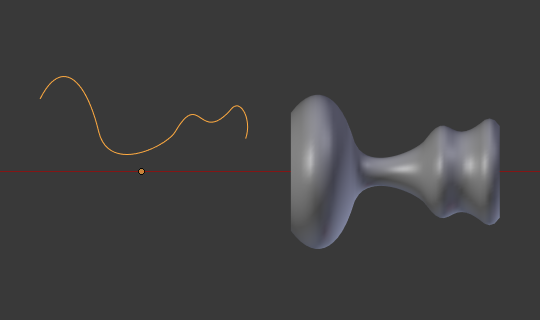
Taper example 3.
In Fig. Taper example 3. we see the use of a more irregular taper curve applied to a curve circle.
Bevel extrusion with Tilt example.