Pose Library
This section describes the pose library, which is based on the Asset Browser. For an overview of the asset system, see the Asset Libraries(アセットライブラリ) section.
注釈
At the moment of writing, the pose library is meant to be used in Pose Mode. In other words, it only works when posing an armature, and not for general object animation.
What is a Pose Asset?
A pose asset is an action that has been marked as asset, and that contains exactly one frame of animation data. Usually these are created via the Create Pose Asset button (see below), but any action that is keyed on exactly one frame can be seen as pose asset.
Each pose in the library is stored in its own action data-block. This means that it can get its own name, its own preview image, and can be organized in Asset Catalogs.
Creating a Pose Library
A pose library file is typically a blend-file that is dedicated to poses. It can link in a character, props, etc., which can then not only be used to create the poses, but also for rendering previews.
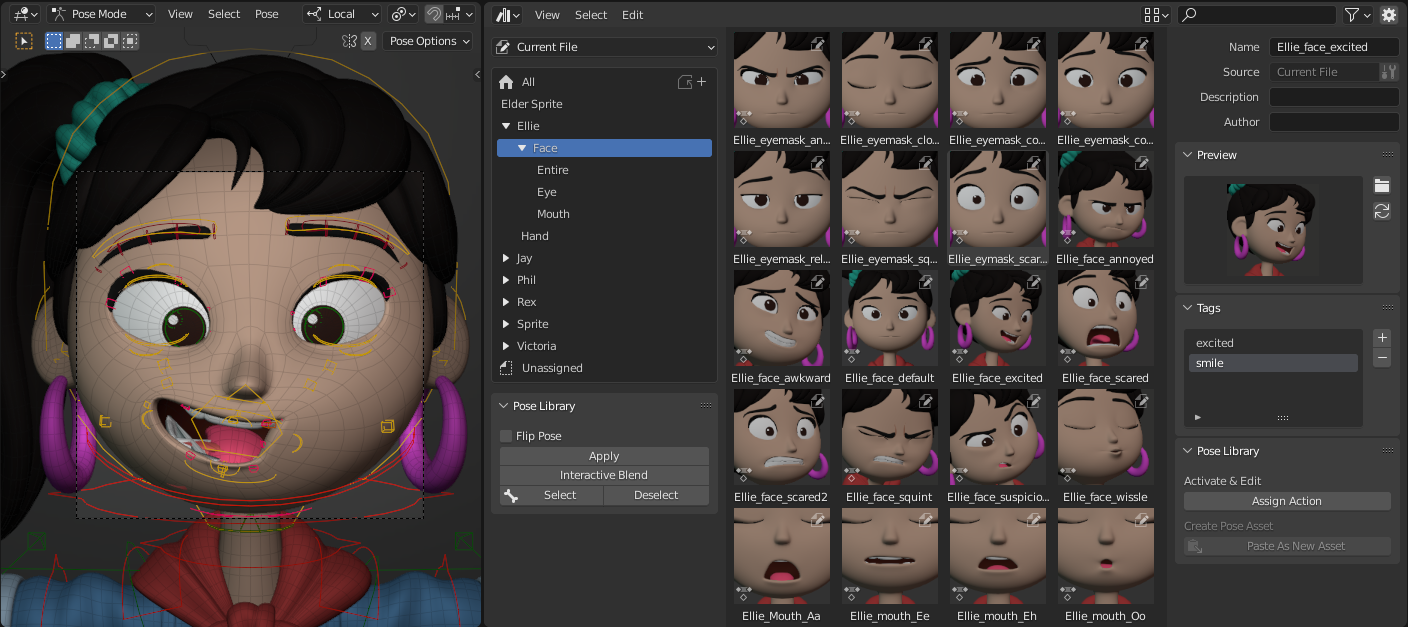
Example pose library of the Sprite Fright character Ellie.
Pose Creation via Action Editor
To create a pose in the library from the Action Editor, pose the character, select the relevant bones, and click the Create Pose Asset button. This will create the new pose Action, which will contain keys for the current value of each bone's location, rotation, scale, and Bendy Bone properties.

To create a new pose asset, use the Create Pose Asset button in the Action editor.
The created Action is now assigned to the armature. This makes it possible to inspect which bones are included and to tweak anything. In that respect, it's an Action like any other, and you can add or remove keys as usual. Just make sure that the keys are all on the same frame, in order to keep this a "pose" instead of an "animation snippet"; the latter isn't supported at the moment.
True to its name, the Create Pose Asset button automatically marks the Action as Asset. Not only does this make it available in the pose library, it will also act as a fake user to ensure the Action isn't lost after you unassign it from the armature.
The Create Pose Asset button is also available in the 3D Viewport sidebar. This button acts almost the same as the one in the Action Editor, except for one thing: it will not assign the newly created Action. Doing so would be invisible, as the pose doesn't change and the name of the current Action is not shown in the viewport. The pose asset can still be renamed in the Asset Browser. There you can also click the Assign Action button to explicitly assign the selected pose asset as the armature's active Action.
注釈
The Create Pose Asset button creates a new Action. To make sure that this is actually visible in the user interface, so that you know that something happened, it tries to make sure that the Asset Browser shows the newly created pose asset. Because of this, it requires that there is an Asset Browser visible, and that it's set to show the Current File asset library.
This is especially relevant to pose assets, compared to other assets. You cannot mark an object as asset multiple times, but you can create ten pose assets from the same character pose.
Pose Creation from Existing Animation
Animators eat and breathe time, so there is a fair chance that you already have some poses lined up on the timeline. Creating a pose asset from existing animation is pretty much the same as described above, with a few subtle differences:
Go to the frame with the pose you want to turn into an asset.
Select the relevant bones and click the Create Pose Asset button in the Action Editor.
This creates an Action as before, but this time it also includes any bone property that was keyed on the current frame. In other words: any bone property (regular and custom) that's displayed in yellow in the user interface will be included in the pose asset. This makes it possible to also include properties that control IK/FK switching, for example. As with the pose, the current value is copied into the pose asset, and not the keyed value.
Blender saves which action was previously assigned to the armature.
The new pose Action is assigned to the armature so you can give it a name and inspect/adjust its contents.
Click the Restore Previous Action button (back arrow icon) that appeared next to the Create Pose Asset button. This reassigns the previous Action, so that you're back at the animation you had before.
Pose Creation by Copying from Other File
As described in Design Limitations, Blender only writes data to the currently open blend-file. To copy a pose from some other file into a pose library file, see the following steps:
Pose the character and select the relevant bones.
Click the Copy Pose as Asset button, which is available in the Action Editor as well as the 3D Viewport Sidebar. This will create the pose asset (including its thumbnail) and store it in a temporary file somewhere.
Choose an existing pose asset, and open its context menu. Click the Open Blend File option.
A new Blender process will start, and automatically open the asset library file that contains the chosen pose. By the way, this works for all assets, not just poses!
In the Asset Browser, click the Paste as New Asset button. This will load that temporary file, and load all the assets it can find in there. In our case, it will only find a single pose, but future versions of Blender may extend this for other asset types. This is why the button is named so generically -- it is not pose-specific.
Give the pose a name, and click on the "refresh" button in the preview image panel to render a new preview if you want.
Save the file and quit Blender.
The original Blender is still running in the background and notices that the new Blender has quit. It automatically refreshes the Asset Browser to show the newly added pose.
Automatically Assigned Catalog
When you create a pose asset, Blender may automatically assign it to an asset catalog. This only works if there is an Asset Browser visible; Blender then assigns the pose asset to its active asset catalog. If there are multiple Asset Browsers open, it performs the following steps:
If the current window has one Asset Browser, it uses that one.
If the current window has multiple Asset Browsers, it uses the biggest one.
Otherwise Blender goes over the other windows (if there are any), and do a similar search. The first window it sees that has an Asset Browser wins.
Controlling the Look of Preview Images
The pose library preview images are rendered with the active Scene camera. This approach was preferred over rendering a specific 3D Viewport for two main reasons:
There is only one scene camera active at any time, making it predictable which camera is used.
The camera, as well as the rest of the scene, can be set up specifically for rendering the thumbnails. Pose library files are intended for that purpose: to contain the poses and render their preview images.
The preview images are rendered using the Workbench Engine. Switch the scene to use that as render engine, and you'll see various options to influence the look. Select a pose asset and press the Generate Preview button to re-render the preview image with the current settings.
You can also animate settings such as MatCap rendering, light positions, and intensities, etc. Use this to your advantage!
Scene Animation for Preview Images
Sometimes it's handy to have a few different background colors or camera angles for your poses. Many facial poses are made with a specific camera angle in mind.
Background color can be animated by placing a plane behind the character and animating its material. In this case just for fun, but for more serious applications this could be used to indicate a certain character, or a mood, or anything else.
The active camera can be switched by using camera markers.
Both make it possible to choose a specific frame to pick the background color and camera angle. Pose the character, click the Create Pose Asset button, and the pose action will be keyed on the current frame. This means it's easy to edit the pose and refresh its preview image, because you know exactly which frame it was originally created on.
Using the Pose Library
The pose library can be used to pose a character in a few different ways. In short, you can fully apply a pose or blend it into the character's current pose interactively. How exactly these operations work depends on where you use them. This section will explain the use from both the Asset Browser and the 3D Viewport.
Use from the Asset Browser
The pose library can be used directly from the Asset Browser. The Pose Library panels will appear when the active object is an armature and in Pose Mode. The catalog system and the filter bar at the top can be used to search for specific poses.
- Apply
Applies the pose to the character. If there are any bones selected, the pose will be applied only to those bones. This makes it possible to create a "finger guns" pose by applying a fist pose to the hand, and then an "open hand" pose for only the index finger and thumb. Double-clicking a pose will also apply it.
- Interactive Blend
Allows you to gradually blend a pose from the library into the character's pose. Click the button, then move the mouse left/right to determine the desired blend. While blending, you can use the Tab key to toggle between the original and the blended pose. As usual in Blender, left-click or press Enter to confirm; right-click or press Escape to cancel the operator.
- Flip Pose
Will mirror the pose from left to right and vice versa. This makes it possible, for example, to apply a left-hand pose to the right hand, reducing the number of poses you have to put into the library. This can of course also be applied for asymmetrical facial expressions that depend on the camera angle.
- Select, Deselect
Select or deselect the bones that are used in the pose. This can be used to create a selection set, or simply show what was part of the pose and what wasn't.
Use from 3D Viewport
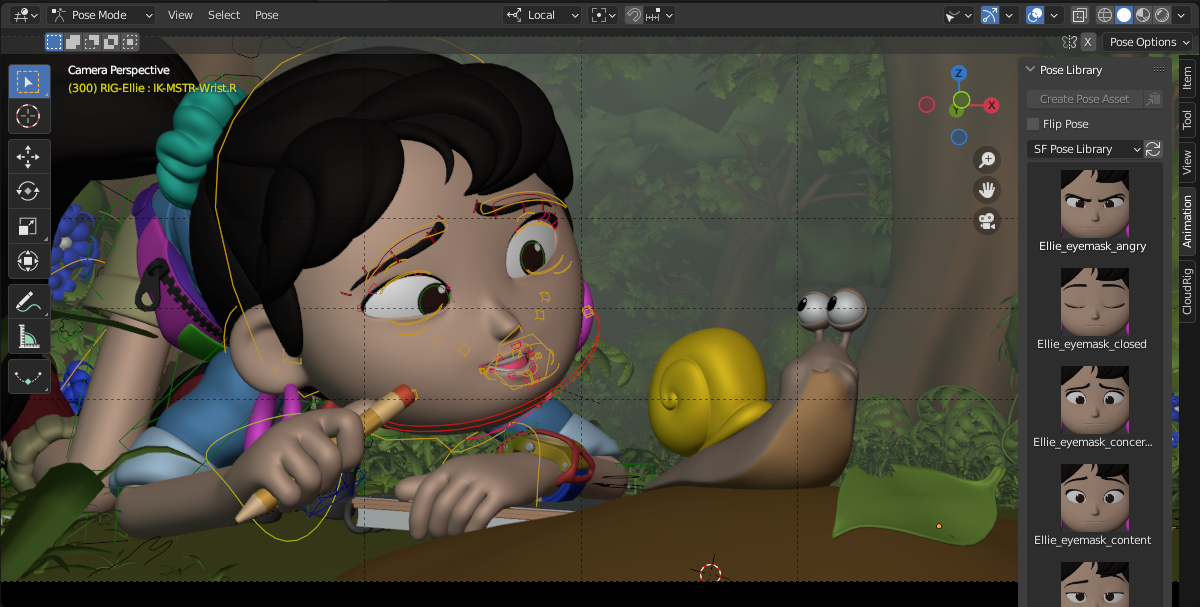
The pose library as a side-panel of the 3D Viewport.
The Sidebar of the 3D Viewport has a Pose Library panel in the Animations tab. Contrary to the Asset Browser, which can be used for different asset types and also for some asset management tasks, this panel is dedicated to applying poses. This means that it can allow faster interaction.
Click on a pose to apply it. A single click is enough. You can also select and apply a pose via the cursor keys. This allows for fast exploration of the poses, to directly see the result on the active character. Of course the Flip Pose checkbox is available here as well -- it works the same as described in the previous section.
Drag the pose thumbnail left to right to blend it into the character's current pose. Just release the mouse button to confirm.
To search for poses, hover your mouse over the poses, then press Ctrl-F and type a search query. This will filter the poses to match what you typed. The scrollable area will automatically scroll the search field into view.
Old Pose Library
The Asset Browser based pose library, described above, replaces the old pose library. This section describes that old pose library, including how to convert poses to the new system.
警告
The old pose library is deprecated in Blender 3.0, and will be mostly removed Blender 3.1. Only the Python interface will remain a bit longer, and be removed in Blender 3.2. The necessary functionality to convert old pose libraries to pose assets will remain in Blender for the foreseeable future.
参照
- Mode(モード)
Pose Mode
- Menu(メニュー)
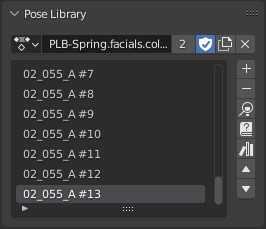
The old Pose Library panel.
Converting Old Pose Libraries
Old-style pose libraries can be converted to pose assets in the following way:
In the Armature properties Pose Library panel, select the pose library you want to convert.
Make sure the scene camera is set up correctly for rendering preview images.
Click the "Convert Old-Style Pose Library" button.
Open the Asset Browser, and see the poses have been converted.
If you're happy with the result, remove the old pose library Action.
Save the blend-file.
As usual, the blend-file should be saved to a directory marked as asset library in order to use the pose assets from other blend-files.
注釈
This conversion does not assign the poses to any catalog, and so they will appear in the "Unassigned" section of the "Current File" asset library.
Browse Poses (Old Pose Library)
警告
This section describes the deprecated pose library. For the new, Asset Browser based pose library, see Pose Library.
参照
- Mode(モード)
Edit Mode(編集モード)
- Menu(メニュー)
- ショートカットキー
Alt-L
Interactively browse poses in the 3D Viewport. After running the operator, cycle through poses using the Left and Right arrow keys. The name of the pose being previewed is displayed in the header region. After the desired pose is selected using Return or LMB to make it the active pose; to cancel browsing, use Esc or RMB.
- Pose
Index of the pose to apply (-2 for no change, -1 to use the active pose).
Add Pose (Old Pose Library)
警告
This section describes the deprecated pose library. For the new, Asset Browser based pose library, see Pose Library.
参照
- Mode(モード)
Edit Mode(編集モード)
- Menu(メニュー)
- ショートカットキー
Shift-L
If a pose is added, a pose marker is created. The Whole Character keying set is used to determine which bones to key. If any bones are selected, only keyframes for those bones are added, otherwise all bones in the keying set are keyed. Bones that are ignored by the Whole Character keying set are always ignored, regardless of their selection state.
- Add New
Adds a new pose to the active pose library with the current pose of the armature.
- Add New (Current Frame).
Will add a pose to the pose library based on the current frame selected in the Timeline. In contrast to Add New and Replace Existing which automatically allocate a pose to an action frame.
- Replace Existing
Replace an existing pose in the active pose library with the current pose of the armature.
Rename Pose (Old Pose Library)
警告
This section describes the deprecated pose library. For the new, Asset Browser based pose library, see Pose Library.
参照
- Mode(モード)
Edit Mode(編集モード)
- Menu(メニュー)
- ショートカットキー
Shift-Ctrl-L
Changes the name of the specified pose from the active pose library.
- New Pose Name
The new name for the pose.
- Pose
The pose action to rename.
Remove Pose (Old Pose Library)
警告
This section describes the deprecated pose library. For the new, Asset Browser based pose library, see Pose Library.
参照
- Mode(モード)
Edit Mode(編集モード)
- Menu(メニュー)
- ショートカットキー
Shift-Alt-L
Deletes the specified pose from the active pose library.